How to make a Pretty Tote Bag with Vintage Linen and Lace
Indulge your creative side and embark on a delightful DIY project by crafting a truly exquisite tote bag using vintage linen and delicate lace. This charming combination of materials will not only add a touch of elegance to your accessory collection but also make a unique fashion statement. This one-of-a-kind accessory will surely turn heads and make a stylish addition to any outfit. Whether you use it for shopping, a day at the beach, or simply as a statement piece, your handmade tote bag will be a true reflection of your creativity and individuality.
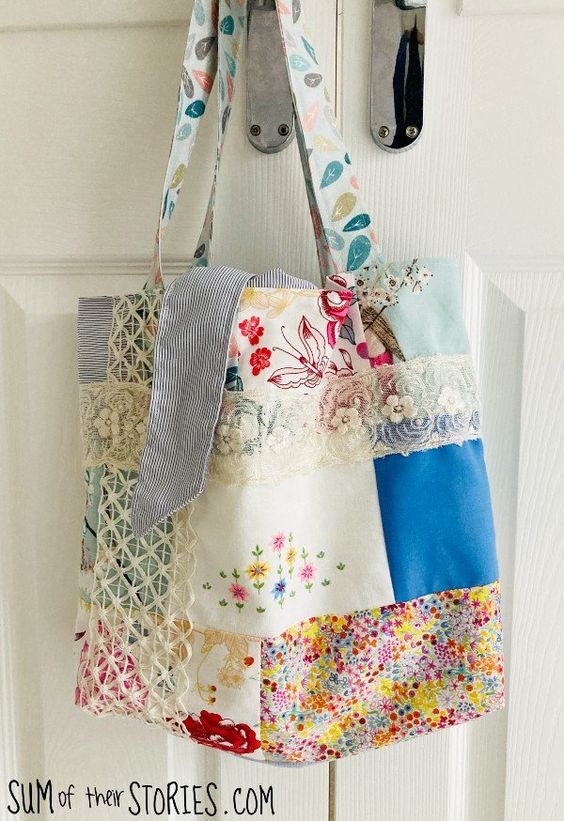
These are the pieces you’ll need to make a similar bag:
- 2 pieces of patchwork for the bag front and back: 17” x 15” (43cm x 38cm)
- 2 pieces of plain fabric for the bag lining: 17” x 15” (43cm x 38cm)
- 2 lengths of fabric for the bag handles: 21” x 3.5” ( 53cm x 9cm)
- 2 lengths of fabric for the bag ties: 17” x 4.5” ( 43cm x 11.5cm) * or shorter, see notes below
- Pieces of Lace (optional)
Use a thin fabric for the ties ideally, it’s just easier to tie. I used an old shirt. * On reflection I think I’ll make the ties just a little shorter next time. I think 14” (36cm) or 15” (38cm) would probably be a better length
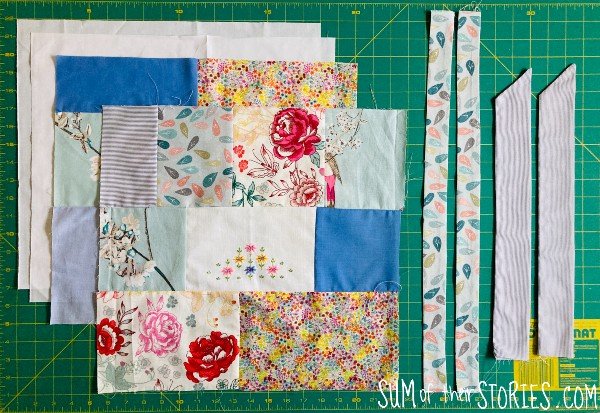
How to make tote bag handles
First make the bag handles.
Fold the strips of handle fabric in half lengthways and sew with a 1cm seam allowance to form a long thin tube. Turn right side out and press flat. Top stitch down each side. Repeat for the other handle.
How to make tote bag ties
Next make the ties.
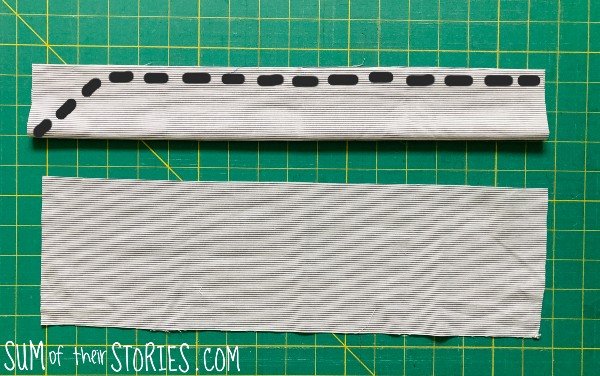
Fold each tie in half and stitch diagonally across from one end and then down the side. Trim any excess fabric and then turn, pushing the point out carefully. Top stitch all round.
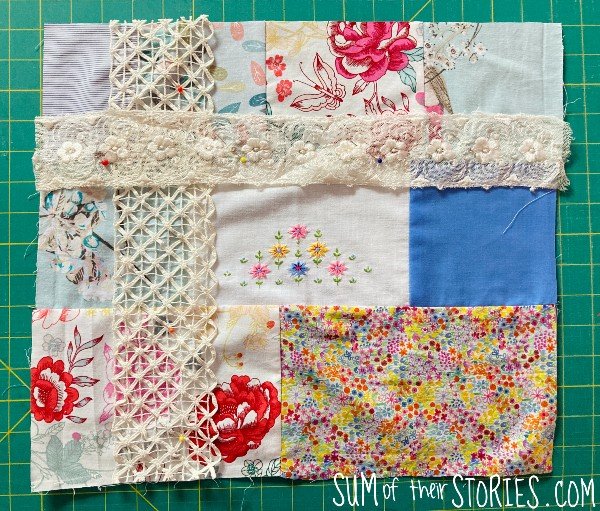
Adding lace embellishment to a tote bag
Apply any lace to the patchwork bag front and back before you sew it together. I found some lovely bits in my bundle from the charity shop.
Assembling the tote bag
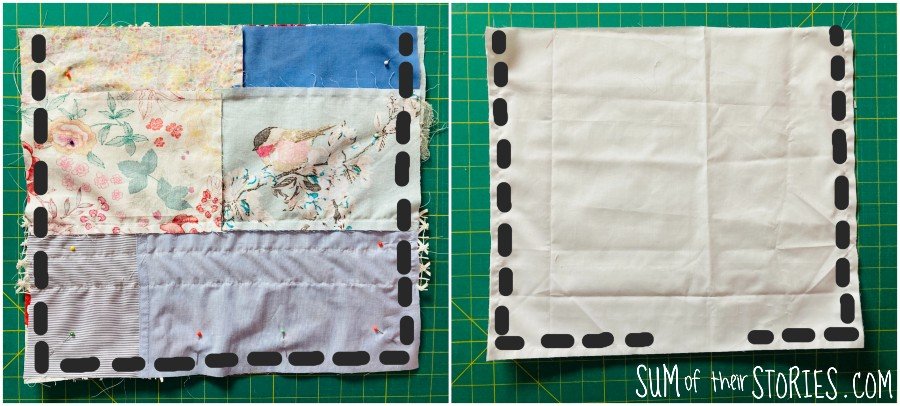
Place the bag front and back right sides together and sew around leaving the top edge open.
Repeat for the bag lining but leave a 3-4 inch gap in the bottom edge of the lining.
Box the bottom by flattening the corners and stitching across.

Pin the bag handles and ties in place on the bag outer. Place the handles 3” from the side seam and the ties centrally.
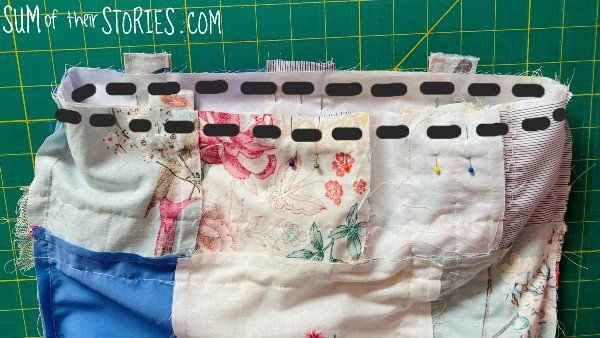
Turn the lining right side out and pop it into the bag outer. Line up the side seams and pin carefully all the way round. Stitch all around the top edge.
Turn the bag out through the gap you left in the lining and then stitch the gap closed. Press carefully and the top stitch round the top of the bag. This will keep everything tidy and make the handles even more secure.
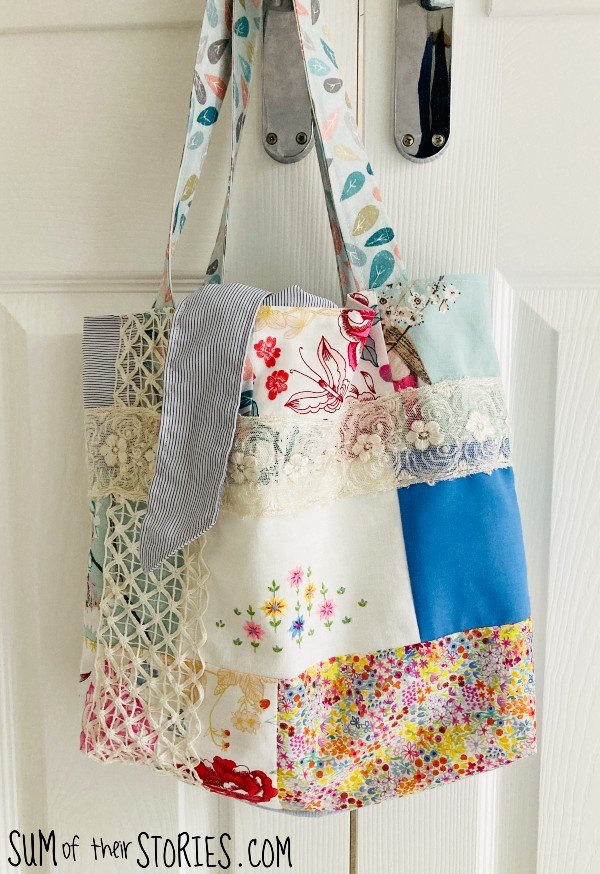
That’s it, the bag is finished. Secure the contents by tying the ties. I’ve not made tie closures like this on a tote bag before. I usually use a button and ribbon loop or a magnetic fastener. I think the ties look nice with the vintage look of the bag though, I will definitely do them again in the future.

The back of my bag is pretty too, but you could speed up your bag making by leaving that plain if you liked.

Inside the bag is nice and tidy as it’s fully lined. You could add a pocket inside if you wanted too, add that before you sew the lining pieces together.
