DIY Loopy Yarn Christmas Santa Wreath
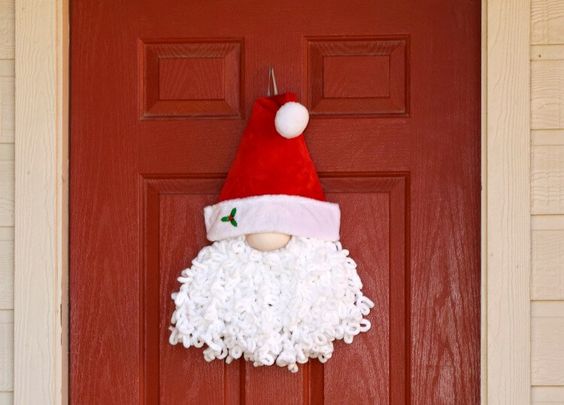
If you're looking to add a touch of whimsy to your Christmas decor, why not try making a DIY Loopy Yarn Santa Wreath? This adorable and fun project involves wrapping red and white yarn around a wreath form to create Santa's iconic red and white hat. Adding a fluffy white yarn pom-pom for the bobble on the hat and some felt for the eyes and nose brings this wreath to life. It's a fantastic way to get into the holiday spirit and spread some festive cheer. Plus, crafting your own decorations always adds a personal touch to your home during the holiday season. So grab your yarn, wreath form, and crafting supplies, and let's get crafty!
Materials
- Dollar Store Santa Hat Tinsel Decor
- 1 large skein or 2 regular skeins of white loopy yarn
- 1 knee high
- 1 santa hat
- small piece of grosgrain ribbon
- polyfil stuffing
- roll of white tulle ribbon
Tools
- hot glue gun
- glue sticks
- scissors
Instructions
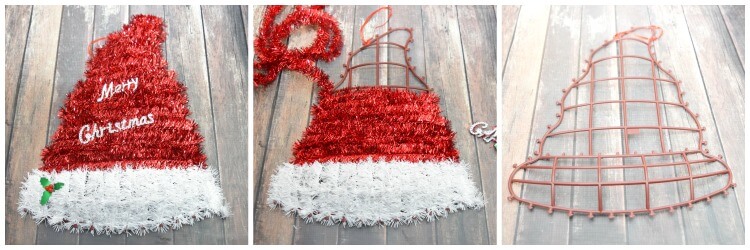
- Remove the tinsel from the Santa Hat Tinsel decoration so all you have left is the Santa Hat frame. Save the little embellishments just in case you'd like to add them to your finished decoration.
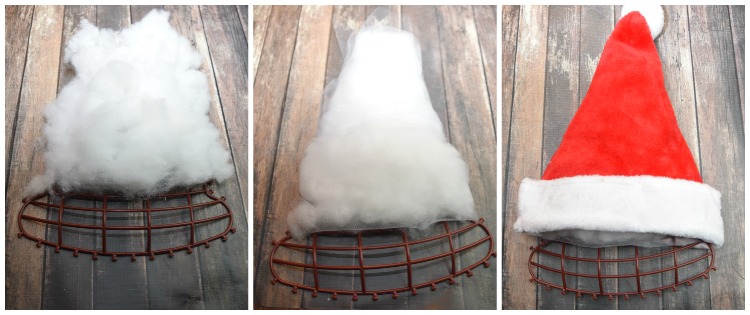
- Spread out a big wad of polyfil over the top of the santa hat frame.
- Then, wrap the polyfil with some white tulle to make more of a santa hat shape. Add dots of hot glue to keep the tulle wrap tight over the stuffing.
- Check to make sure the santa hat fits.
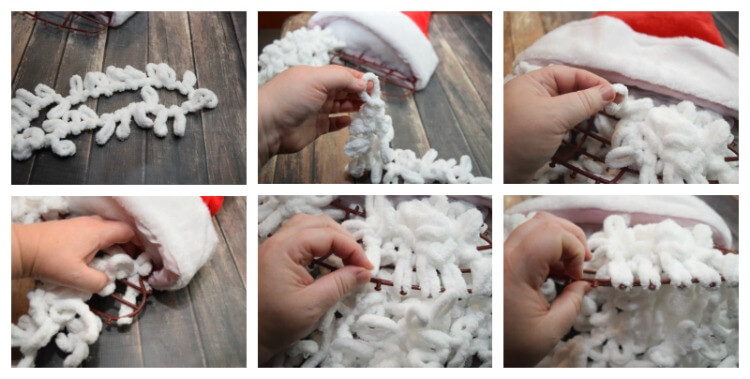
- Cut 12-15 24-inch pieces of the loopy yarn.
- Fold a piece of loopy yarn in half.
- Start on the front side of the frame and feed the folded center of the yarn through the top of the "brim of the hat" section.
- Feed it down the back to the little nubs sticking out and hook a loop of the yarn on a nub.
- Once hooked, give a gentle pull on the yarn from the front to make sure that loop is taut on that little nub. Do this same thing until you've covered all the little nubs.
- Flip over the frame to the backside and add a dollop of hot glue on each nub to keep the loops attached.

- Cut a 10-12 inch piece of pantyhose/knee high. Knot it at one end.
- Fill it with a handful of polyfil stuffing.
- Twist the pantyhose to form a rounded shape of the stuffing.
- Knot the other side of the pantyhose as close to the stuffing as you can to keep it's rounded shape.
- Take both loose end of the pantyhose and behind the stuffing ball tie a tight knot. This will form a squashy kind of ball for the nose.
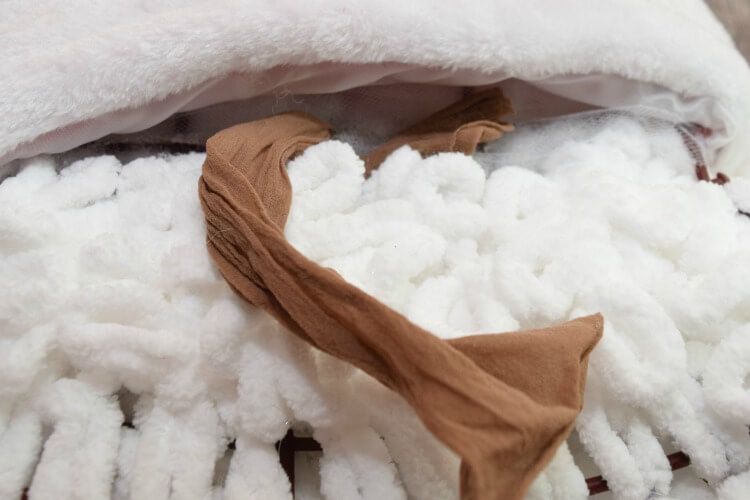
- Right in the middle and just above the loopy yarn beard on the santa hat frame, tie the nose on with a knot.
- If your santa beard looks a little sparse, cut 10-12 18-inch pieces of loopy yarn.
- From the backside, next to each nub where a yarn loop is hooked, thread a piece of loopy yarn through until the ends hanging down are even.
- Use the glue gun to glue the middle of the loopy yarn piece together just under the frame so it cannot come undone. Do this to fill up the entire beard.
- Once your beard is done and you're happy with the fullness, give it a haircut. I like to round the sides so they are a little shorter.
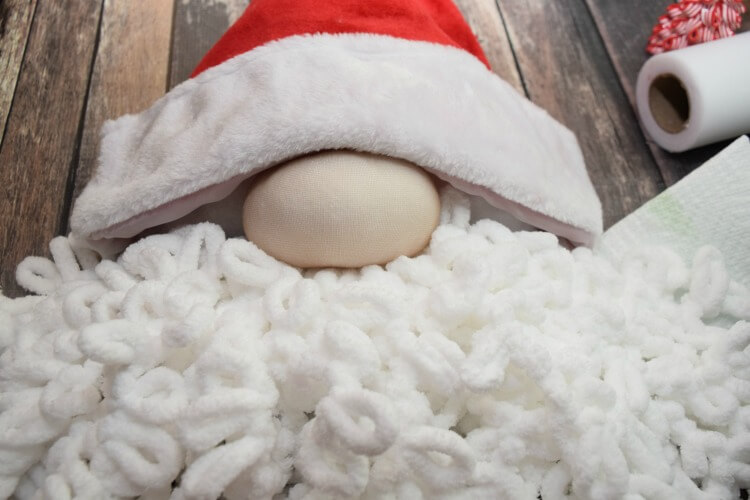
- Slide the santa hat down over the top. Hot glue it down to the beard on the sides. Hot glue it over the nose. Hot glue it along the back as well.
- Hot glue the ball of the santa hat at a diagonal as shown. Hot glue any embellishments.

- Take a small piece of grosgrain ribbon and hot glue it in a loop
- Hang up your new creation!
No comments
Write a comment