DIY Make A No Sew Easter Bunny Gnome
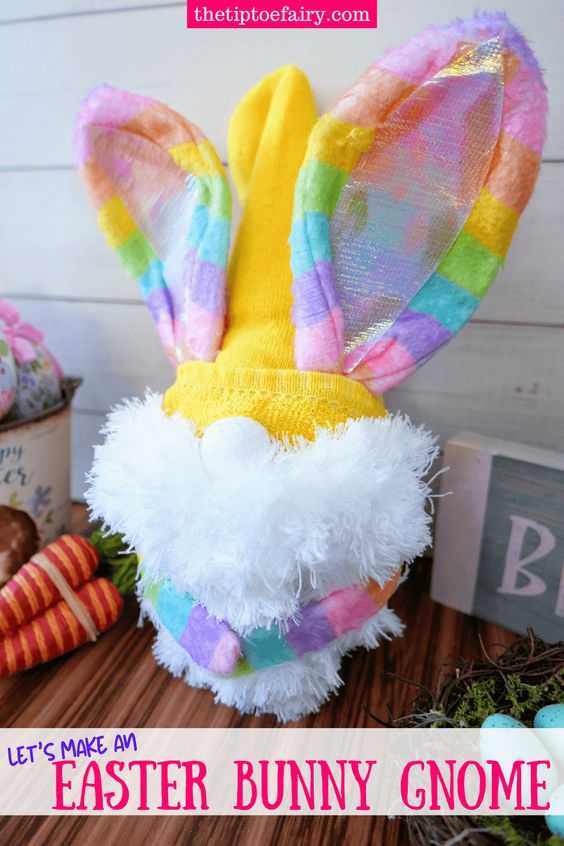
Want to add some cute Easter decor to your home without sewing a single stitch? Try making a no-sew Easter Bunny Gnome! This fun and easy DIY project involves using simple materials like socks, rice, and felt to create an adorable bunny gnome that is perfect for the spring season. You can personalize your gnome with different colored socks and felt to match your existing decorations or go for a vibrant and whimsical look. All you need is a few minutes to put everything together and you'll have a charming Easter decoration that will surely bring smiles to your family and guests. Get ready to bring some festive cheer into your home with this delightful no-sew Easter Bunny Gnome!
Supplies:
- 1 white sock & 1 yellow sock
- Decorative small pebbles, preferably in white, but any color will work
- Polyfil stuffing
- 2 rubber bands
- 1 marble
- Scissors
- Hot glue and glue gun
- 1 small foam cone
- 1 rainbow Easter Bunny ears headband
- 1 white microfiber duster/mop head
- Box cutter
- Wire cutters (not pictured)
How do you make a No Sew Easter Bunny Gnome?
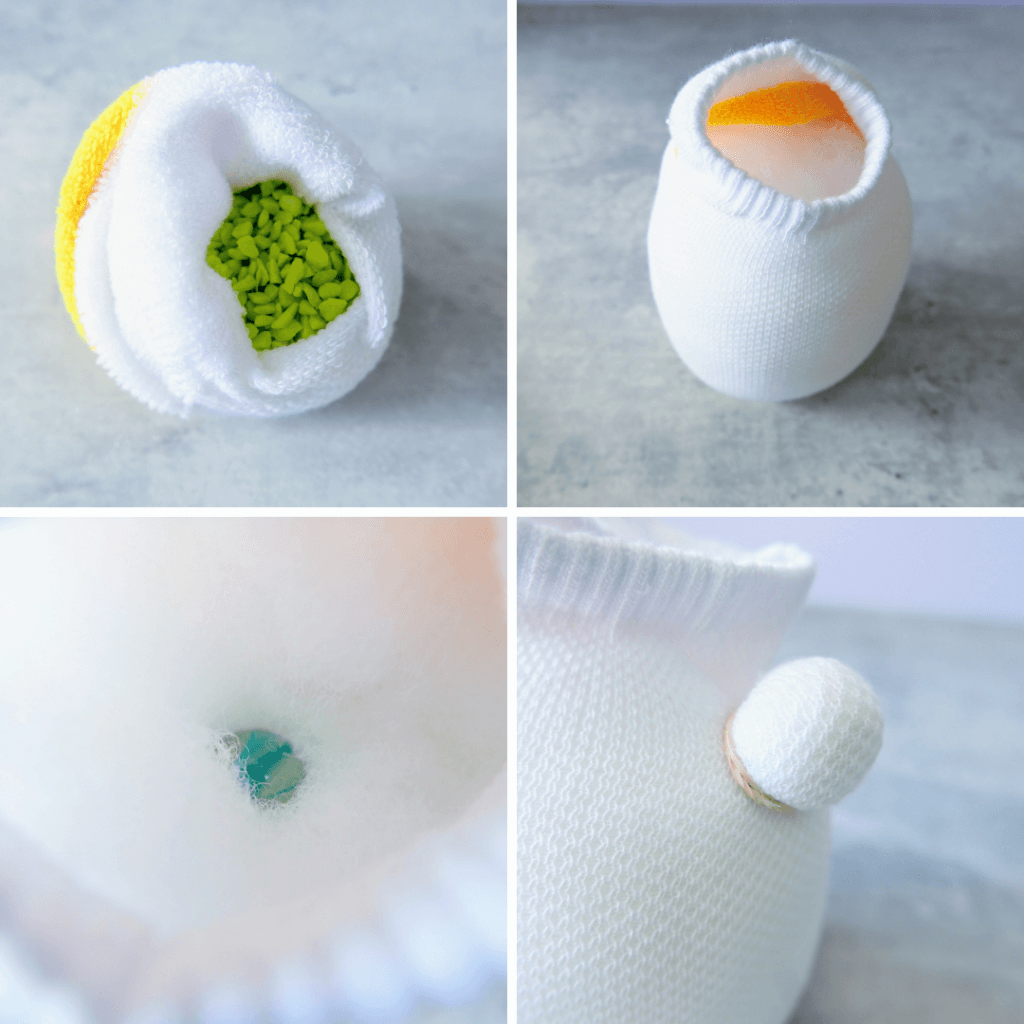
We will begin with opening the white sock and filling the bottom with about a ¼ cup of the decorative small pebbles. You just need enough to keep the sock weighted, so that the gnome doesn’t fall over.
Next, add polyfil on top of the pebbles until the sock is very full and rounded, filling it almost to the top.
Take the marble and place it inside of the stuffing in the sock, and push it towards wherever you want the nose to be.
Place the rubber band around the outside of the sock with the marble in it. Make sure to wrap the rubber band multiple times, so that the marble doesn’t slip out.
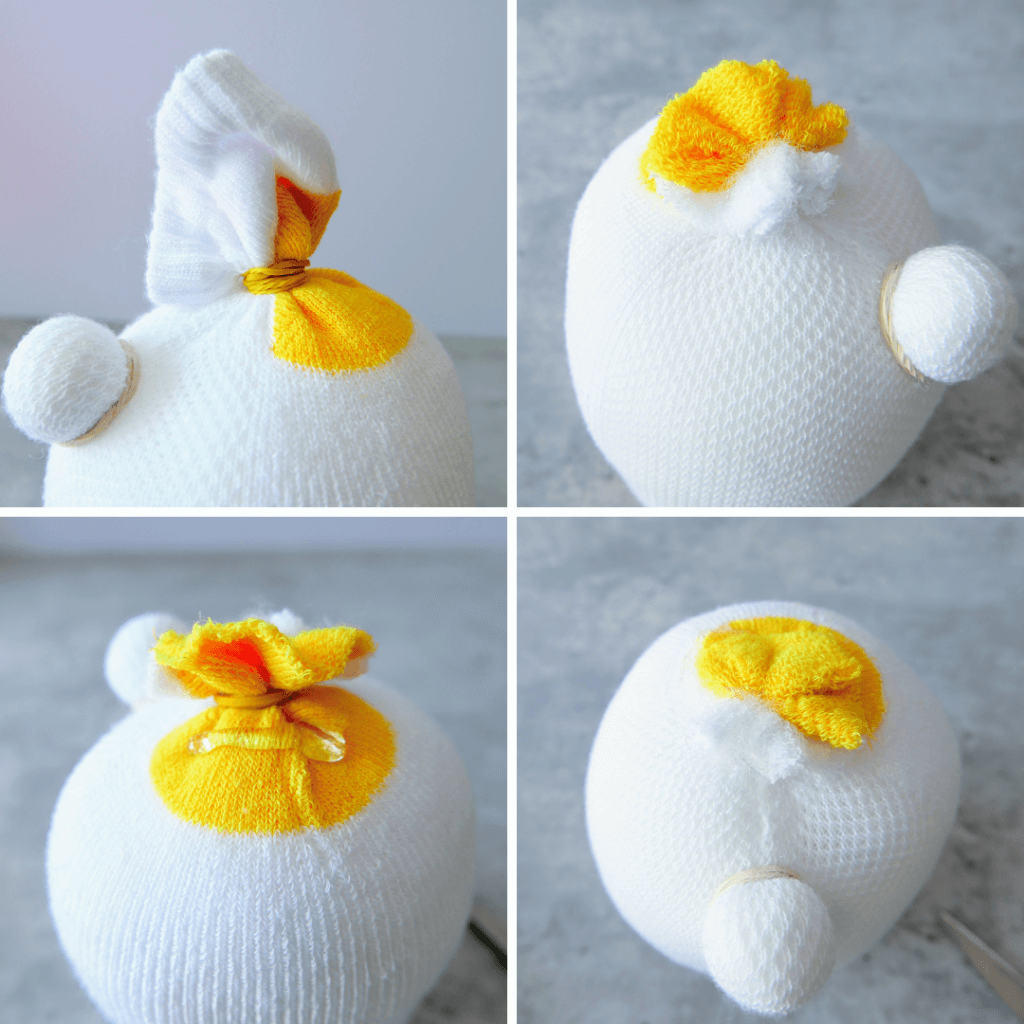
Gather the sock at the top, and place the second rubber band around it, and wrap it around multiple times as well.
You may need to pull and stretch the sock a little bit to make sure your gnome is nice and rounded and even. Once you have the shape you like, cut the remaining top of the sock off with scissors.
Hot glue the edges of the sock down, so that the edges are flush. I used the blades of my scissors to press down, so that I didn’t burn myself on the glue. But, if you have those silicone tips to wear on your fingers to avoid burns with the hot glue, you can use those, too.
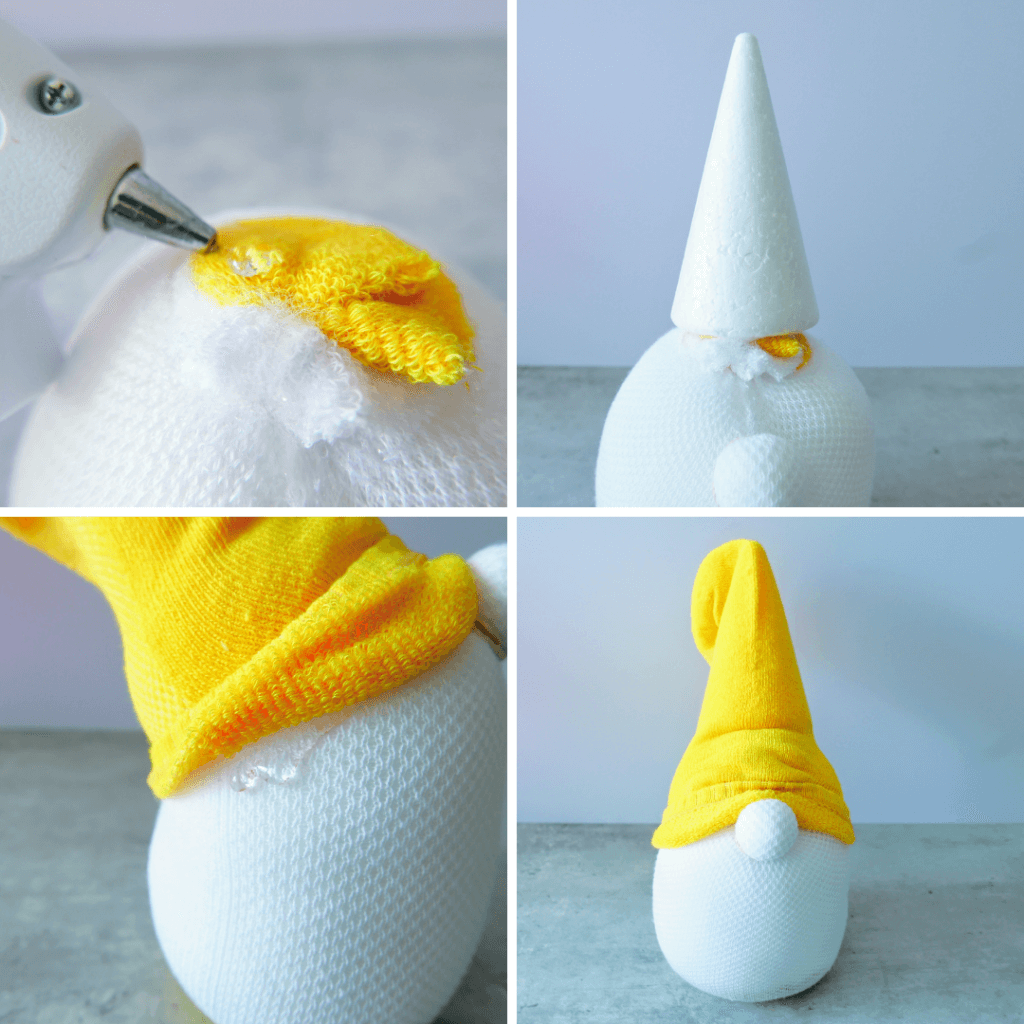
Add hot glue to the top of the sock opening, and place the styrofoam cone on top. Stretch the yellow sock over the cone, and pull it down to cover the top of the white sock. Roll it up one time, and then hot glue it to the white sock.
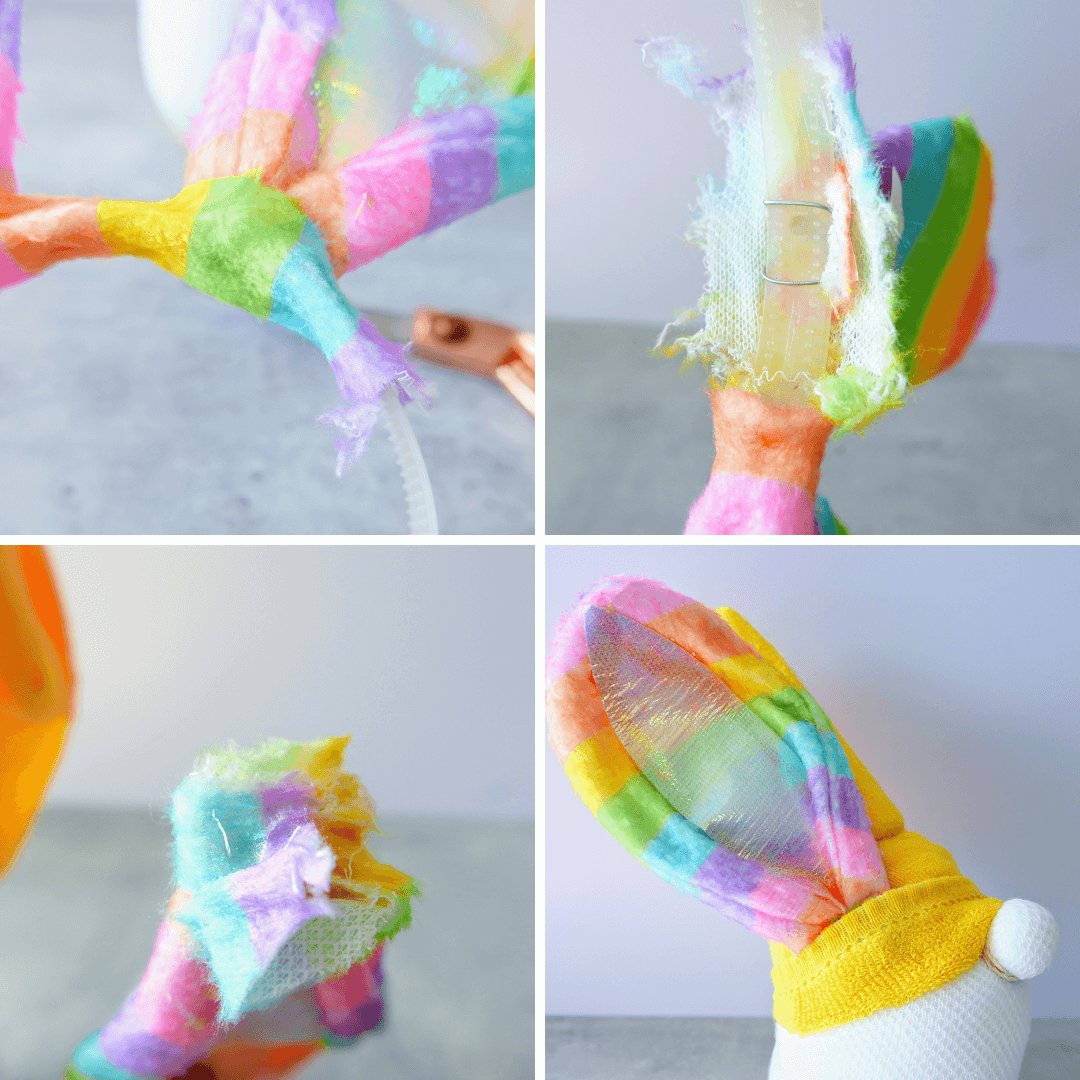
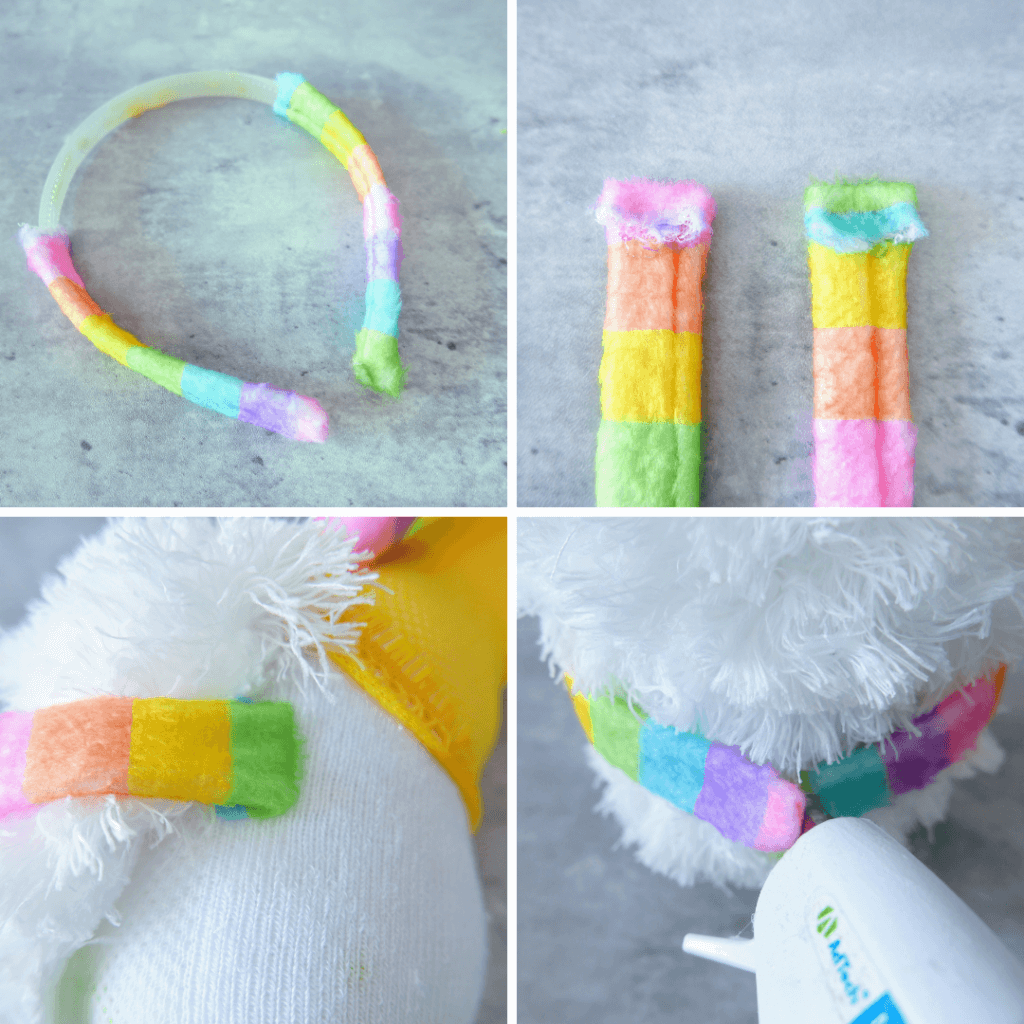
Using scissors or a box cutter, cut the ears off of the Easter Bunny headband, leaving about ½” on both sides. When I did this, there were two pieces of wire attaching the ears to the headband, so I ended up having to use wire cutters to remove them, but you could possibly use scissors also.
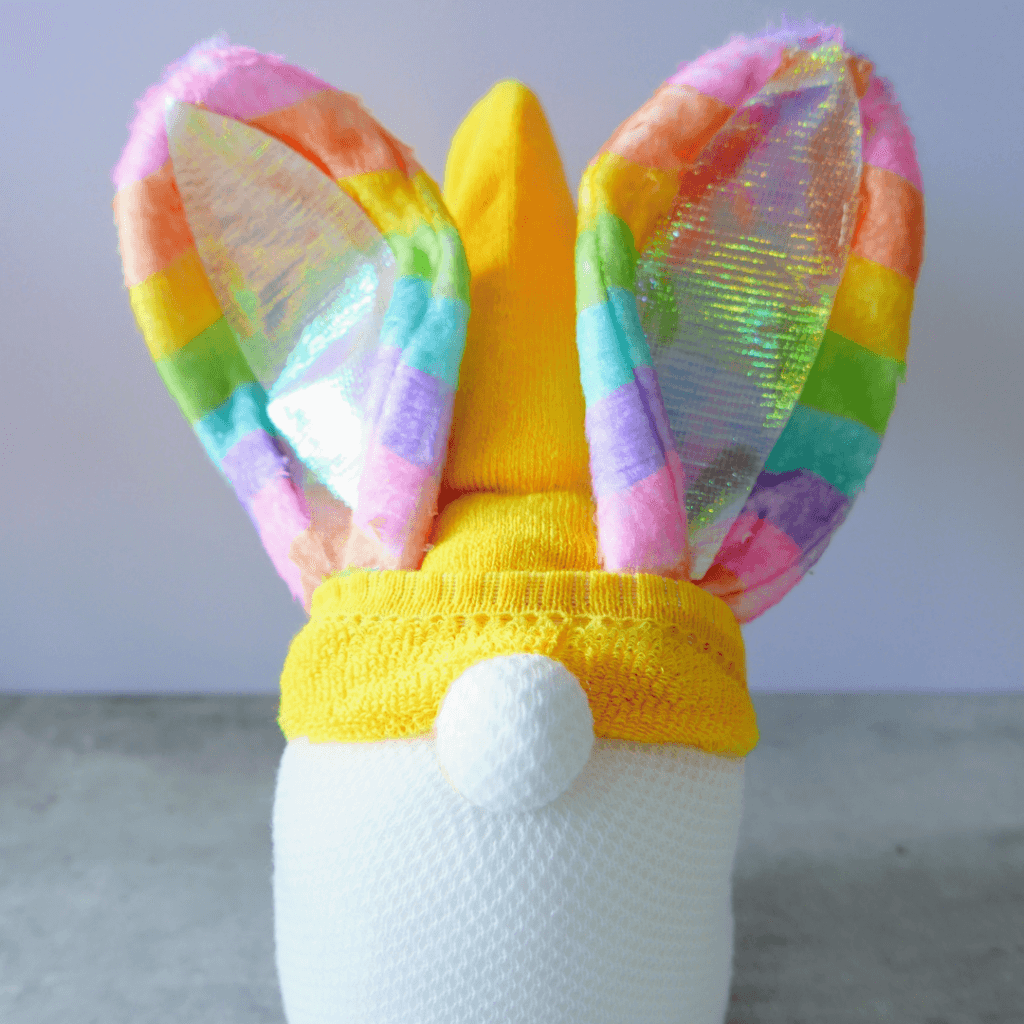
Don’t throw away the leftovers from the headband! It’s going to be the arms!
Once the ears are removed, fold the extra fabric at the bottom over and hot glue together. Place the ears inside the folded flap of the yellow sock hat, and hot glue them into place.
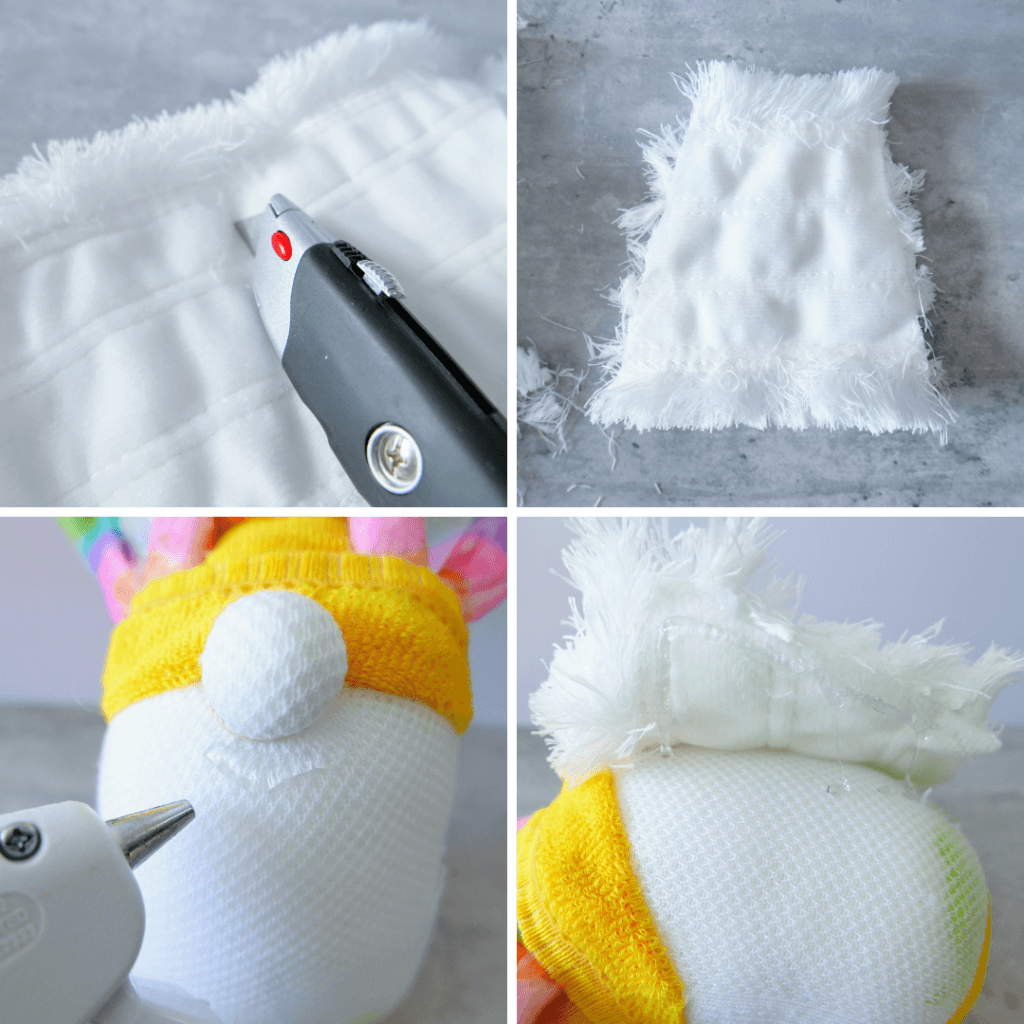
Wrap the duster mop head around the gnome to measure where to cut for the beard. Once you have it lined up, and decide where to cut, flip the duster/mop head over, and use a box cutter or scissors to cut the back side.
FYI, there will be excess loose pieces. Just pull them away until it stops shedding, and dispose of them.
The beard should be in a slight trapezoid shape. Hot glue the beard to the gnome, tucking it right below the nose.
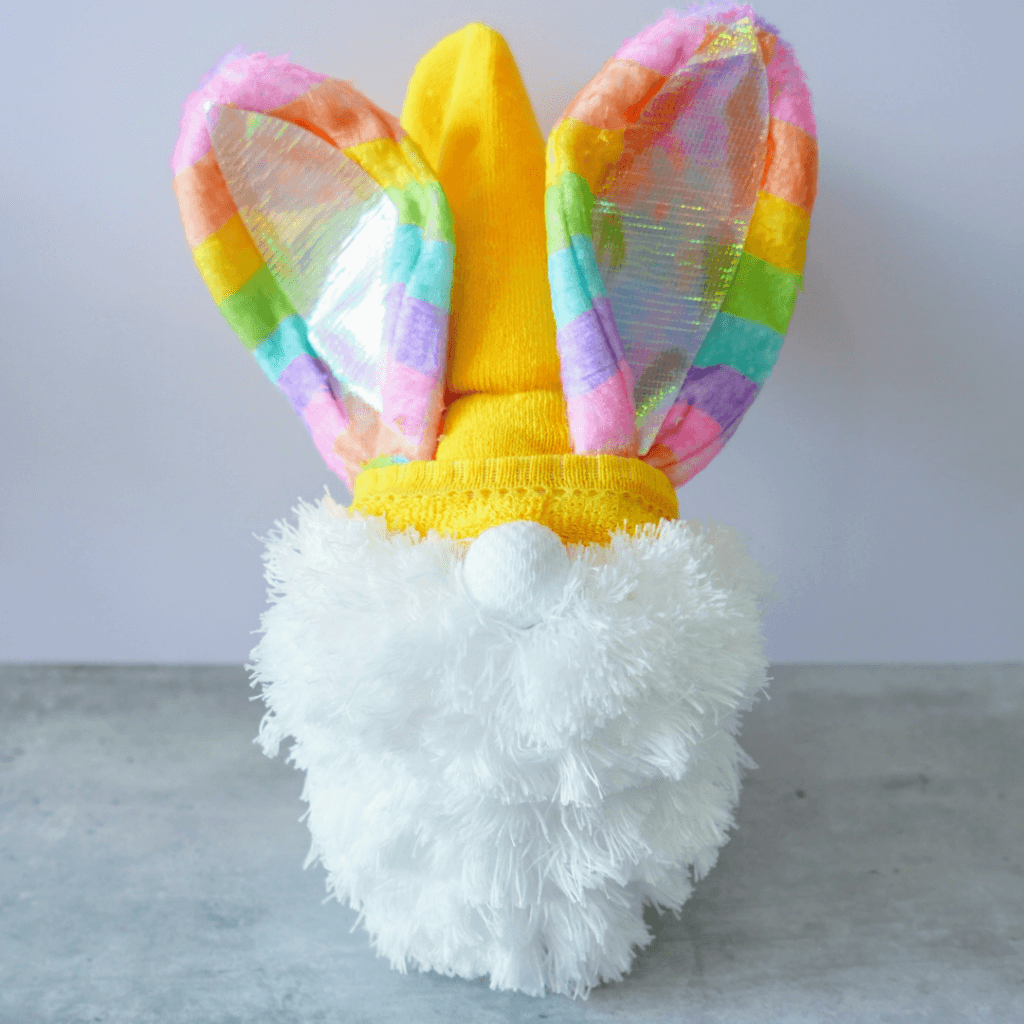
Remove the remaining fabric from the headband, and fold the cut edges over and glue them. Glue the fabric on the sides of the gnomes to be the arms, and add a little glue to the middle to make the hands overlap.
You’re done! Your gnome is now complete and ready to enjoy.
