DIY Thanksgiving Napkin Rings
If you're looking to add a personal touch to your Thanksgiving table decor, creating DIY napkin rings is a fun and budget-friendly way to do so! You can use materials like twine, ribbon, beads, or even natural elements like pinecones and leaves to craft unique napkin rings that match your fall theme perfectly. Get creative with colors and textures to complement your table setting, and don't forget to involve the kids or friends for a fun craft session. Not only will these handmade napkin rings impress your guests, but they'll also add a heartwarming touch to your Thanksgiving dinner that everyone will appreciate. DIY Thanksgiving napkin rings are a simple yet impactful way to elevate your holiday table setting with a personal and welcoming flair.
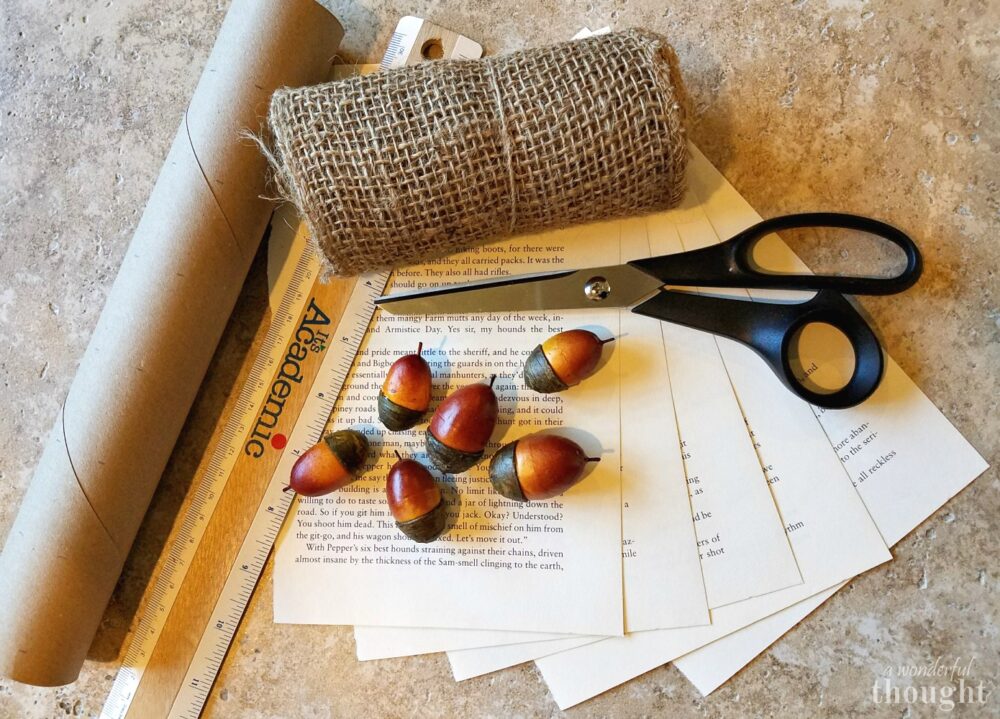
Supplies:
- Book pages (pick up a book at the thrift store)
- Acorns (similar)
- Scissors
- Hot Glue Gun and Glue Sticks
- 6″ Burlap Roll
- Empty Paper Towel Roll
- Ruler
How to make DIY Thanksgiving napkin rings
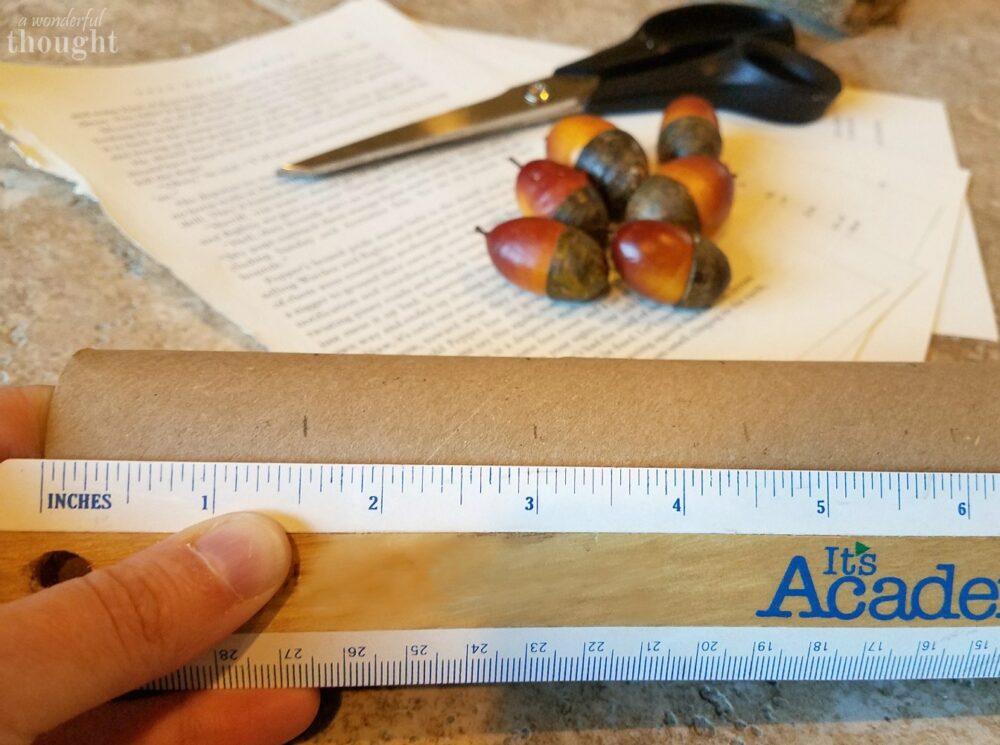
These are really so easy to make that I was not even sure if I needed to do a tutorial. However I know sometimes it is helpful to see the steps laid out so I decided to do one. The first thing you need to do is take your paper towel roll and mark off of every 1.5 inches.
Cut the paper towel roll at the marks. I just used scissors for this, it did bend down the roll a little bit but I was able to shape it back easily. Not wanting a paper towel roll napkin ring, I covered the paper towel roll rings with burlap to make them look nicer. I had a burlap roll already and this worked great. I cut a 6″ piece off of the roll, so it ended up being approximately 6 ” square. Then I cut that in half and hot glued the strip around one of the napkin rings.
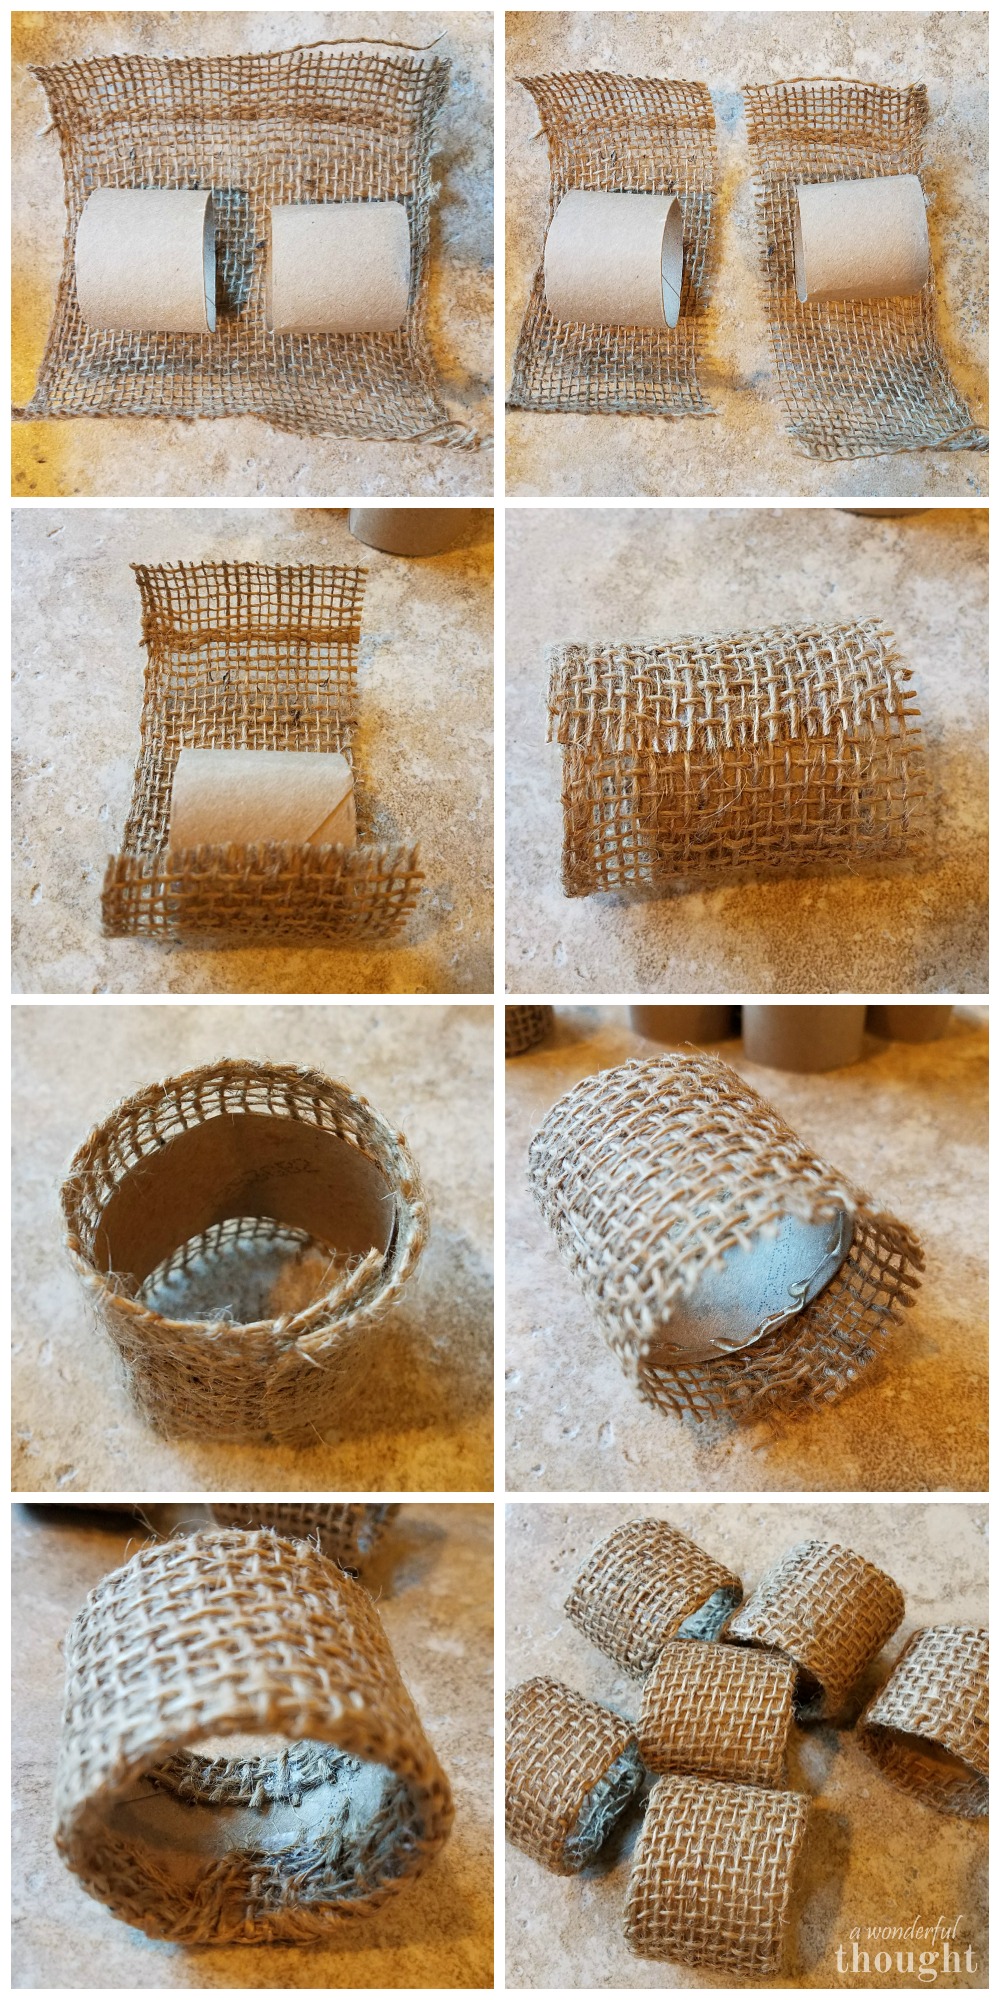
Putting a bead of hot glue around the inside edge, it was easy to fold down the burlap edges into the napkin ring. The glue gets a little hot on the fingers doing this though since the hot glue can squeeze through the burlap easily. It seemed like it worked better if I let it cool just a bit before pressing the burlap down.
How to make book page acorn turkeys
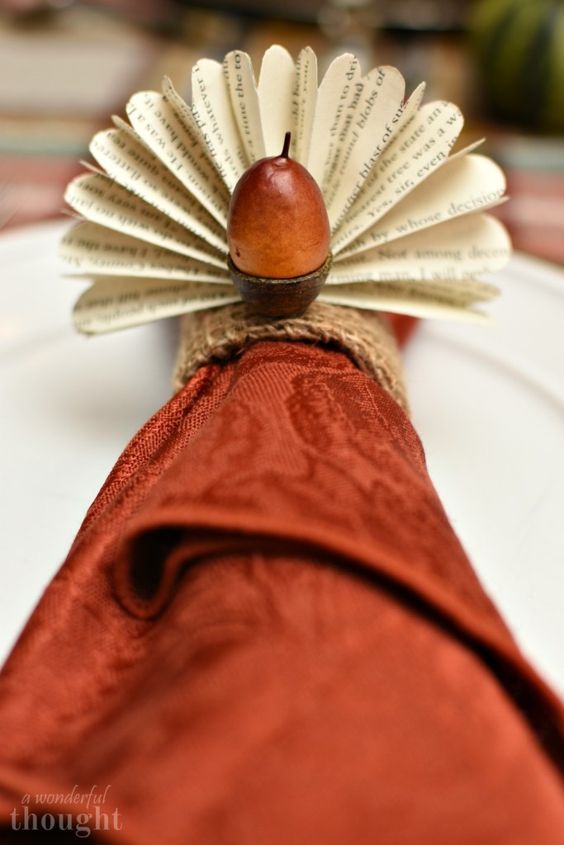
Next up were the turkey feathers. I took my book pages and just cut off the white edges from around the words. Then I cut that piece in half. The size of the book page strip ended up being about 2″x 7.5″. To get the look of feathers, I did an accordion fold on the paper. Starting on one end, I folded it up 1/2″, then folded that again the opposite way back onto itself and continued this to the end of the strip.
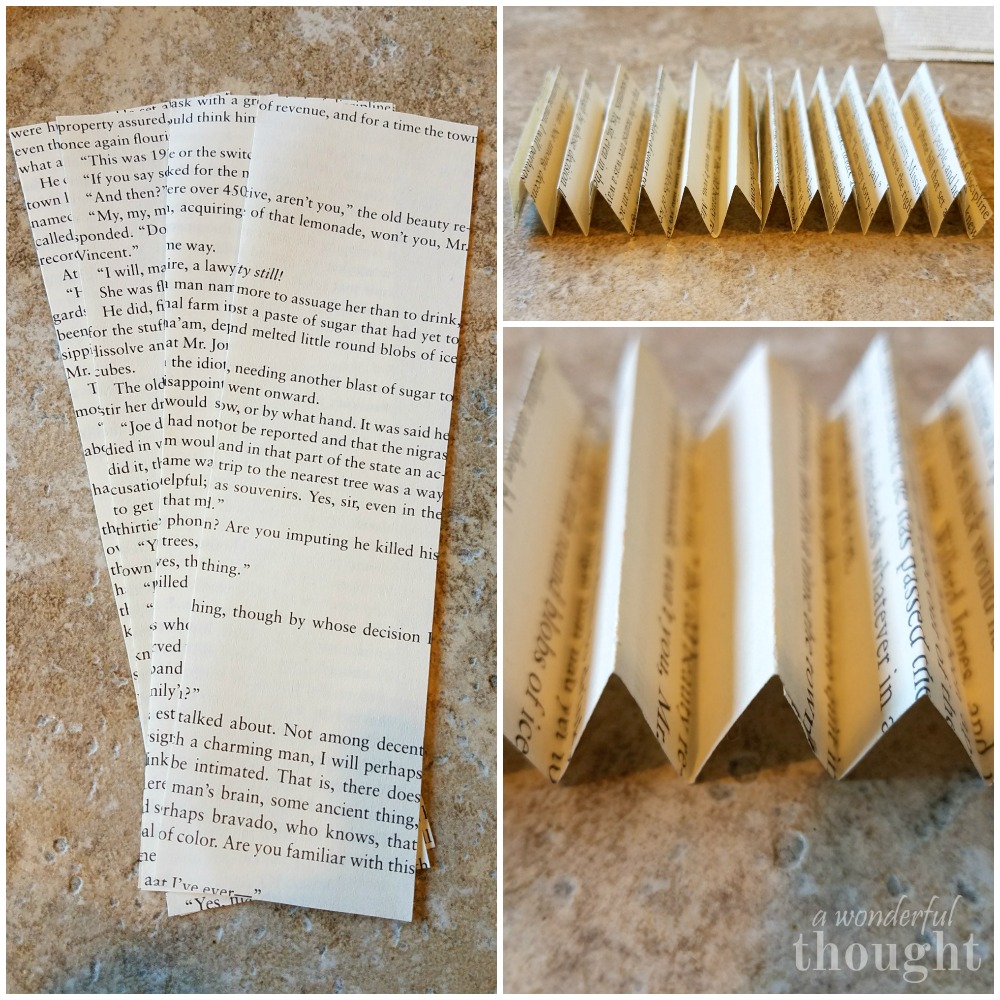
One strip by itself was not long enough to fan out all the way like I needed so I took two strips and glued the ends together. You can see this in the closeup picture above.
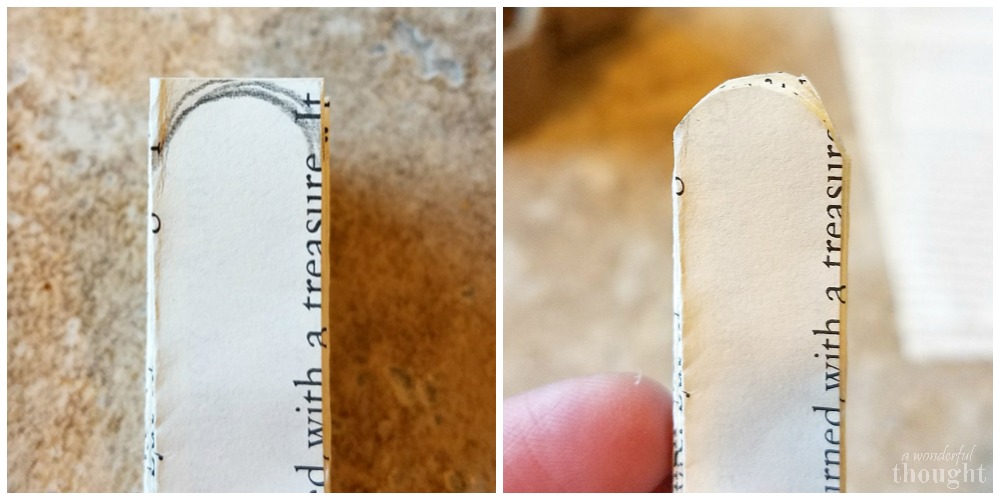
After gluing two strips together, I rounded the edges to give more of a feather look to it.
The next step was to glue the feathers onto the burlap napkin ring. Make sure to glue them down facing the same way as the opening of your napkin ring. I made the mistake of doing it the wrong way the first time. Initially I was thinking I could just cover the seam with the feathers, but that did not work out so well. 
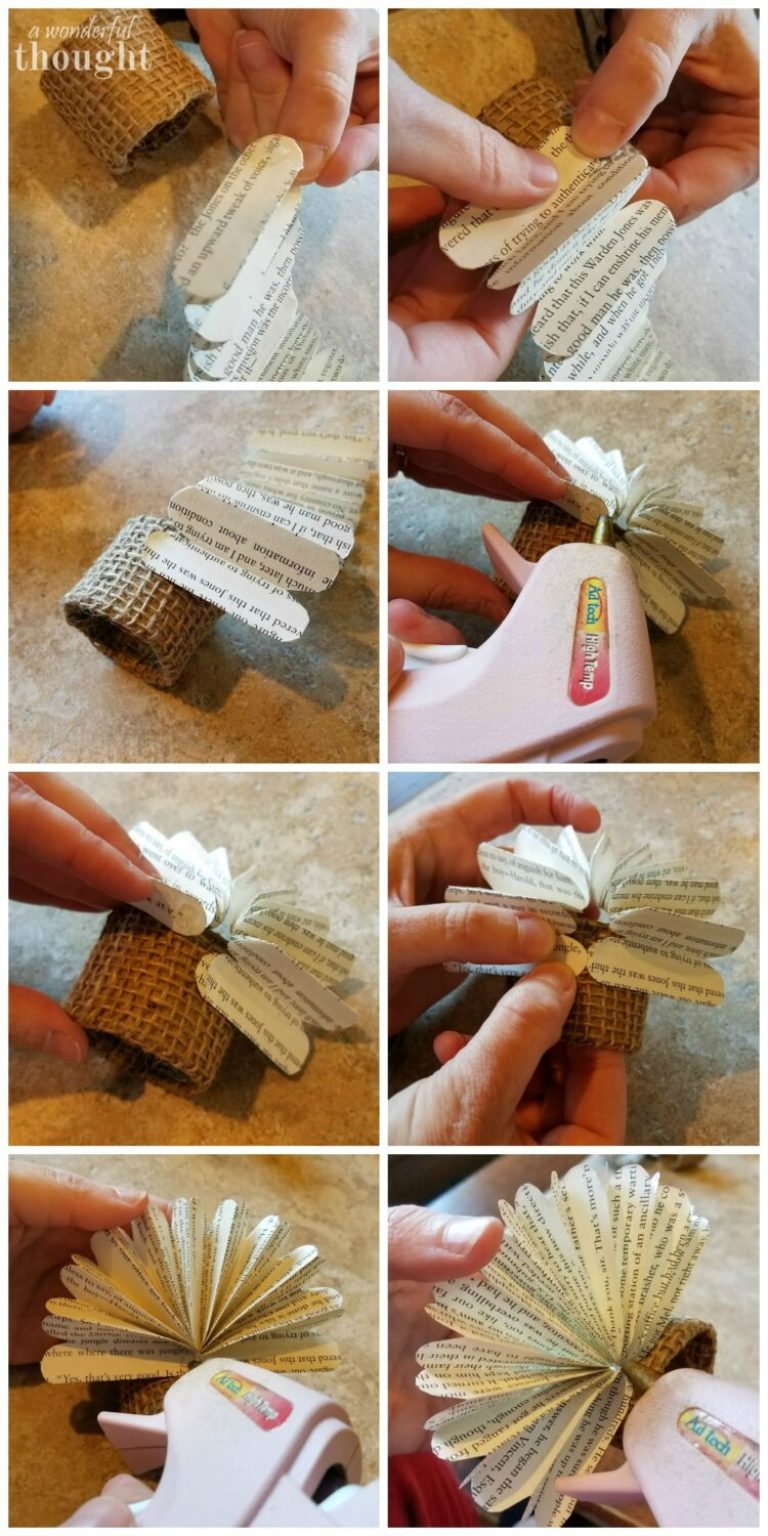
Make sure you glue it on the bottom in the front and back. This will hold it upright without leaning one way or the other.
The last step was to add the acorn, which resembles the turkey’s body. I just added glue on the bottom of the acorn and pressed it straight down onto the burlap ring. I also added a touch of glue to the backside of the acorn where it met the feathers.
