DIY Tin Can Jack-O-Lantern Planters
Get ready to add a spooky touch to your garden with DIY Tin Can Jack-O-Lantern Planters! Transform your empty tin cans into adorable Halloween decorations that also double as planters for your favorite flowers or herbs. These DIY planters are a fun and eco-friendly way to spruce up your outdoor space for the Halloween season. Can't wait to see those spooky faces brightening up your garden!

Supplies:
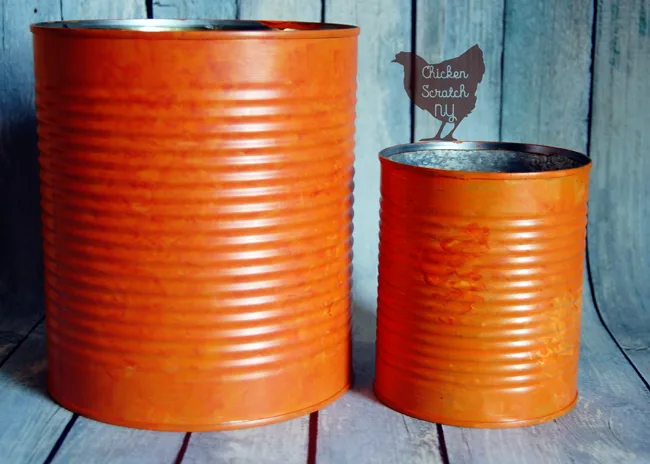
- Tin cans (the large pumpkins are #10 cans, the small guy is from a can of crushed tomatoes) washed with the label removed
- DecoArt Americana Multi-Surface Satin Acrylic in Pumpkin Patch, Paprika, Orange Sherbet, Chick and Canary
- Metallic Paint Pen in an Old Gold or Coppery color
- Foam Brush
- Contact Paper
- Scissors
- Cosmetic sponge wedges (the white ones you can get at the dollar store)
- Nail + Hammer
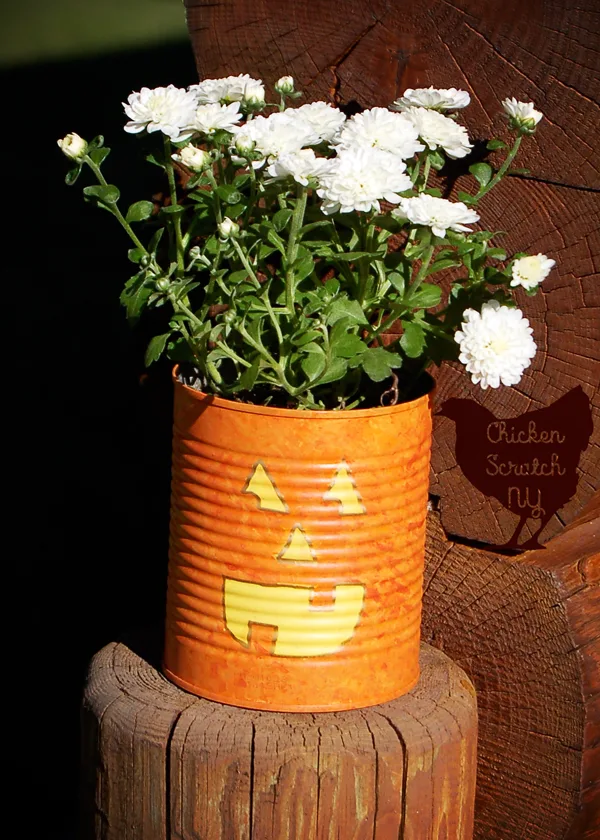
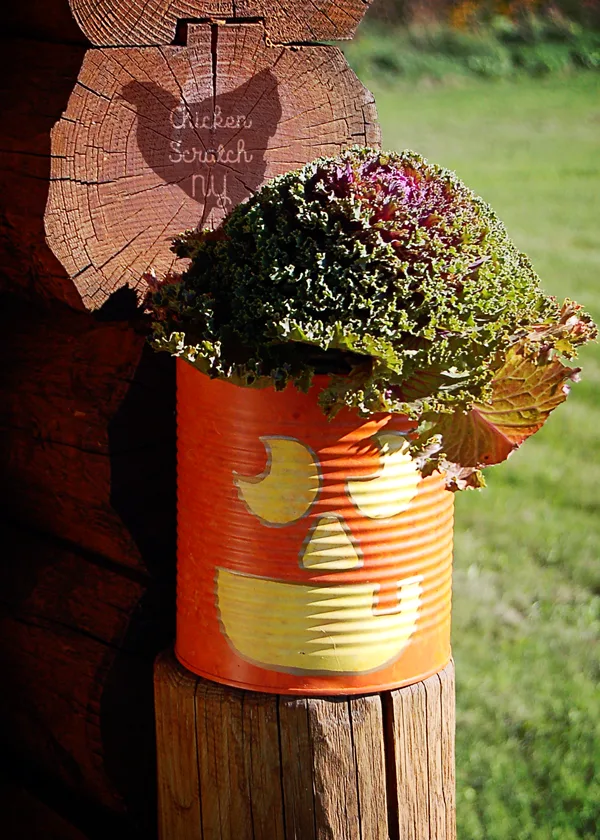
- Mums or Flowering Cabbage

Instructions:
1. Use the foam brush to over the cans with one or two layers of Pumpkin Patch letting each dry. It’s ok if it looks a little streaking, we’re adding more color in a moment.
2. Pour a little of Pumpkin Patch, Orange Sherbet and Paprika on a plastic plate (coolwhip-style container lids are great for this). Use the cosmetic sponge and tiny bits of all three colors to build up a mottled orange.
You can make your pumpkin darker or lighter by dabbing on more Paprika or Orange Sherbet.
3. Draw a pumpkin face on a piece of contact paper and cut out the eyes, nose and mouth. You can use a vinyl cutter if you’re feeling ambitious but I went old school and scribbled until I was happy then cut with scissors.
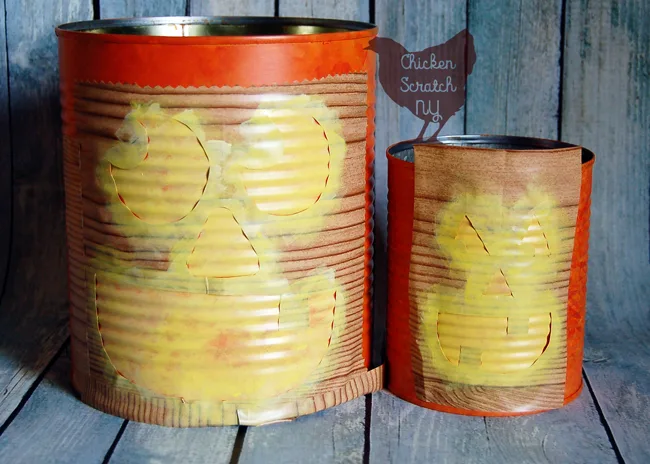
4. Slap the contact paper on the can and smooth out as best as possible, the ridges on the can make it a little tricky
5. Use another cosmetic wedge with Chick and Canary to fill in the face. You might need to build up a few coats so the orange doesn’t show through
6. Remove the stencil after the last coat. There will be a few areas where the paint bled, after it dries you can cover it up with a little orange if it’s really bad or leave it and it’ll get covered in the next step
7. Trace around the the face with the paint pen. I was going to do this with paint but it’s nearly impossible to paint a straight line on a tin can. Don’t do it, get the paint pen and save your sanity.
8. Pop a few holes in the bottom of the can for drainage, you can skip this if you aren’t putting live flowers in your cans.
9. Drop in a mum or decorative cabbage to give your pumpkin a fancy hairdo