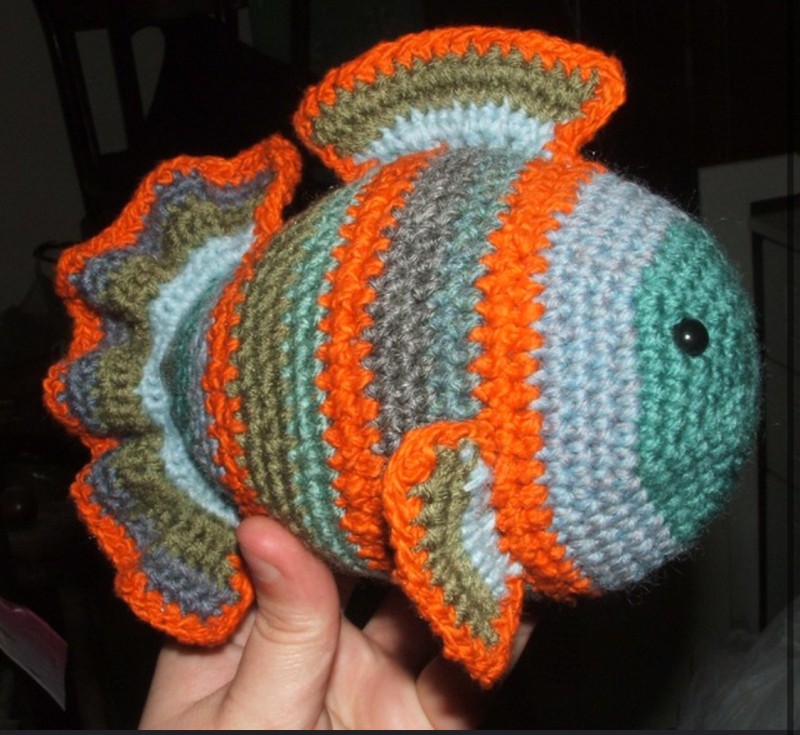
Crochet Freddie The Fish
Crochet Freddie The Fish is a charming and fun project that brings creativity and joy to the art of crocheting. With his colorful scales and adorable fins, Freddie is sure to become a beloved creation for both beginners and experienced crocheters alike. The detailed patterns and step-by-step instructions make it easy to bring this delightful fish to life, making it a perfect gift or a whimsical addition to your home decor. So grab your yarn and crochet hook, and let's dive into the magical world of creating your very own Crochet Freddie The Fish! Remember, the most important part is to have fun and enjoy the process of crafting something truly special.

Ingredients:
Scraps of DK yarns
Safety eyes
Crochet hook to give you a nice tight gauge for amigurumi. I used a 3mm hook, but I crochet loosely.
Fish is worked in rounds of single crochet (double crochet in UK terminology!), all rounds start with a ch1 and end with a sl st to join, this is to make the stripes look neat. If you aren't as obsessive as me, you can work it in a continuous spiral instead, just make sure to place a stitch marker to mark the beginning of rounds. The pattern starts at the head end of the fish and finishes at the tail end.
The '--'s denote where I changed colour for the orange stripes.
Rnd 1: Make a magic ring, sc 6 into ring, and tighten.
Rnd 2: 2sc in every stitch (henceforth known as inc)
Rnd 3: *sc, inc* around
Rnd 4: *2 sc, inc* around
Rnd 5: *3 sc, inc* around
Rnd 6: *4 sc, inc* around
Rnd 7: *5 sc, inc* around
Rnd 8: *6 sc, inc* around
Rnd 9: sc around
Rnd 10: *7 sc, inc* around
Rnd 11: sc around
--
Rnd 12 & 13: sc around
--
Rnd 14-18: sc around
--
Rnd 19-20: sc around
--
Rnd 21: sc around
Rnd 22: *7 sc, dec* around
Rnd 23: sc around
Rnd 24: *6 sc, dec* around
Rnd 25: sc around
Remember to put in the safety eyes somewhere round here
--
Rnd 26: *5 sc, dec* around
Rnd 27: sc around
--
Rnd 28: *4 sc, dec* around
Rnd 29: sc around
Rnd 30: *3 sc, dec* around
Rnd 31: sc around
Stuff
Rnd 32: *2 sc, dec* around
Rnd 33: sc around
Rnd 34: *sc, dec*
Dec around until hole is closed
Top fin
Row 1: Pick up and sc 10 sts
Row 2: inc in every st
--
Row 3 and 4: sc. Fasten off.
--
Row 5: sc around entire fin
Tail
Row 1: Pick up and sc 12
Row 2: inc in every st
Row 3: sc
--
Row 4: inc in every st
Row 5: sc
--
Row 6 & 7: sc
Fasten off.
--
Row 8: sc around entire tail
Bottom Fins x2
Row 1: Pick up and sc 6
Row 2: inc in every st
--
Row 3: sc
Row 4: sc, fasten off
--
Row 5: sc around entire fin