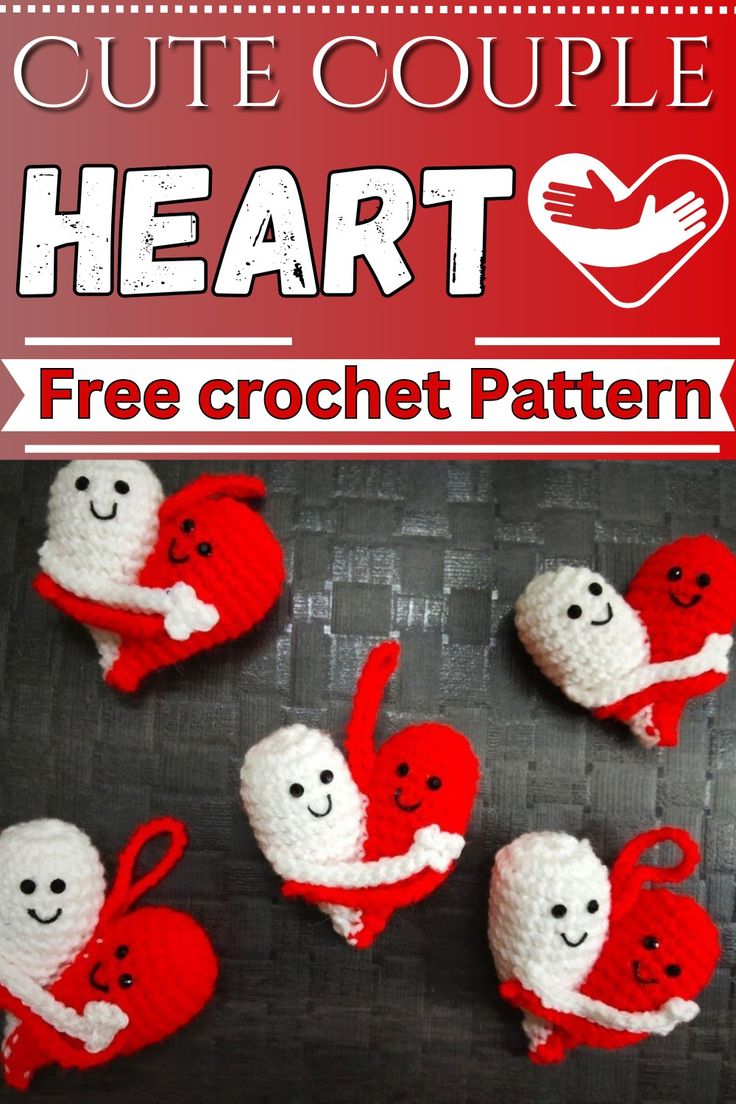
Crochet Amigurumi Couple Heart
If you're looking to add a touch of sweetness to your crafting projects, consider making a Crochet Amigurumi Couple Heart. These adorable creations make for a charming gift for a loved one or a delightful decoration for your home. The best part about creating these crochet masterpieces is the joy that comes with bringing them to life stitch by stitch. As you work on crafting each part of the amigurumi couple, you'll feel a sense of accomplishment and warmth knowing that you're creating something special with your own hands. Whether you're a beginner or an experienced crocheter, this project is sure to bring a smile to your face and to anyone who sees your lovely handmade creation. So grab your yarn, crochet hook, and a dash of creativity, and let the magic of crafting these sweet amigurumi hearts begin!

Materials Needed:
- Two colors of four-ply yarn
- Crochet hook (size 3mm)
- Stitch marker
- Yarn needle
- Fiberfill for stuffing
- Scissors
Step by step Pattern
Heart (Make 2, one in each color):
- Row 1:
- Start with a magic ring.
- Chain 1, make 10 single crochet (sc) stitches into the ring.
- Pull the ring tightly closed.
- Row 2:
- Begin by inserting the hook into the first stitch. Make an increase in each stitch around (2 sc in each stitch).
- Place a stitch marker in the first stitch made. You should have 20 stitches at the end of this row.
- Row 3:
- Sc in each stitch around, maintaining 20 stitches.
- Rows 4 to 6:
- Repeat Row 3.
Joining the Two Hearts:
- Remove the stitch markers and position the two hearts together.
- Join by pulling a loop from one heart through a loop of the other heart, alternating colors.
Row 7:
- Continue sc around the perimeter of the hearts, making sure to smoothly transition between the two colors at the joins.
Row 8:
- Begin with 2 sc, then make an invisible decrease.
- Sc in the next 12 stitches.
- Make another invisible decrease and complete the round changing colors as needed.
Row 9:
- Start with 2 sc, perform an invisible decrease.
- Sc in next 10 stitches.
- Continue the pattern with decreases and single stitches, changing colors as required.
Row 10:
- Start with 2 sc, then an invisible decrease.
- Sc in the next 8 stitches, followed by an invisible decrease, and continue the pattern.
Arms (Make 2, one in each color):
- Chain 13 (for blue) or 12 (for yellow).
- Start from the second chain from the hook, make a slip stitch back down the chain, forming fingers by chain 2 and slip stitch in each, then join the digits with slip stitches.
Attach the arms between Rows 7 and 8 on each side.
Finishing Rows 11-16:
- Continue decreasing each row to close the heart at the top, changing colors as you go.
- Use an invisible decrease and manage color transitions until the piece is closed.
- Fasten off and leave a long tail for sewing.
Final Steps:
- Stuffing:
- Stuff the hearts adequately before completely closing the tops.
- Ensure the stuffing is evenly spread.
- Detail Work:
- Using a yarn needle, secure all ends and add facial features (eyes and a mouth) using black kundans or embroidery.
- Optionally, create a keychain loop or leave it as a decorative piece.
- Finishing:
- Attach any additional accessories as desired, such as a key ring or additional decorative elements.