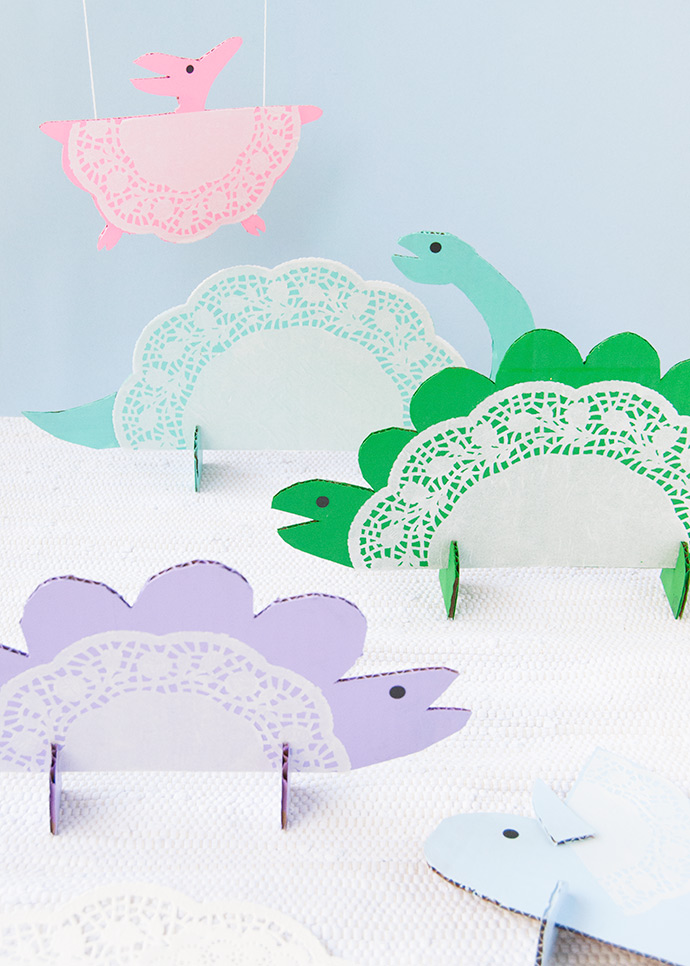
Doily Dinosaurs
Doily Dinosaurs are the cutest addition to any craft project or DIY party decoration! These adorable paper dinosaurs made from doilies bring a touch of whimsy and charm to any event. With their delicate lace-like patterns and vibrant colors, Doily Dinosaurs are sure to put a smile on everyone's face. Whether you're crafting with kids, adding a unique touch to your home decor, or looking for a fun and easy craft project, Doily Dinosaurs are a delightful choice. Let your creativity run wild and watch as these charming creatures add a playful and inviting atmosphere to any setting. Get ready to have a roarin' good time with Doily Dinosaurs!
What you need:

Step 1
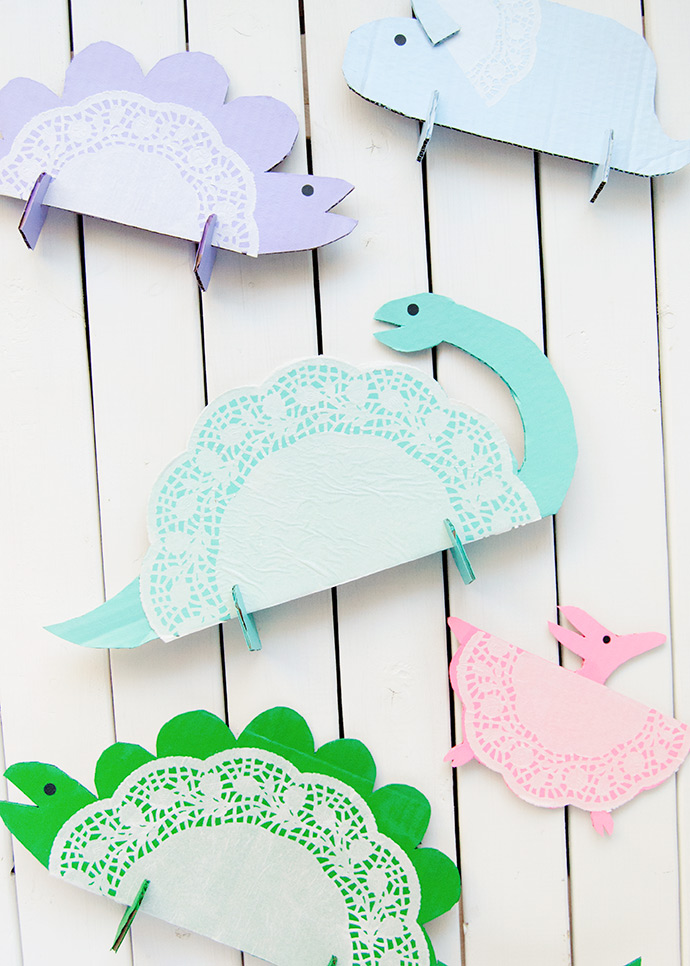
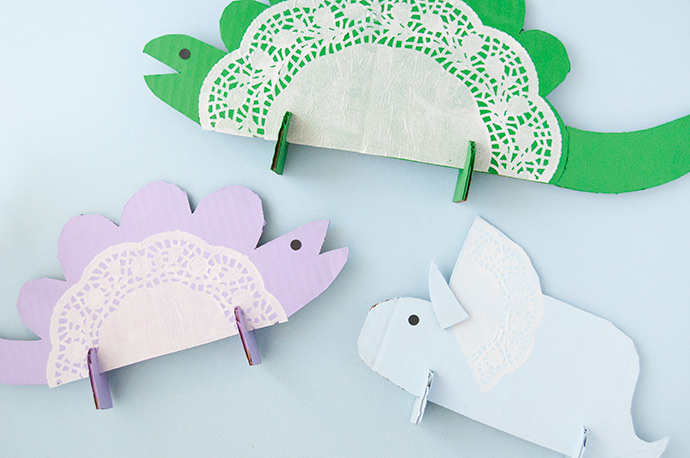
Gather up some plain corrugated cardboard and lay it flat on your work surface. We like to start by cutting a doily in half to use as the dinosaur’s body. Place the doily half onto the cardboard and trace/draw around it, forming a head and back details. Our cardboard wasn’t quite long enough to include a tail, so we had to make that a separate piece, but you can draw that on now if it fits. Use a craft knife and cutting mat to carefully cut out, and use scissors to smooth any edges or make smaller details and snips.
For the legs, we drew two upside-down U shapes with a pencil and cut them out. Then cut two narrow slots in the curved side so that the legs fit snugly and securely onto the dinosaur body.
Repeat this process for different dinosaurs. Do a search on Pinterest for dinosaur inspiration and don’t forget to mix and match different sizes of doilies for smaller and larger dinos.
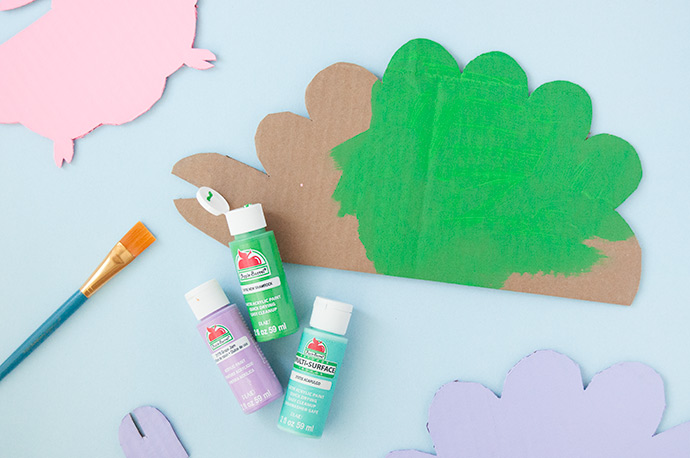
Step 2
Give the cardboard cut-outs a quick coat of paint – we used a few different shades for a super colorful dino bunch. Paint each side, and let dry – don’t forget the legs!
Step 3
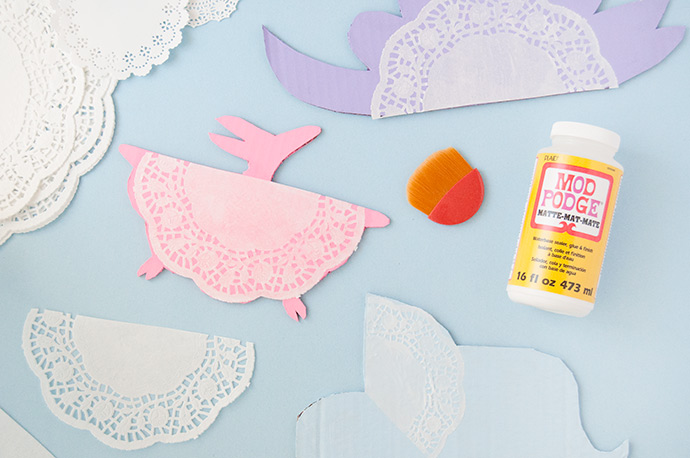
Once the paint is completely dry, apply a thin coat of Mod Podge onto the main body area that will be covered with the doily. Gently set the doily in place, and apply another coat of Mod Podge on top to seal it. Let dry.
Note: before attaching the doily down, make sure you’ve got only one and not multiples stuck together.
Step 4
Use a hole punch on black paper to cut out perfectly round eyes and use more Mod Podge to attach, as well as any other details like horns.
Once the Mod Podge is all dry, slide the legs onto the bodies and voila! Your doily dinos are ready to play.