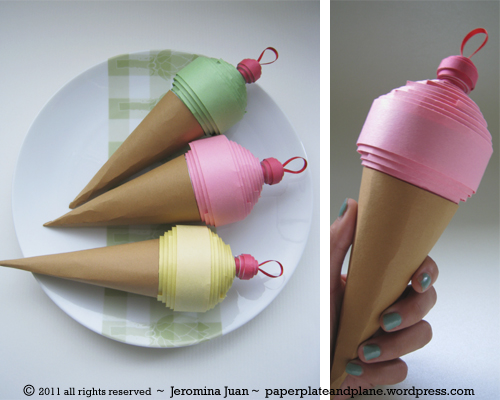
DIY Rolled Paper Ice Cream
DIY Rolled Paper Ice Cream is a delightful and creative craft that will bring a touch of sweetness to your home decor. By using colorful paper and a few simple steps, you can create charming rolled paper cones topped with scoops of paper ice cream in your favorite flavors. Whether you're looking for a fun project to do with kids or wanting to add a whimsical touch to your space, this craft is sure to bring joy and smiles all around! So, gather your materials, unleash your creativity, and have a 'scooper' good time crafting your very own paper ice cream cones.
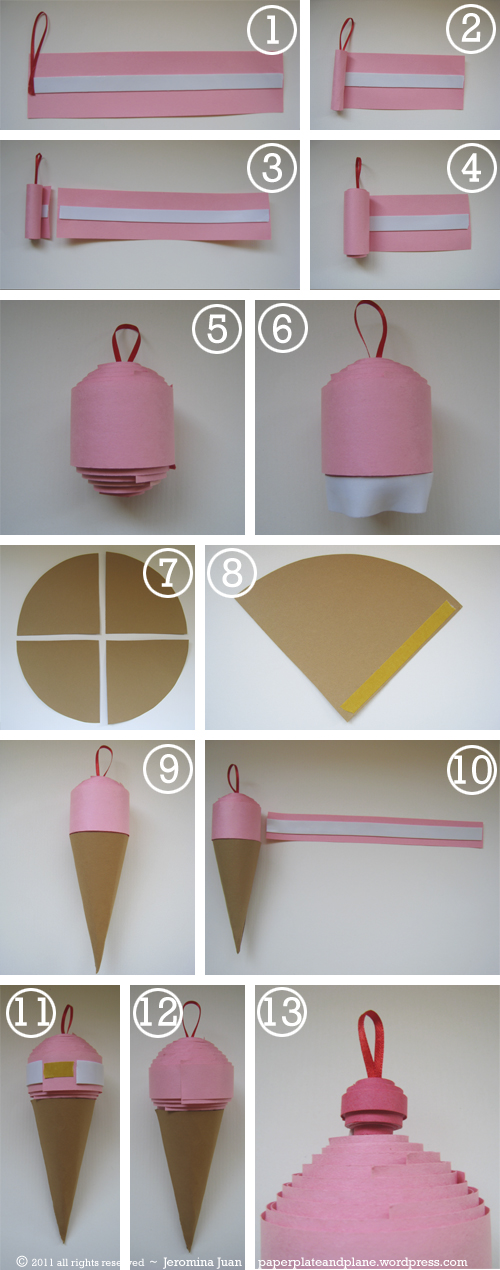
You will need construction paper, double-sided tape, mounting tape, and 1/8″ red ribbon.
1. Cut construction paper lengthwise (9″ long) in 1/4″ increments starting from 3″ wide down to 1″ wide (e.g. 3″, 2-3/4″, 2-1/2:, 2-1/4″ and so on until 1″). Take the widest piece (3″) and adhere mounting tape across the center. Take 8″ of ribbon, fold, and place on the mounting tape.
2. Roll.
3. Take the second widest piece and adhere mounting tape across the center.
4. Center the strip on the previously rolled strip and roll.
5. Repeat, going from widest, until you’ve rolled the 2″ piece.
6. Adhere mounting tape on the bottom.
7. Take a brown sheet of construction paper. Cut into an 11″ circle. Cut circle into quarters.
8. Take one quarter and place double-sided tape on one of the edges.
9. Roll on top of the mounting tape to make a cone. Peel off the double-sided tape and affix.
10. Continue steps 2-5, by rolling the remaining strips (except the narrowest strip).to form the ball shape of the ice cream,
11. When you get to the narrowest strip, place the mounting tape directly on the center and cut it about 3/4″ from where you began. Place double sided tape where the seams will meet. This will ensure the final seam is flat, and not raised.
12. Roll the final piece only once around and cut at the seam.
14. Cut red construction paper into 4-1/2″ length and 3/4″, 1/2″ and 1/4″ strips. Repeat same rolling process to make a cherry.
Hang them up as fun summer party ornaments.