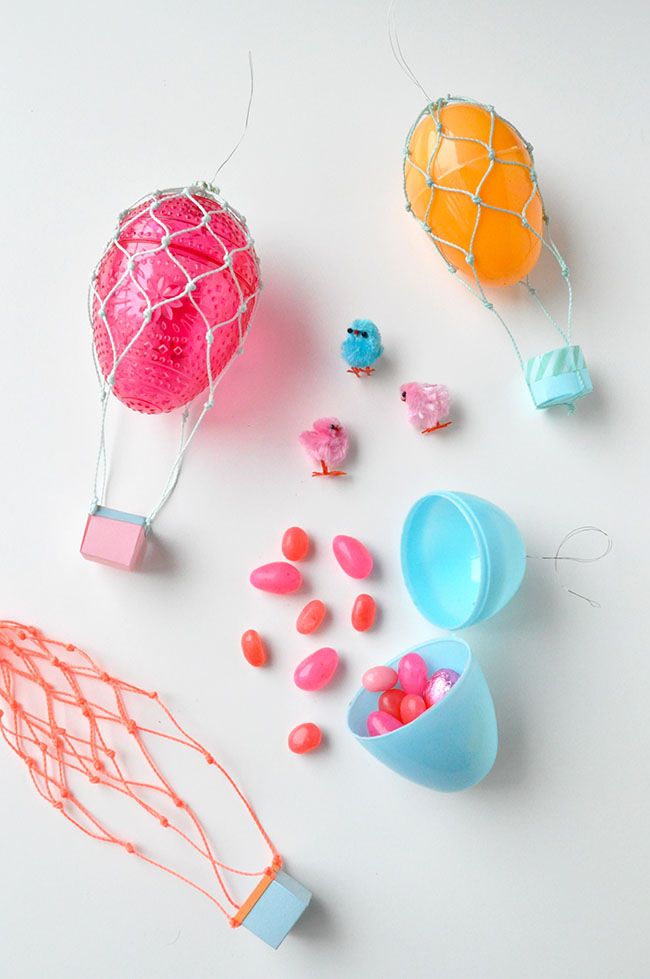
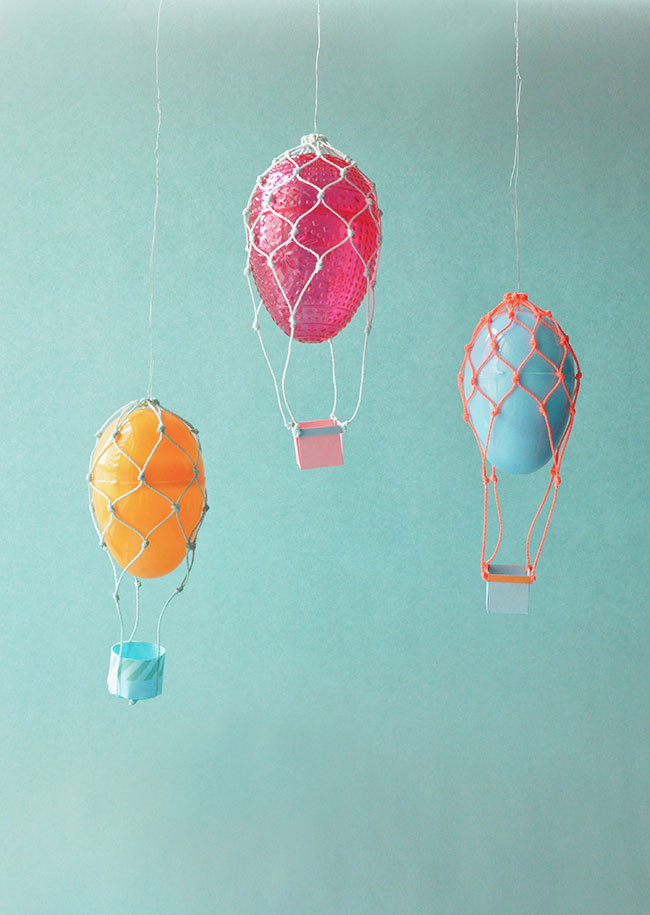
DIY Easter Egg Hot Air Balloons
Get ready to elevate your Easter egg decorating game with DIY Easter Egg Hot Air Balloons! This creative and whimsical project will bring a touch of magic to your Easter celebrations. With the simple stated materials, you'll have adorable Easter decorations that will delight everyone who sees them. Let your creativity soar as you craft these charming Easter Egg Hot Air Balloons and spread joy this holiday season!
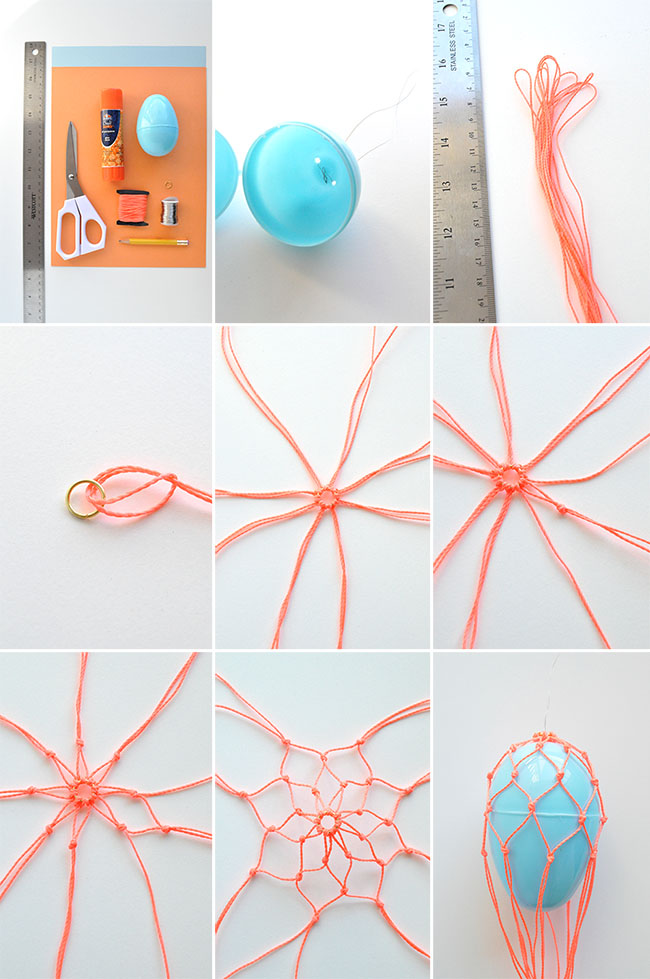
Step 1: Cut a piece of wire about 12" long. Almost all plastic eggs have two small holes on each end - if not, use a drill with a super fine drill bit to make your own. On the fat end of the egg, thread one end of the wire through one of the holes and the other wire-end through the other hole; this forms a loop on the outside of the egg. On the inside, twist both the ends together securely.
Step 2: Cut eight lengths of twine each 32", but then folded in half at the centre.
Step 3: Thread 1"of the folded centre of one of the strings through the jump ring. Pull the two tail ends through the string loop and pull taught.
Step 4: Repeat for the other seven strings.
Step 5: Take one strand from one knot and the neighbouring strand from the next knot over and use an overhand knot to tie them together 1/2" from the jump ring.
Step 6: Repeat for the rest of the strands and then start another tier of knots, again taking strands from separate neighbouring knots to tie together.
Step 7: Continue doing this, adjusting the distance between knots if desired.
Step 8: Slide the jump ring over the wire loop on the egg. Once you are happy with how the net looks on the egg, move on to the next step.
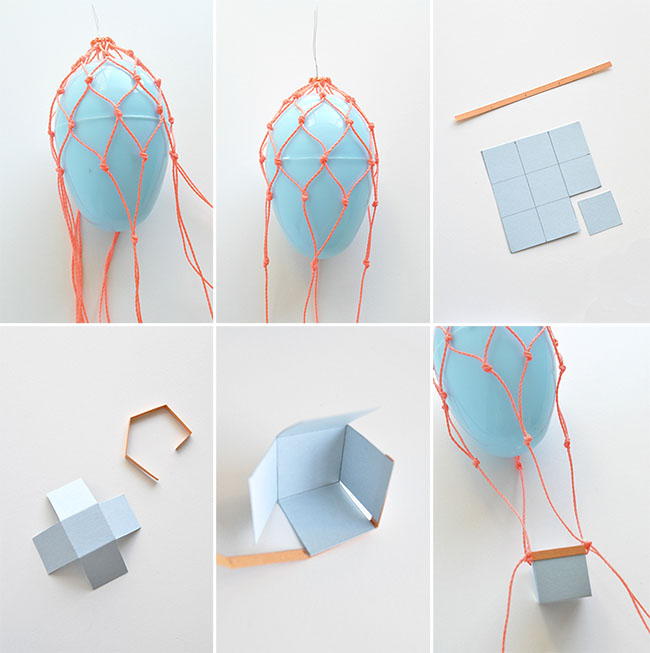
Step 9: As before, tie two strands from neighbouring knots together 1 1/4" away from the previous knots. This time though, cut off the single strands that were not used in the most recent knot.
Step 10: Repeat this for the next two knots, and then twice more for the rest. On your most recent tier, you should now have 4 knots with 2 strands on each. Cut off one strand from each of these lower-most knots so that only four strings are hanging down.
Step 11: Time to make the basket! On card stock, draw 2 1/4" by 2 1/4" square made up of nine smaller squares, each measuring 3/4" by 3/4". On another colour of card stock, draw a strip 1/8" by 3 1/2" long. On this strip, use your ruler to make a tick mark every 13/16" so that there are four sections with a bit of extra left at the end. (Sounds complicated, but the idea is that each of the four sections on the strip are very slightly longer than the 3/4" edges of the basket.)
Step 12: Cut out the four corners of the square and fold along the remaining lines. Fold the strip along the tick marks you just drew.
Step 13: Use your glue stick to attach the thin strip to the top edge of the basket - there should be tiny gaps along the vertical edges of the basket as shown below. The leftover bit of the strip will overlap onto the first piece you glue - this will hold the basket together.
Step 14: Thread each string through a corner of the basket. Double knot the string to itself 1 3/4" down from the previous knot. Remove the Easter egg, fill with candy, and replace.
No comments
Write a comment