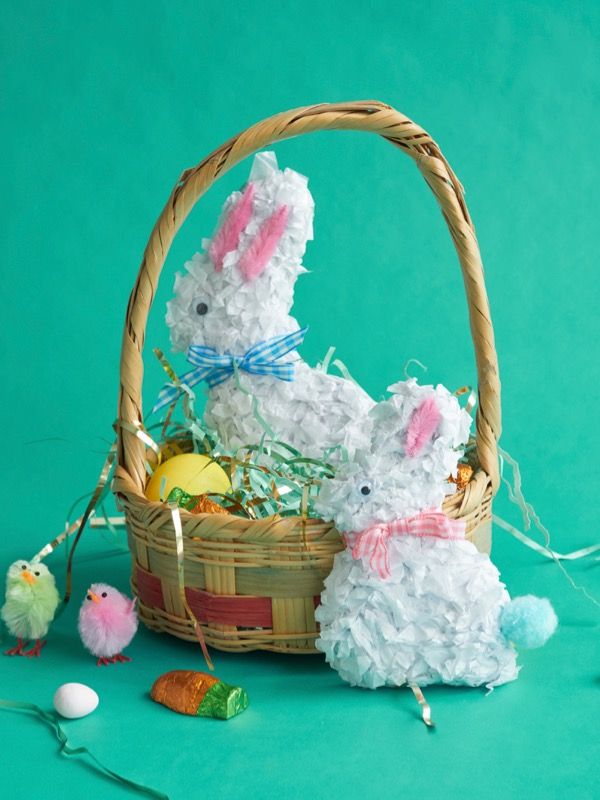
DIY Decorated Chocolate Bunny
Creating your own DIY Decorated Chocolate Bunny can be a fun and delightful project! Whether you're making it for Easter, a special occasion, or just for the joy of crafting, decorating a chocolate bunny allows you to add your personal touch. From colorful sprinkles to edible glitter and little fondant decorations, the options are endless. Get creative, enjoy the process, and have a hopping good time making your custom chocolate bunny masterpiece!
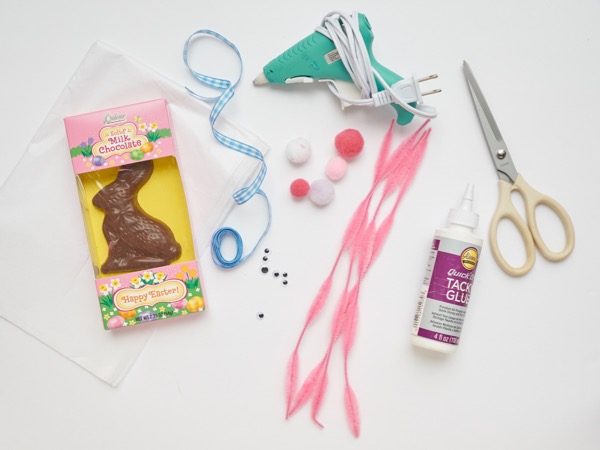
Materials needed: chocolate bunny, tissue paper, scissors, craft glue, ribbon, pink bump chenille pipe cleaners, googly eyes, tin foil (if needed), pencil, ½” pom poms
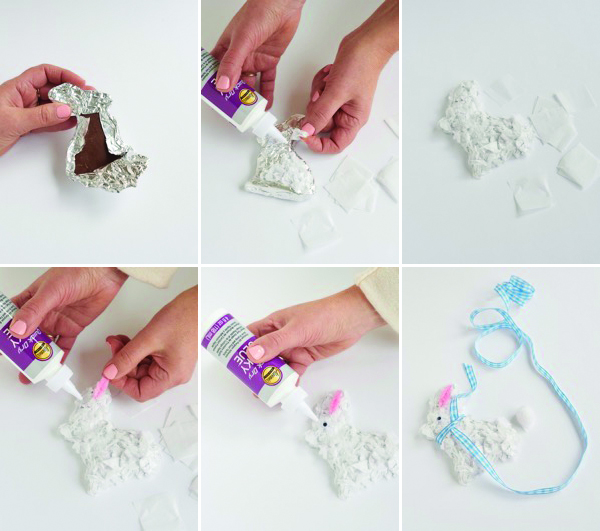
Step 1: If you are using a chocolate bunny that is not wrapped in foil, gently wrap it in tin foil, pressing down to get as close a possible to the chocolate form.
Step 2: Cut up tissue paper into 1″ x 1″ squares. They do not need to be perfect, but try to keep them roughly the same size so that your finished project is fairly even. Place your pencil’s eraser into the center of a pink tissue paper square, and wrap the square around the pencil eraser. Stick the tissue paper into the glue using the eraser, then pull the pencil up and out.
Step 3: Continue until the front and sides of the bunny are all covered.
Step 4: Cut out the pink bump from the pipe cleaner, and glue to the bunny’s ear.
Step 5: Glue on a googly eye.
Step 6: Cut a piece of ribbon and tie it in a bow around the bunny’s neck, and glue on a pom pom for the bunny’s tail.