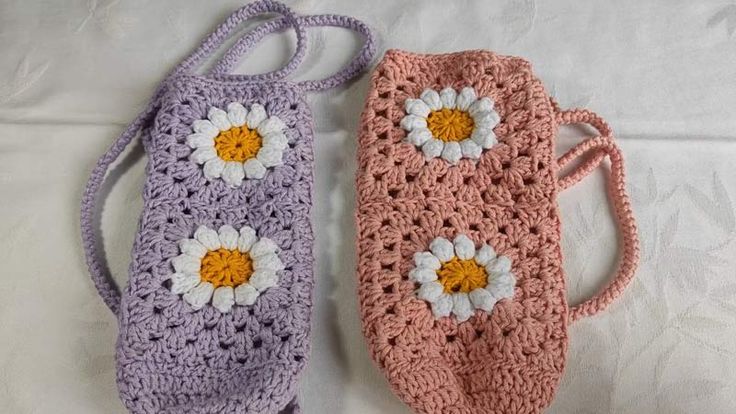
Crochet Water Bottle Holder
Crochet water bottle holders are a fantastic way to stay hydrated on the go while also adding a touch of charm to your daily routine. With their colorful designs and practical functionality, they make carrying your water bottles a breeze. The intricate crochet work not only provides a sturdy grip but also adds a personalized touch to your everyday accessories. Whether you're out for a hike, at the gym, or simply running errands, a crochet water bottle holder is a friendly and trendy companion to keep you hydrated in style.
Materials Needed & Measurements:
- Yarn: Light worsted cotton yarn (e.g., Lion Brand 24/7 Cotton or Knit Picks CotLin yarn)
- Crochet Hook: US G/4.0mm hook
- Scissors
- Stitch Markers (optional)
- Tapestry Needle
Measurements:
- Gauge:
- 20 stitches and 8 rows = 4 inches in double crochet, worked in the round.
- Strap gauge: 19 stitches = 4 inches in strap pattern, unstretched.
- Finished Size:
- The body of the holder: 7 inches tall, 2.5 inches diameter (unstretched).
- Strap: 38 inches unstretched, 48 inches stretched.
Stitches Used:
- ch = chain
- sc = single crochet
- dc = double crochet
- blo = back loop only
- sl st = slip stitch
- inc = increase (2 stitches in the same stitch)
- dec = decrease (combining 2 stitches into 1)
- st(s) = stitch(es)
- Rnd = round
- BLO = back loop only
Stitching Instructions for Making the Crochet Water Bottle Holder Pattern:
Bottom (Spiral Rounds):
- Rnd 1: Make a magic ring, then crochet 6 sc into the magic ring. (6 sts)
- Rnd 2: Inc in each sc around. (12 sts)
- Rnd 3: (Inc, sc) Repeat around. (18 sts)
- Rnd 4: (Inc, 2 sc) Repeat around. (24 sts)
- Rnd 5: (Inc, 3 sc) Repeat around. (30 sts)
- Rnd 6: 2 sc (inc, 4 sc) Repeat five times, inc, 2 sc. Sl st to the first sc to join the round. (36 sts)
Body (Joined Rounds):
- Rnd 7: Ch 3 (counts as 1 dc). Dc-blo in each sc around. Sl st to the top of the ch-3 to join the round. (36 sts)
- Rnd 8: Ch 4 (counts as 1 dc, ch 1). Skip next st, dc in next st, ch 1, skip next st; repeat from around. Sl st to the top of the ch-3 to join the round. (36 sts – 18 dc, 18 ch)
- Rnd 9: Ch 3 (counts as 1 dc). Dc-blo in each ch and dc around. Sl st to the top of the ch-3 to join the round. (36 sts)
- Repeat Rnds 8 and 9 for a total of 21 rounds, or until the water bottle holder measures 7 inches tall (or your desired height).
Strap:
- Step 1: Use stitch markers to mark the first stitch and the 21st stitch of the last round of the body.
- Step 2: Chain 180 for the strap.
- Step 3: Attach the foundation chain: Sl st in the 21st stitch of the last round of the body and the next two stitches (the 20th and 19th stitches of the last round of the body). These 3 slip stitches also count as your turning chain for the next row. (Optional: Mark the 19th st with a stitch marker.) Turn.
- Step 4: Working back toward the start of the chain: Dc in the back bump of each chain across.
- Step 5: Join the body by sl st into the third dc of the last round of the body.
Left Side of Strap:
- Rnd 1: Sl st-blo in the next 15 dc of the body. Sl st dec in the last sl st of the body and the first dc of the strap. Then sl st-blo in the next 178 dc of the strap. Sl st-blo dec in the last dc of the strap and next sl st of the body.
- Rnd 2: Sl st-blo in the next 14 sts. Sl st-blo dec in the last sl st of the body and next sl st of the strap. Sl st-blo in next 177 of the strap. Sl st-blo dec in the last dc of the strap and next sl st of the body.
- Step 6: Cut yarn, leaving a long tail. Use the yarn tail to reinforce the connection of the strap to the body. Weave in ends.
Right Side of Strap:
- Rnd 1: Sl st-blo in the next 15 sts. Sl st-blo dec in the joining slip st and the first ch of the strap. Sl st-blo in next 179 ch. Sl st-blo dec in the last ch of the strap and next sl st of the body.
- Rnd 2: Sl st-blo in the next 14 sts. Sl st-blo dec in the last sl st of the body and next sl st of the strap. Sl st-blo in next 178 sl st of the strap. Sl st-blo dec in the last sl st of the strap and next sl st of the body.
Finishing:
- Cut the yarn, leaving a long tail. Use the tapestry needle to weave in all loose ends securely. Attach the strap to the body by reinforcing the connections with the yarn tail. Ensure everything is tight and neat.
No comments
Write a comment