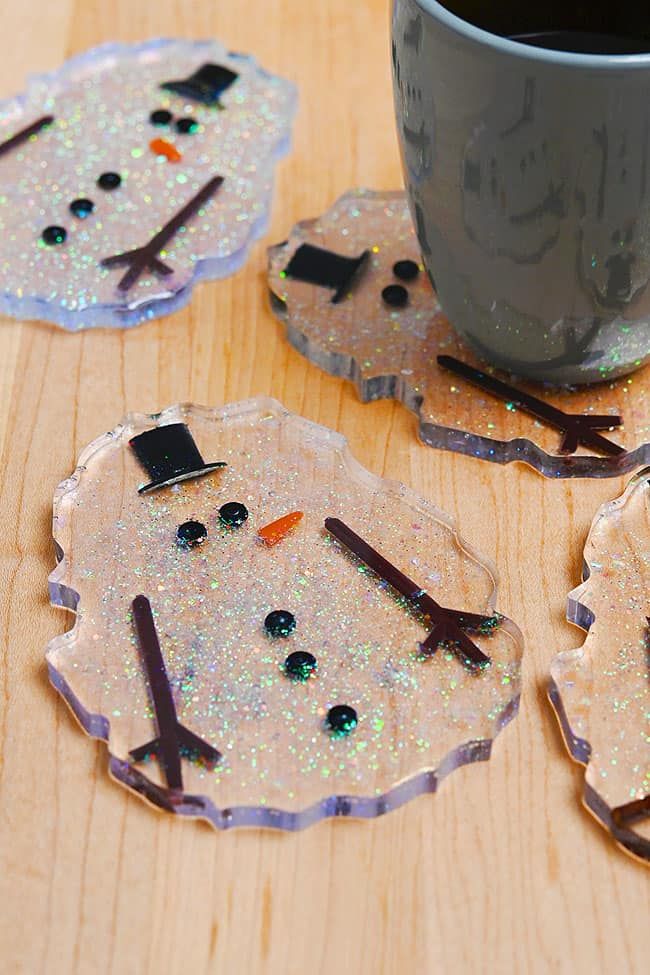
Resin Snowman Coasters
These adorable Resin Snowman Coasters are the perfect addition to your holiday decor! With their charming design and practicality, they bring a festive touch to your home while protecting your surfaces from drips and spills. Made with love and attention to detail, these coasters are sure to bring a smile to your face every time you use them. Whether you're hosting a holiday party or simply enjoying a cozy night in, these Resin Snowman Coasters are a delightful way to spread some seasonal cheer.
Materials:

Step 2: Mix the epoxy resin
- Before working with resin, protect your working surface with a drop cloth and/or a silicone mat. Always wear protective nitrile gloves and eye protection. Work in a well-ventilated space and wear a respirator if your resin requires it.

Mix the amount of resin needed for the amount of snowman coasters you’d like to make. We mixed about 40 ml per coaster, though this did give us some resin leftover. Begin by adding 1 part of Part A to a silicone measuring cup or small disposable plastic cup. The amount of Part A should be half the total amount needed. (In our case, 20 ml.) Follow your specific resin’s instructions for ratios, drying times, and curing times.

Add an equal amount of Part B to the measuring cup. Or whatever ratio your brand of resin suggests. (In our case, 20 ml.)

Mix the resin and hardener together with a popsicle stick or a reusable resin stir stick.Stir slowly, scraping down the sides and bottom of the measuring cup. Continue mixing for 3 to 5 minutes or until the mixture is clear.

Step 3: Add glitter
- Pour the resin into a disposable mixing cup.This will prevent your mixing cup from getting glitter in it.

Add various sizes of iridescent glitter to the resin. We used about 1/2 teaspoon of glitter total, which keeps the resin fairly transparent.

Stir the glitter into the resin until it’s well mixed.

Step 4: Create the snowman
- Place the silicone geode coaster mold on the silicone mat and pour the glittery resin into the mold until it’s half full.Use a popsicle stick to spread the resin, if needed.Pop any air bubbles in the resin with your popsicle stick or a toothpick. You can also run a heat gun over the resin to remove bubbles.

Add the snowman pieces into the resin. Use a popsicle stick to adjust the position of any pieces, if needed.

Allow the resin to cure according to your resin’s instructions. (Ours took about 18 hours). Do not demold it.

Step 5: Pour a clear layer of resin
- Mix another small batch of clear resin (between 10 to 20 ml).Pour it into the mold, on top of the hardened resin.

Use a popsicle stick to spread the resin to the edges of the mold.

Allow the new resin to cure.

Step 6: Demold the snowman coaster
- Once the resin snowman is completely dry you can demold it.Grab the side of the mold and stretch it a bit as you pull it back. The snowman coaster should come out easily.

Your resin snowman coaster is complete! Don’t use your coaster until the full curing time is complete (72 hours, for our resin). If there are any rough edges on the coaster, sand them off, and then enjoy!
