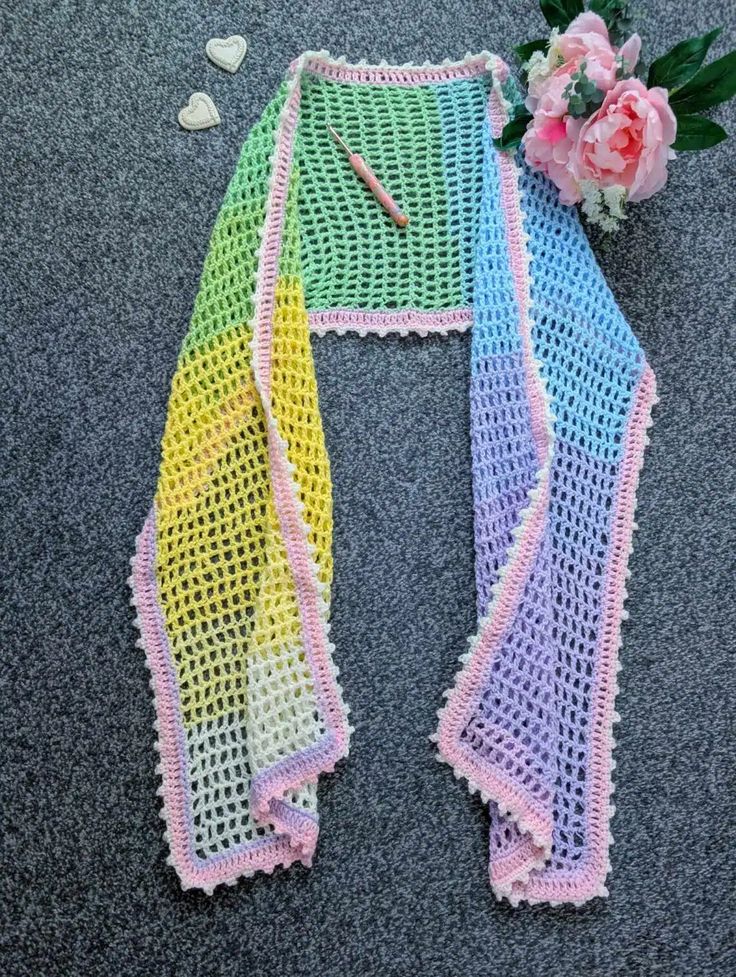
Crochet Josephine Vintage Shawl
The Crochet Josephine Vintage Shawl is a charming and elegant accessory that adds a touch of timeless style to any outfit. With its delicate lacework and intricate details, this shawl is perfect for those who appreciate vintage-inspired fashion. Whether you wear it to a special event or simply to add a hint of sophistication to your everyday look, the Crochet Josephine Vintage Shawl is sure to turn heads and make you feel effortlessly chic. It's a lovely piece that exudes grace and beauty, making it a must-have for any fashion-forward individual looking to elevate their wardrobe with a touch of nostalgia and class.
Level: Easy
Gauge
- 4” (10 cm): 19 stitches
- 4” (10 cm): 6 rows
Size of finished project (including border)
12” x 70,5” (30,5 cm x 180 cm)
Notes
I will be writing in US terms (British terms in brackets).
Materials
- 1 skein of Lion Brand Yarns Baby Mandala yarn in shade Diagon Alley
- A 4,5 mm crochet hook
- A tapestry needle
- A pair of scissors
Abbreviations
I will be writing in US terms (British terms in brackets)
- Ch: chain
- Sk: skip
- SP: space
- Sl st: Slip stitch
- Ch sp: chain space
- DC: Double Crochet (UK Half Treble Crochet)
- SC: Single Crochet (UK Double Crochet)
- EOR: End of row/end of round
Pattern
Ch 55
1: DC in 5th ch from hook (first 4 ch counts as a DC and chain 1), DC into next stitch; sk 1 ch, DC into next ch until eor.
2: Ch 4 (=DC + 1 chain), turn your work, skip one stitch (=chain space from previous row), DC into DC from previous row until eor (finish row with a DC).
3-105: Repeat row 2.
Do not fasten off.
Picot edging border
We will be crocheting the border with the yarn that is still attached to project (as we did not fasten off).
Round 1:
Ch 1 (=does not count as a stitch), and place SCs all along the first “side” of the wrap; once you reach the corner, place 2 SCs together before turning your project sideways and placing SCs all along the second “side” of the wrap.
Repeat this process of placing SCs all along the four sides of the wrap, making sure you space them evenly as you go along. Always place 2 SC into each corner of the project.
Once you place your last SC into the project, slip stitch into the 1st ch or SC at beginning of round.
Round 2: Chain 3 (=DC), DC into next stitch into next stitch until you reach the first corner; in the corner, place 2 DCs together; now continue placing a DC into each stitch until you reach the end of the round, making sure you place 2 DCs together in the corners.
Slip stitch to first ch 1 or SC from the beginning of round.
Round 3: Chain 1 (=TC), place a SC into same first stitch; SC into next 2 stitches; chain 3, slip stitch through the front stitches of the SC to finish off this stitch (picot stitch).
[place a SC into next 3 stitches, chain 3, slip stitch through the front stitches of the SC to finish off this stitch] until eor.
Once you have gone all around the four sides of this shawl, slip stitch through 1st slip stitch or SC from the beginning.
Fasten off, tidy up all loose ends.