Floral Bunny Pillow
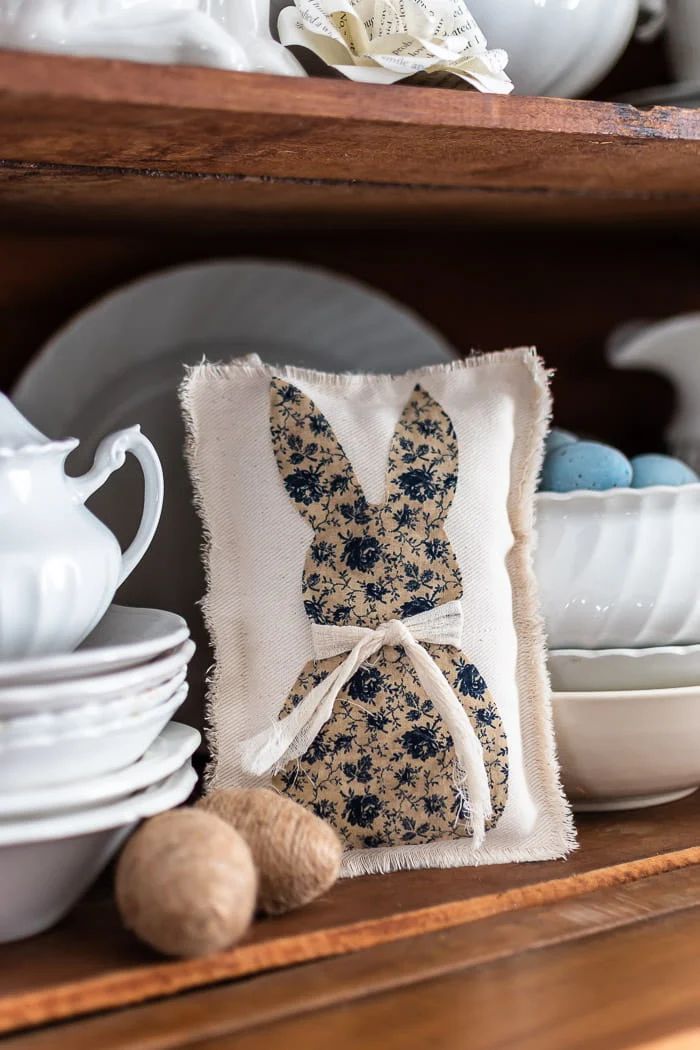
Introducing the adorable Floral Bunny Pillow! This charming piece will add a touch of whimsy and coziness to any room in your home. With its soft fabric and delightful floral design, this pillow is not just a cute accessory but a comfortable companion for your relaxation time. Whether placed on your sofa, bed, or chair, the Floral Bunny Pillow is sure to bring a smile to your face every time you see it. Who wouldn't want to cuddle up with such a sweet and lovely bunny-inspired pillow?

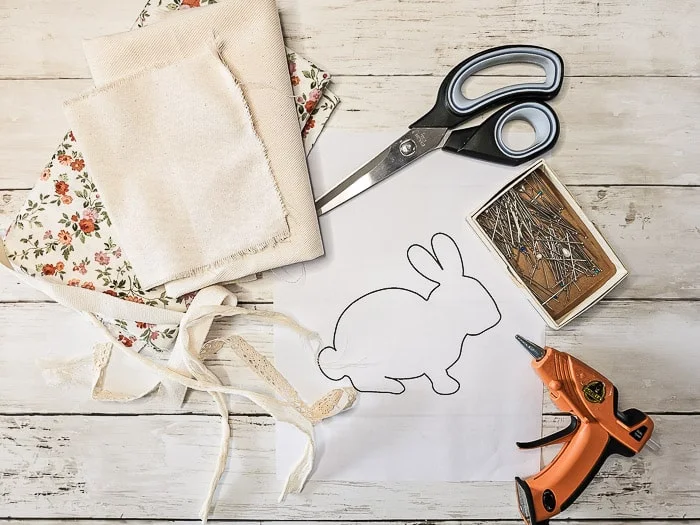
Supplies:
canvas drop cloth (washed and dried)
floral fabrics
bunny silhouette
scissors
hot glue
ribbon (lace or cheesecloth)
straight pins
polyester fiberfill
printer
Tips when selecting fabrics:
Contrast Pick a floral that is dark enough to show up against a light background
Print Select a floral with a small, repetitive print rather than one that's too busy or too large
Color Be sure the color of the floral complements the background fabric
Iron Iron all pieces before putting together the mini pillows
Just a note: My style leans towards vintage cottage. If that's not your style, you can still make these bunny decorations, but use fabrics and embellishments to match your style and decor! They would be really cute in a bold, modern print!

Please refer to the pictures and steps below for details to create these sweet Spring bunny decorations.

Steps to easy floral bunny pillows
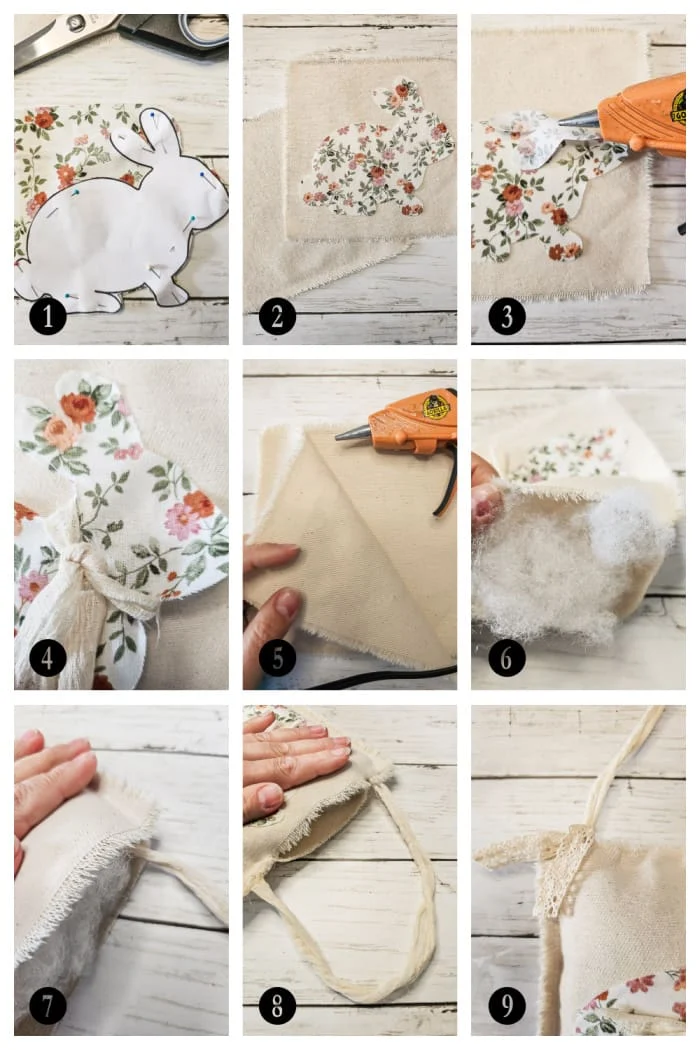
Step 1 - Pin and Cut
Start by printing your design onto regular copy paper and cutting it out. Next you will use the paper cutout as a pattern. Pin it to the fabric you're using and cut bunny shape out.
Step 2 - Prepare Drop Cloth
Decide what shape you want your bunny decor to be and tear, don't cut, two matching pieces of drop cloth fabric. Why tear it? Because you'll get the straightest cuts, and you'll also end up with perfectly tattered and frayed edges with zero effort! Make sure your bunny design fits nicely on the drop cloth with a little breathing room around all edges.
Step 3 & 4 - Glue Bunny
We're going to hot glue the fabric bunny to the drop cloth. BEFORE you glue the bunny, decide if you want a bow that ties around the bunny's neck. I suggest a narrow strip of cheesecloth because it won't have any bulk. Glue the bunny ears down, then tie the cheesecloth loosely and continue gluing the bunny down. I used glue just around the edges.
You can also choose to make a lace bow and hot glue that onto the bunny once the pillow is finished.
Step 5 - Glue Drop Cloth
Line up the two pieces of drop cloth and glue around 3 edges, leaving the TOP SIDE open.
Step 6 - Stuff
Add fiberfill to the pillow, being sure to get down into the corners (use a pencil tip if you need to). I chose to lightly stuff my pieces because I wanted to use them more as hangings. If you're making little decorative pillows, then I would stuff them firmly.
Be sure to stuff right up to the open edge so you don't have an empty spot once it's glued shut.
Step 7 - Glue ribbon end
Cut a piece of ribbon or cheesecloth for your hanger, if using, and hot glue one end into place.
Step 8 - Glue hanger in place
Now glue the end of the ribbon to the other corner. You may want to add a little more stuffing to the pillow top if it needs it before gluing the open edge closed.
And that's it!
No comments
Write a comment