DIY Desktop Organizer
Creating a DIY desktop organizer is a fun and practical project that can help declutter your workspace in style! Not only is it a budget-friendly solution, but it also adds a personal touch to your workspace. Get creative with colors, patterns, or stickers to make it uniquely yours. With a little bit of time and creativity, you can transform your messy desk into an organized and cheerful space that sparks joy every time you sit down to work. Enjoy the process and happy organizing!
Supplies Needed:
- Large Wood slice
- Cardboard tubes – I used old Cricut Vinyl tubes but you can also buy cardboard tubes on Amazon.
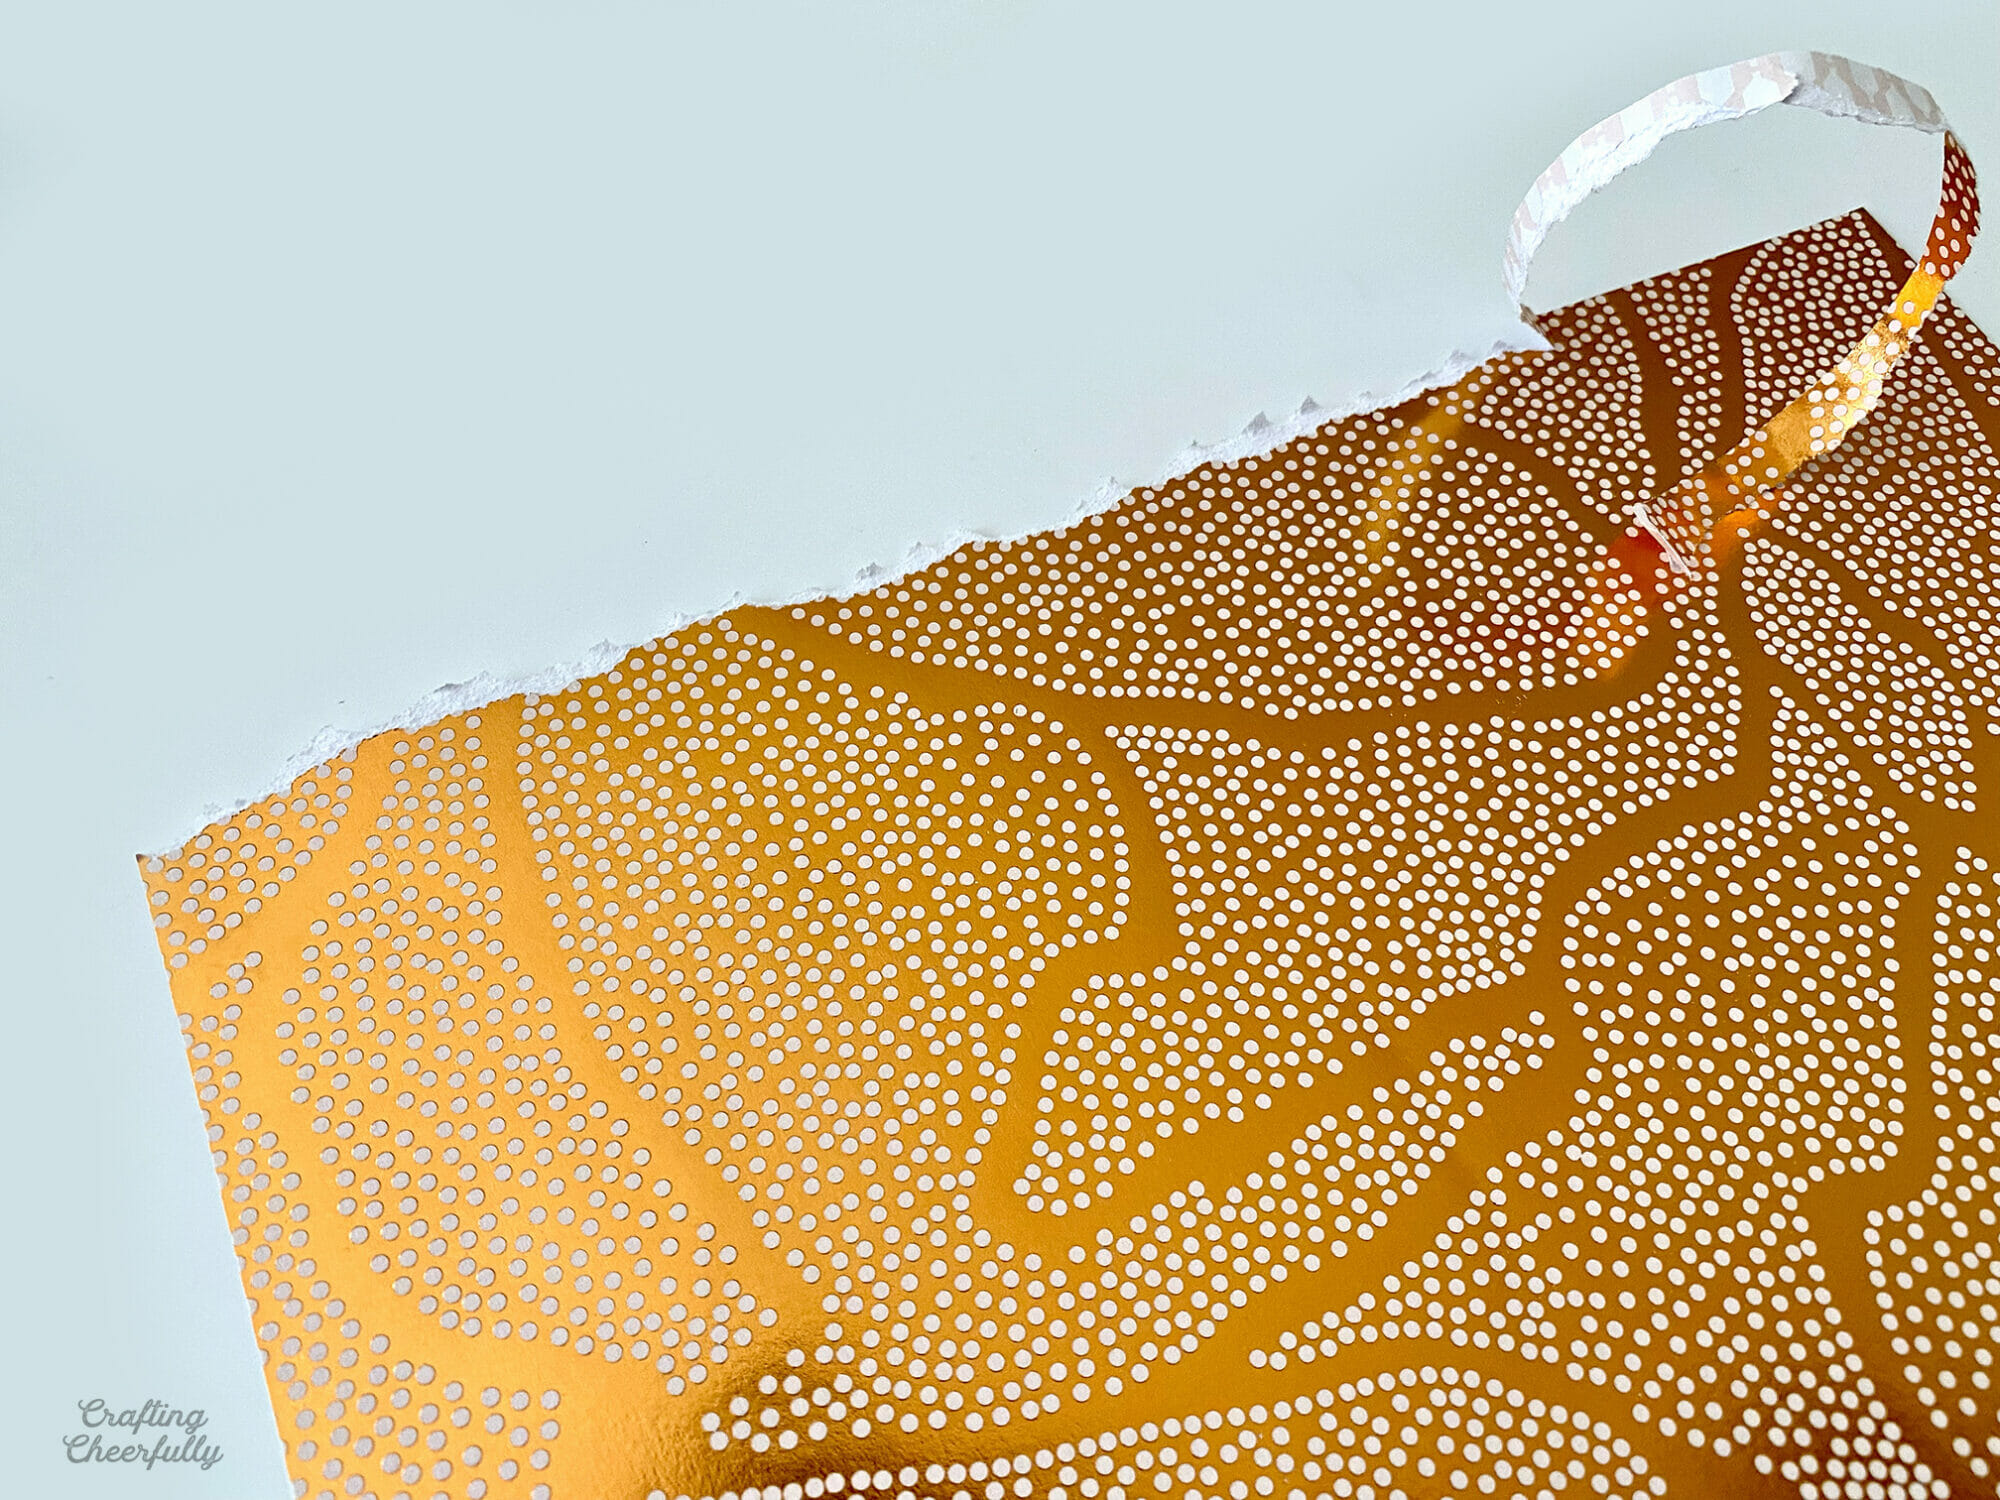
- Scrapbook paper – I used paper from the DSWV paperstack Copper Luxury
- Acrylic paint that coordinates with your paper
- Double-Sided Tape
- Hot Glue
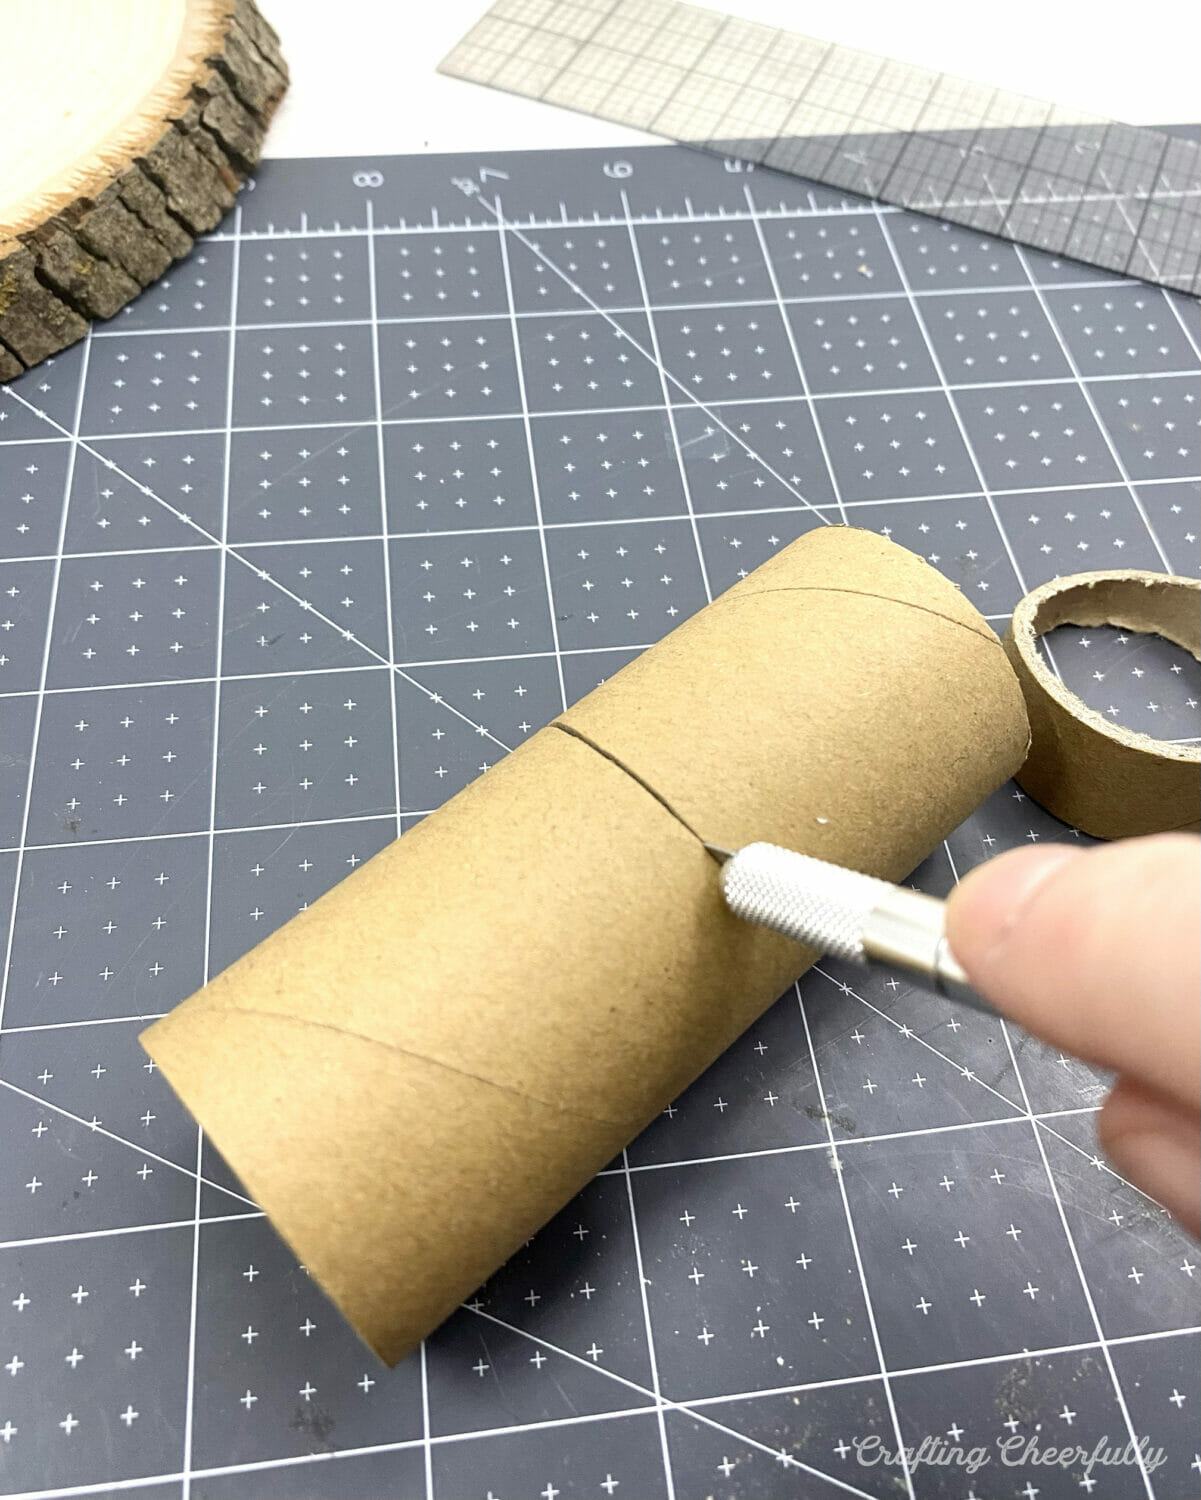
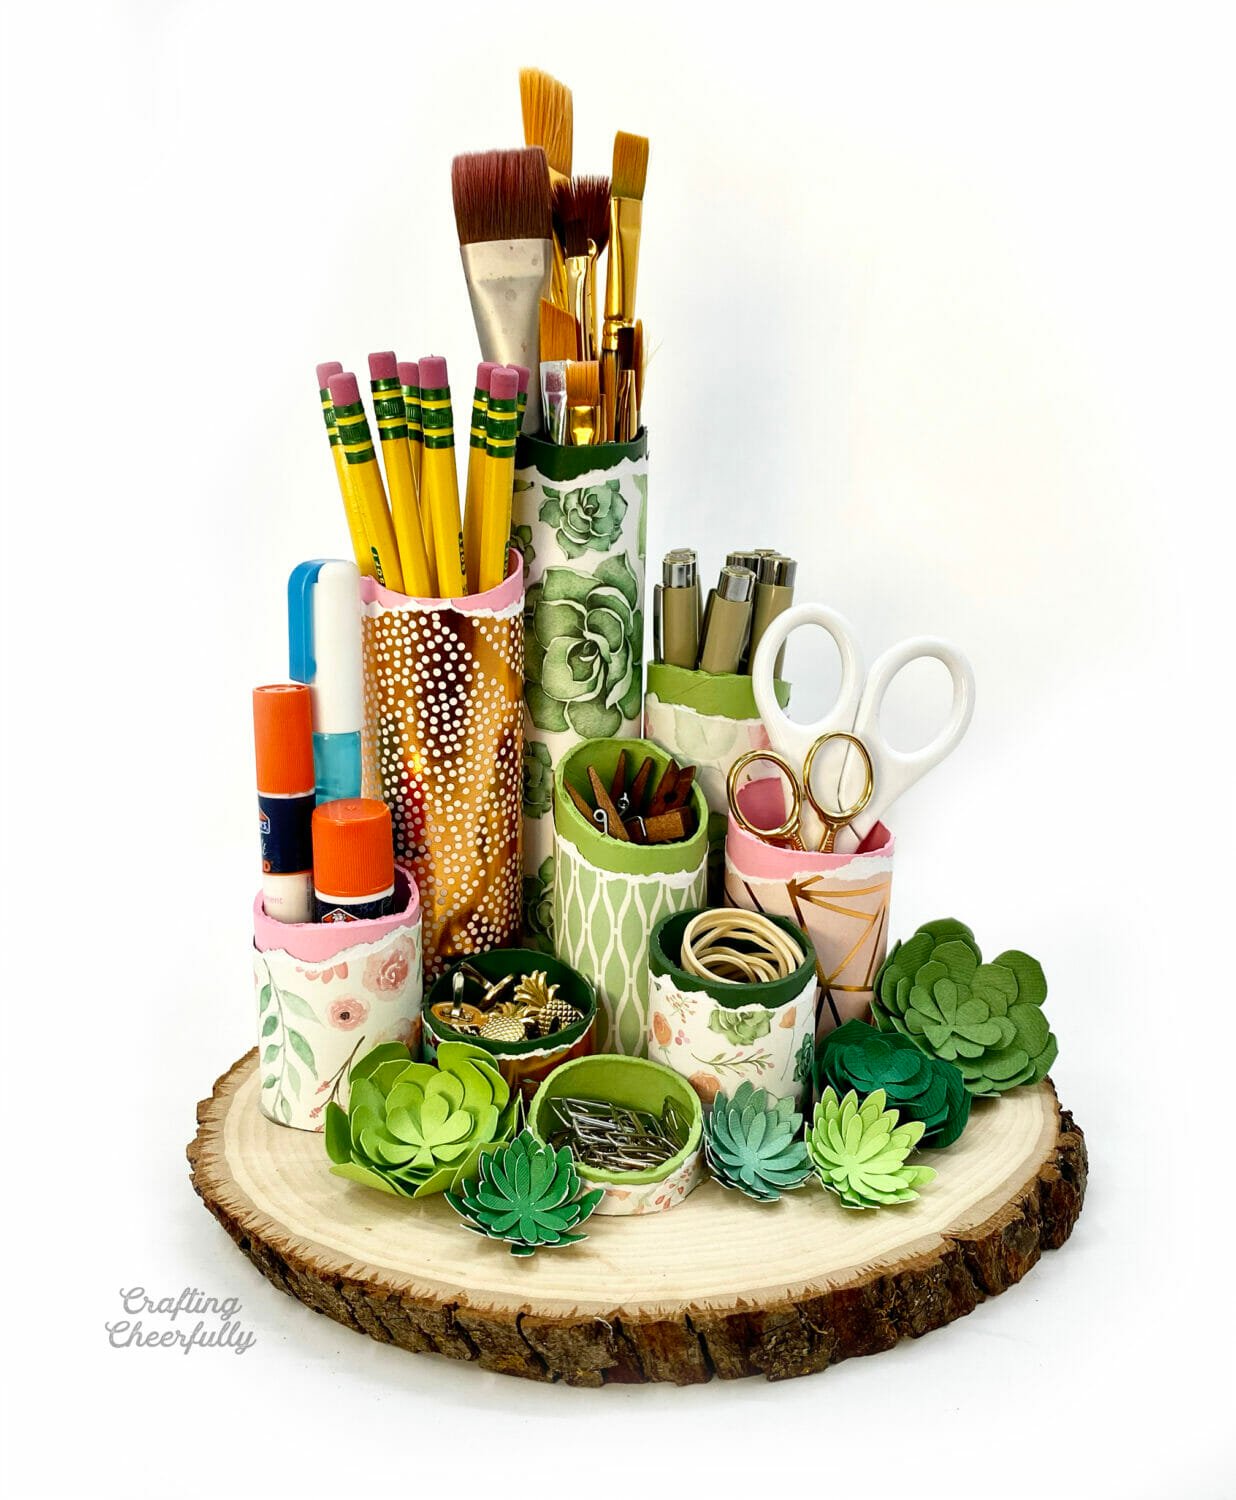
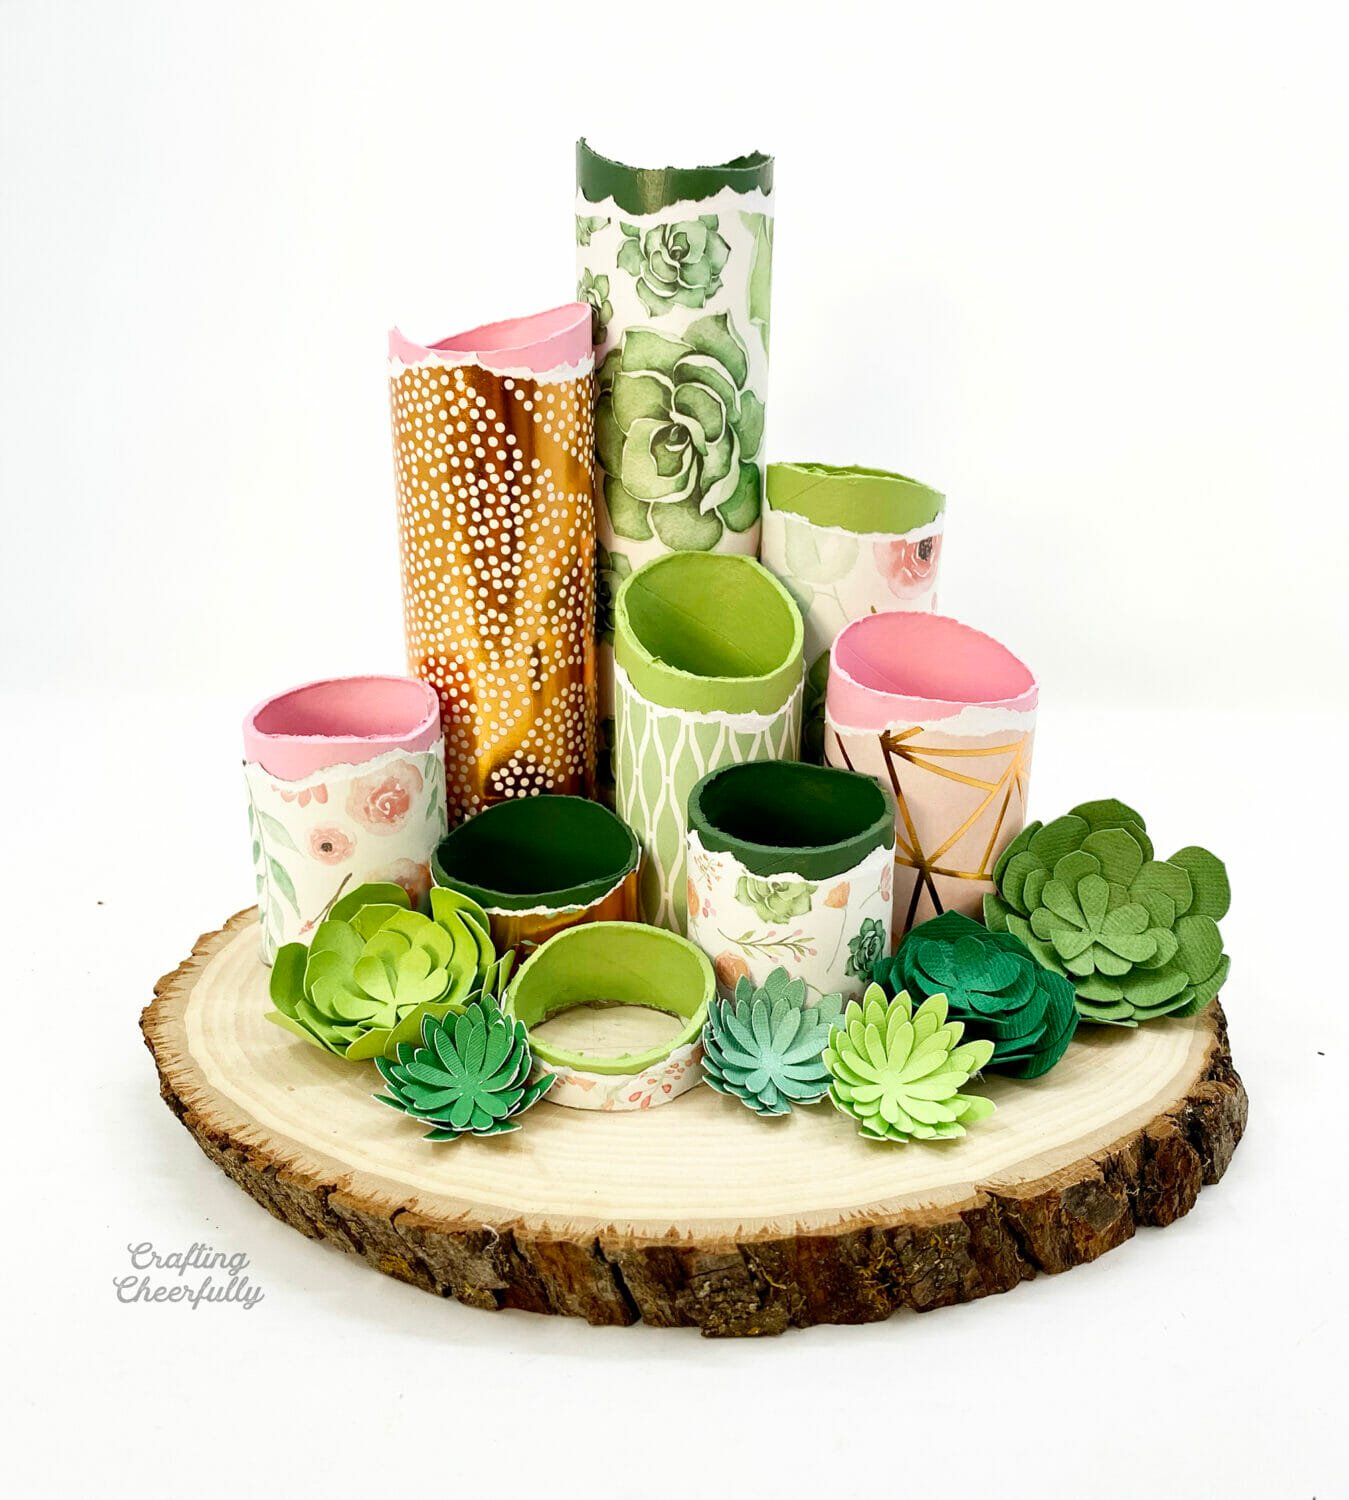
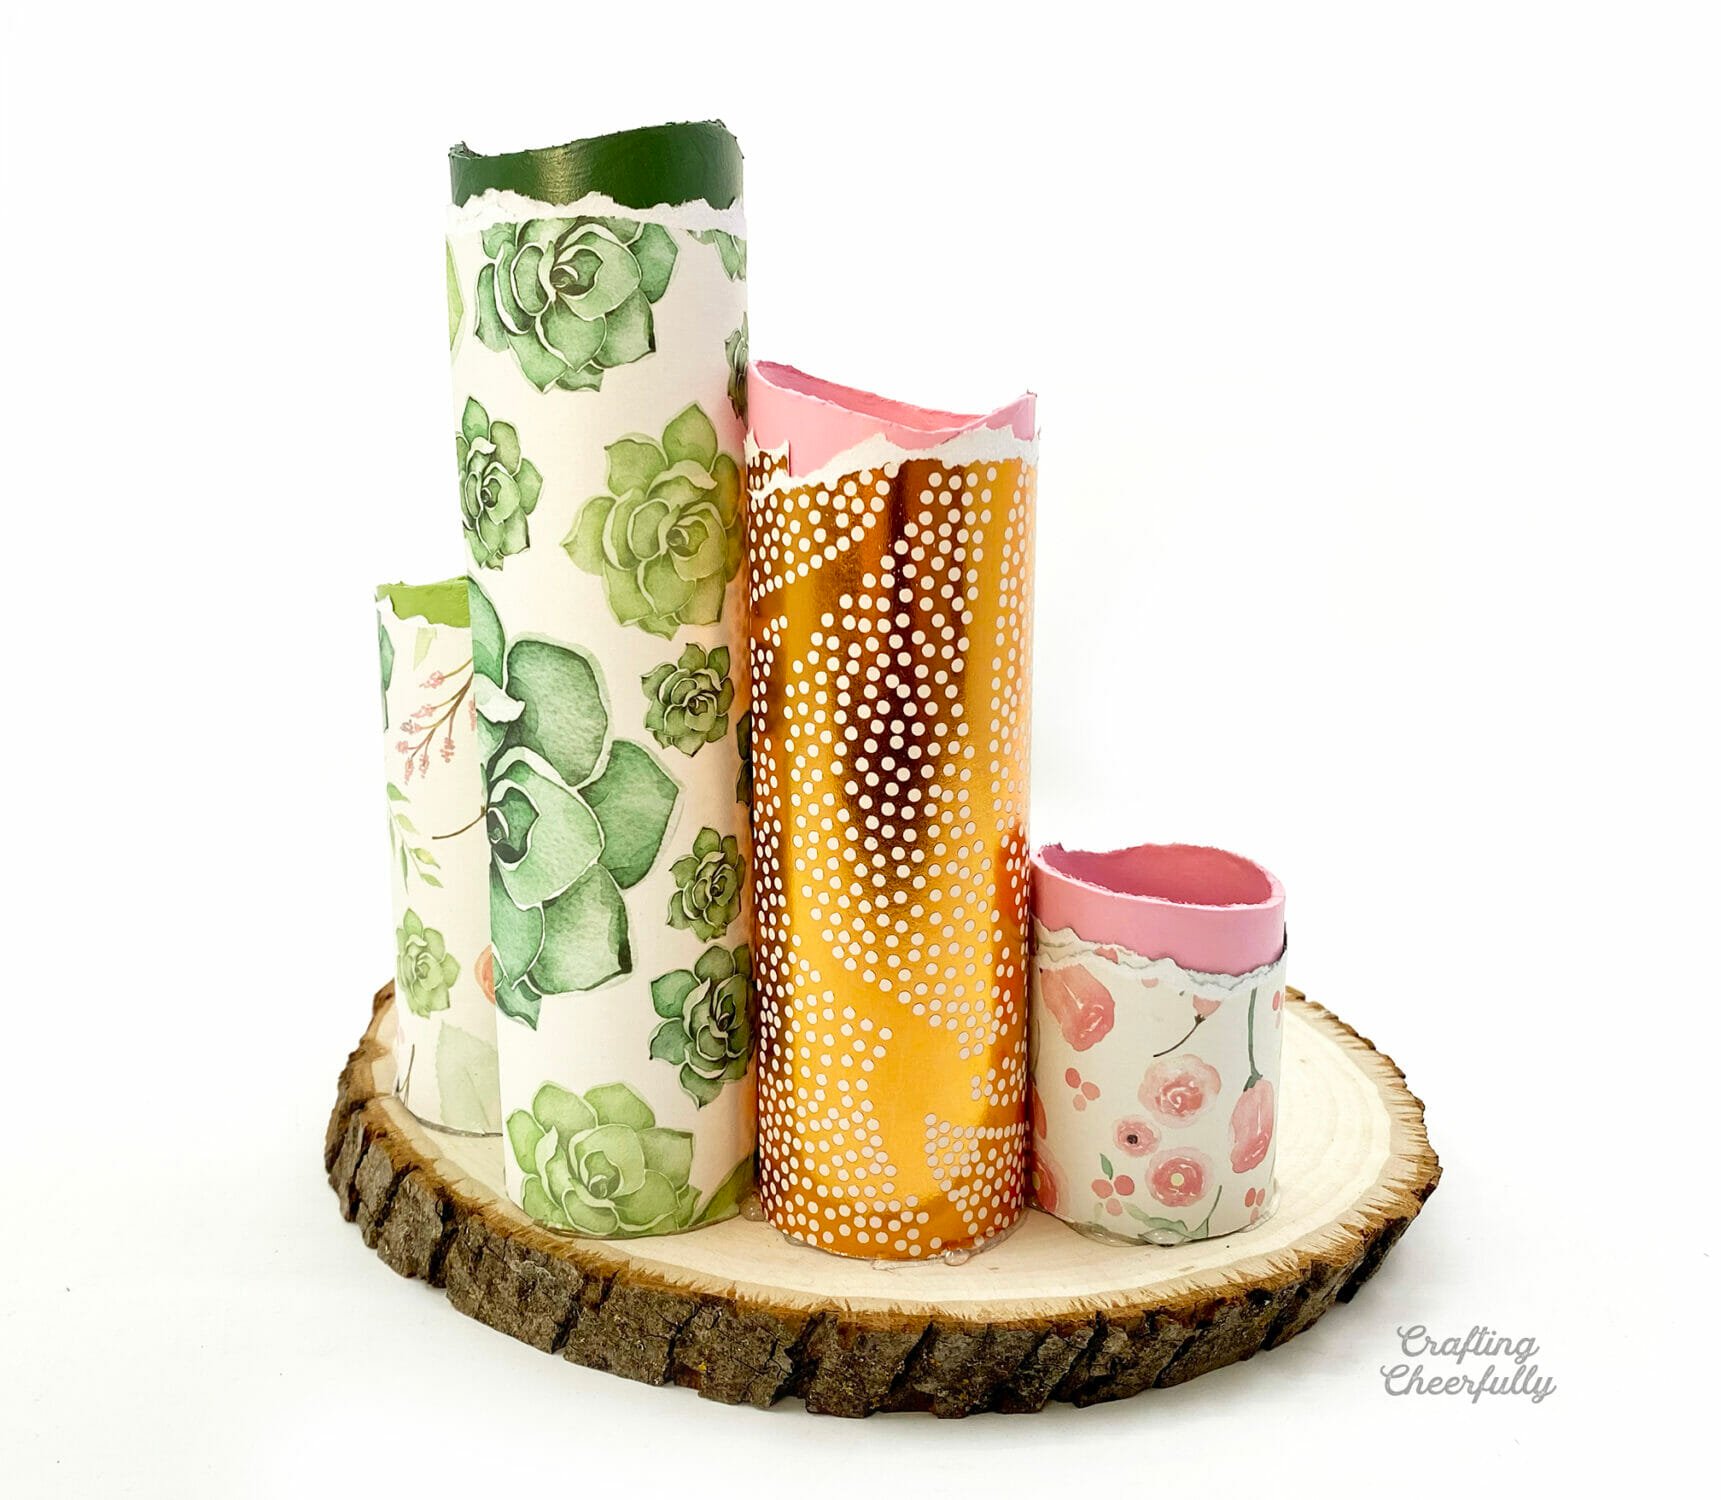
Arrange the cardboard tubes on your wood slice as you cut them so you can see what height tubes you still need. Make sure you have some tall tubes to hold pencils, pens, paintbrushes and other taller items. Cut tubes that are really short to hold small office items like paperclips and thumbtacks. There is no right or wrong way to do this part! I just kept playing around until I liked the look of my tubes.

Step Two: Paint the tops of the tubes to match the paper you plan to wrap the tubes with. Paint inside the tubes as well.

Step Three: Wrap the tubes with decorative paper using double-sided tape to hold it in place. I used scrapbook paper from the DCWV paperstack “Copper Luxury”. I’ve had this stack for so long and it is one of my favorites! To create a more organic look to the paper, tear the paper to create a ripped edge.
Step Four: Create paper succulents to decorate your desktop organizer. I used green cardstock in various shades, my Cricut cutting machine and cut files by Lia Griffith. The cut files are part of a Succulent Wreath project in Cricut Design Space. It comes with a few different succulent designs which was perfect for my desktop organizer!
Step Five: Now that the cardboard tubes are ready, as well as the paper succulents, it’s time to attach them all to the wood slice. I arranged mine on the wood slice a few times until I was happy with the arrangement. Use hot glue to attach the tubes first and then attach the succulents in the front.
By far my favorite part was adding the cute little paper succulents. They look so sweet on the wood slice! Once the organizer is made, it’s time to fill it with all of your fun office and desk supplies! I filled mine with some of my most used items I like to have at my fingertips.