Pipe Cleaner Flowers
Pipe cleaner flowers are a fantastic way to get creative and add a pop of color to your space! You can easily craft these vibrant blooms using just a few pipe cleaners and your imagination. Whether you're looking to brighten up your room, create a handmade gift for a friend, or simply indulge in a fun arts and crafts project, pipe cleaner flowers are sure to bring a smile to your face. So, grab your favorite colors and get ready to craft some adorable floral creations that will bloom all year round!
Supplies You’ll Need
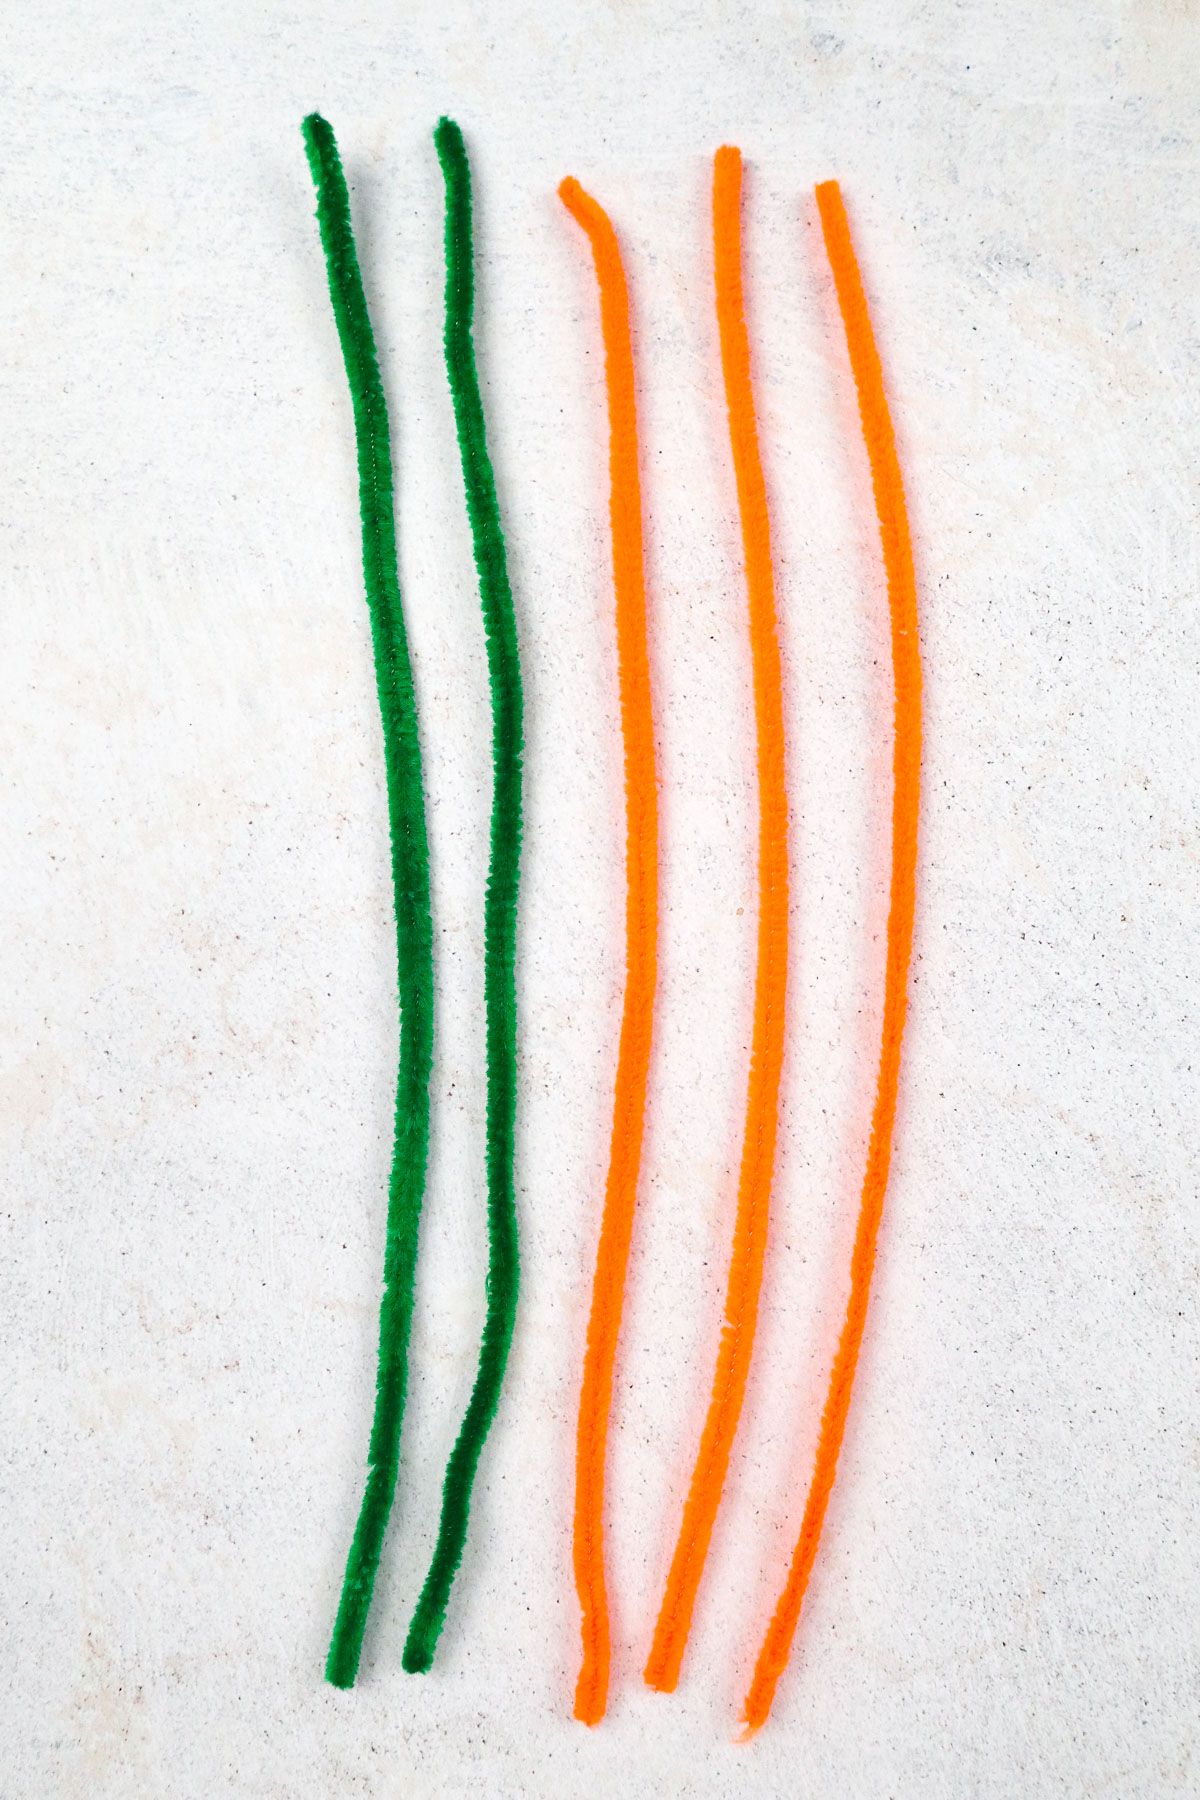
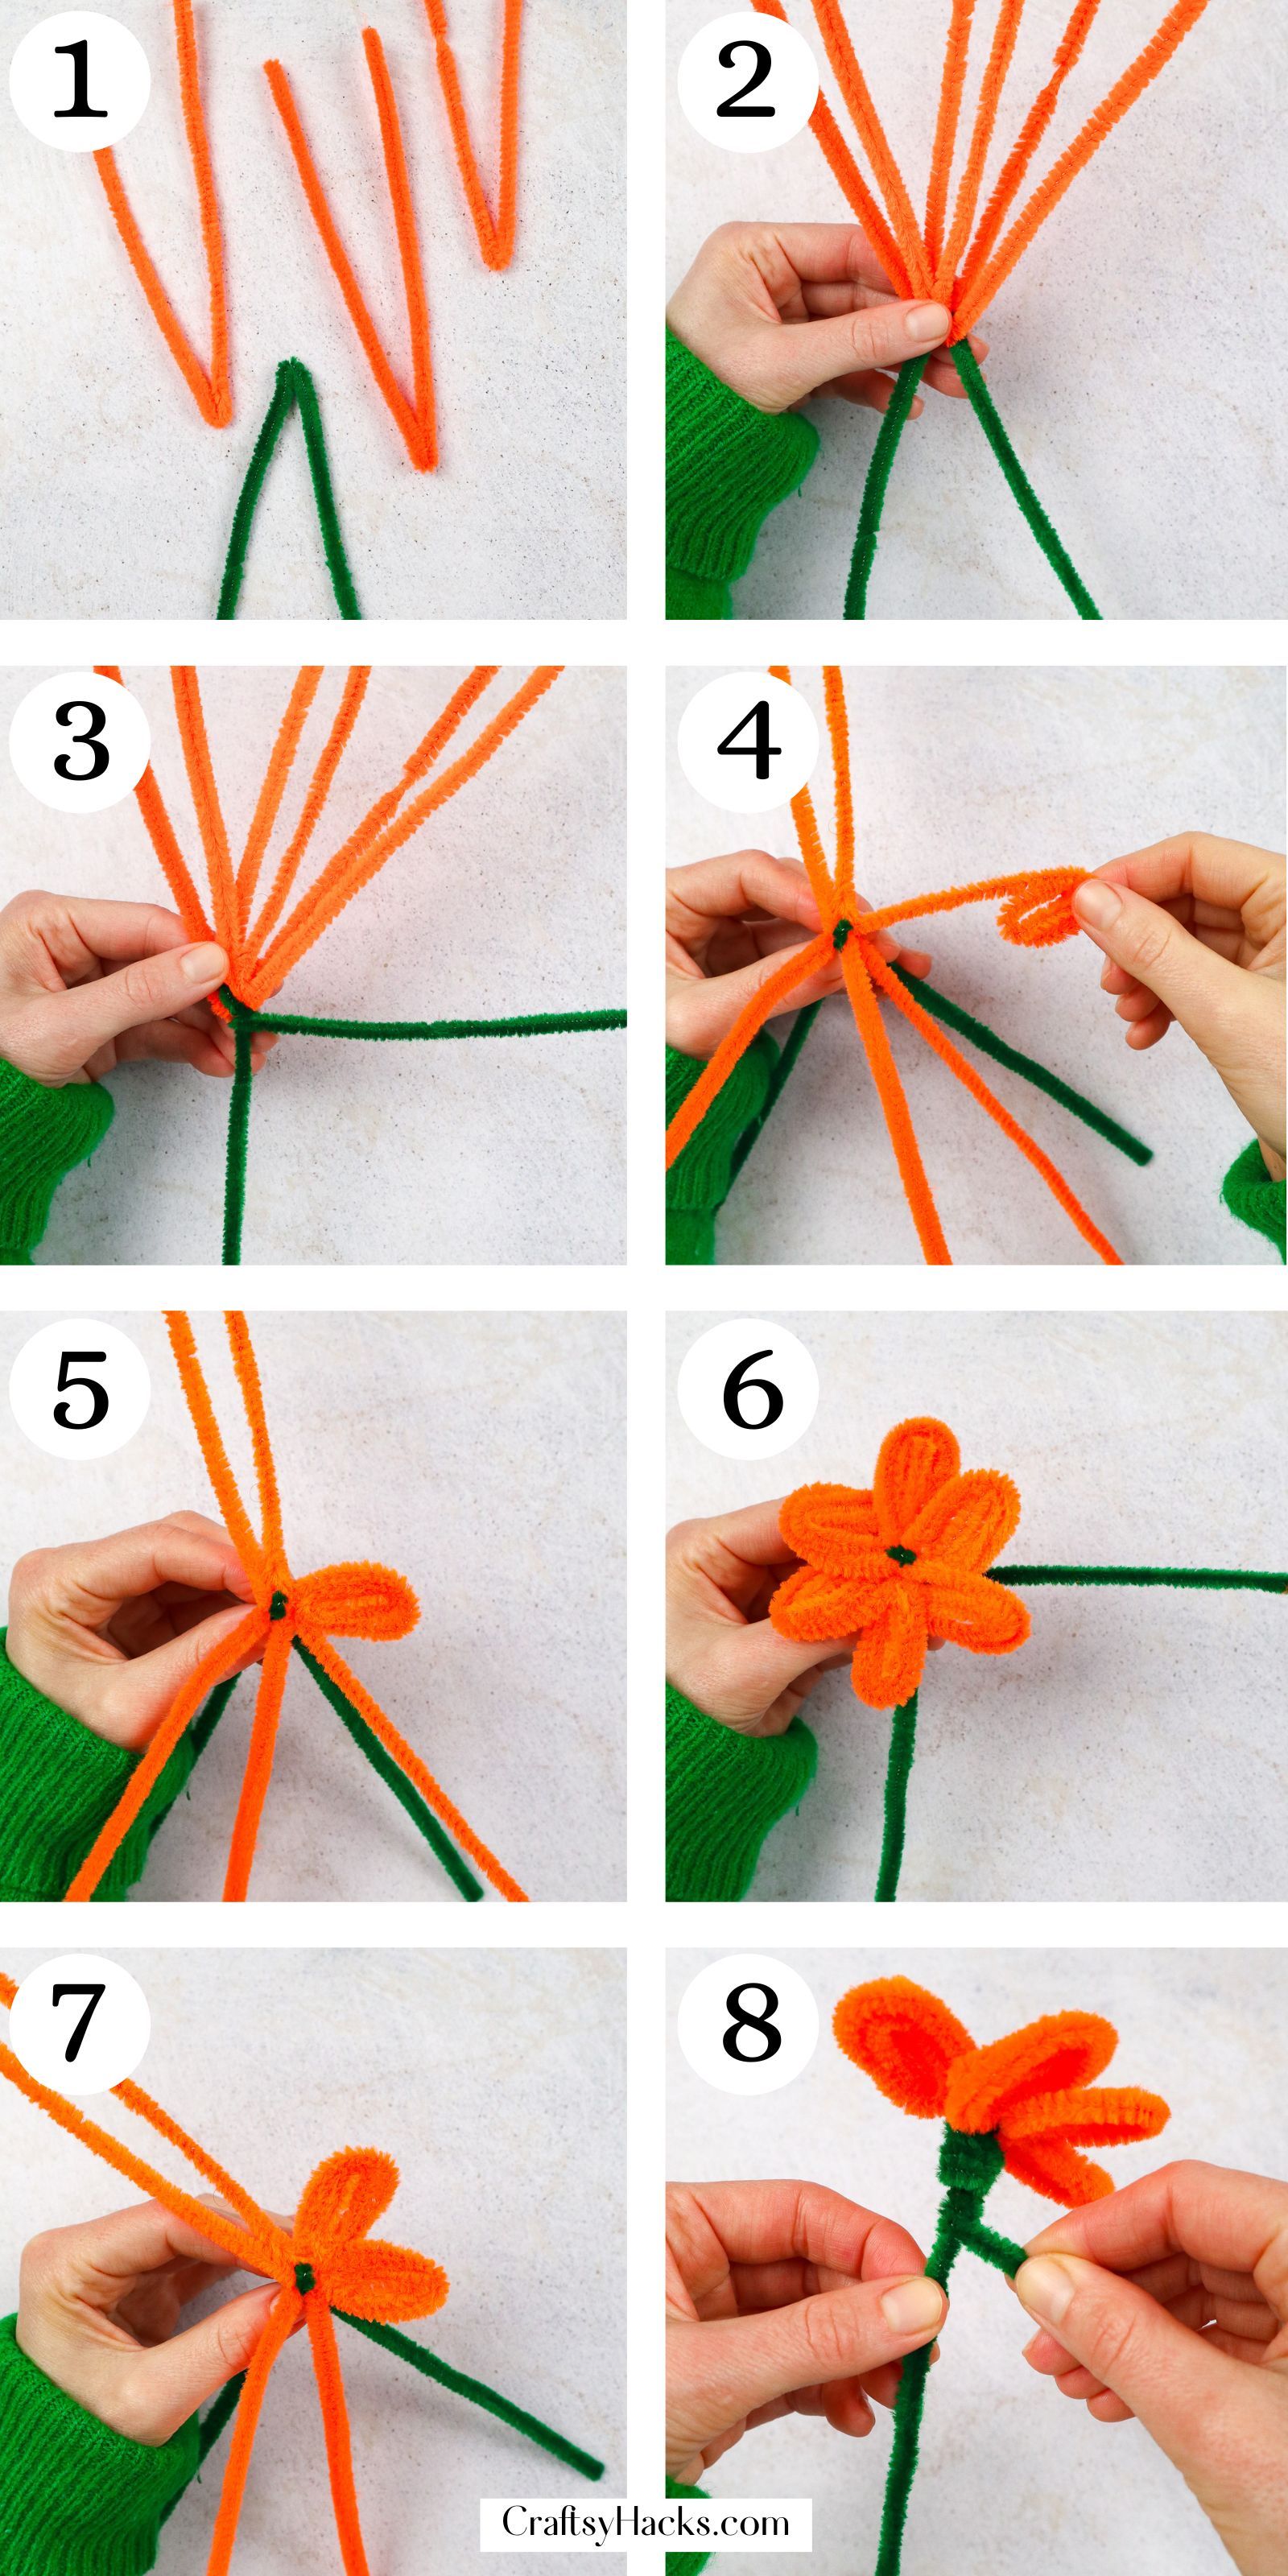
Step 1. Start by grabbing all of your pipe cleaners dedicated to being the petals of the flower and the green pipe cleaner for the stem. Bend all of them in half to create a “V” shape.
Step 2. Once you have all of your pipe cleaners from the first step in order, we’ll start assembling. Hold the green pipe cleaner so the opening on “V” faces downward.
Add your petal pipe cleaners to the downward stem one so the “V’s” are all meeting and locking with the stem’s “V.”
It should look like a party hat with confetti on top of a volcano exploding.
Step 3. After you have settled the shape of your party hat/volcano, take the green pipe cleaner and give it a twist or two.
Once twisted, the lines on the pipe cleaner should be going in opposite directions–one facing downward and the other to the left or right.
Step 4. Separate all of the spokes of the colorful pipe cleaners to start on the flowers. Once they are spaced, start rolling them inward toward the anchored part of the stem.
Step 5. Continue this idea until the pipe cleaner reaches the middle part. Shape or manipulate as needed.
Alternatively, you can wait until the end to reshape or manipulate. Repeat and continue all petal rolls in one direction for a more uniform look.
Step 6. During the last couple of petals assembled, ensure everything is sitting well, continue to shape the petals inward, and reshape them as needed.
Step 7. As you finish the petal formation and arranging, move back toward the stem.
The tail sticking out to the side of the pipe cleaner gets wrapped around the very back of the flower to help with its stability.
Step 8. Once the green pipe cleaner’s tail is becoming shorter, move it down the stem to secure the weight behind the flower. Give the very end of it a good pinch to make it stick better.
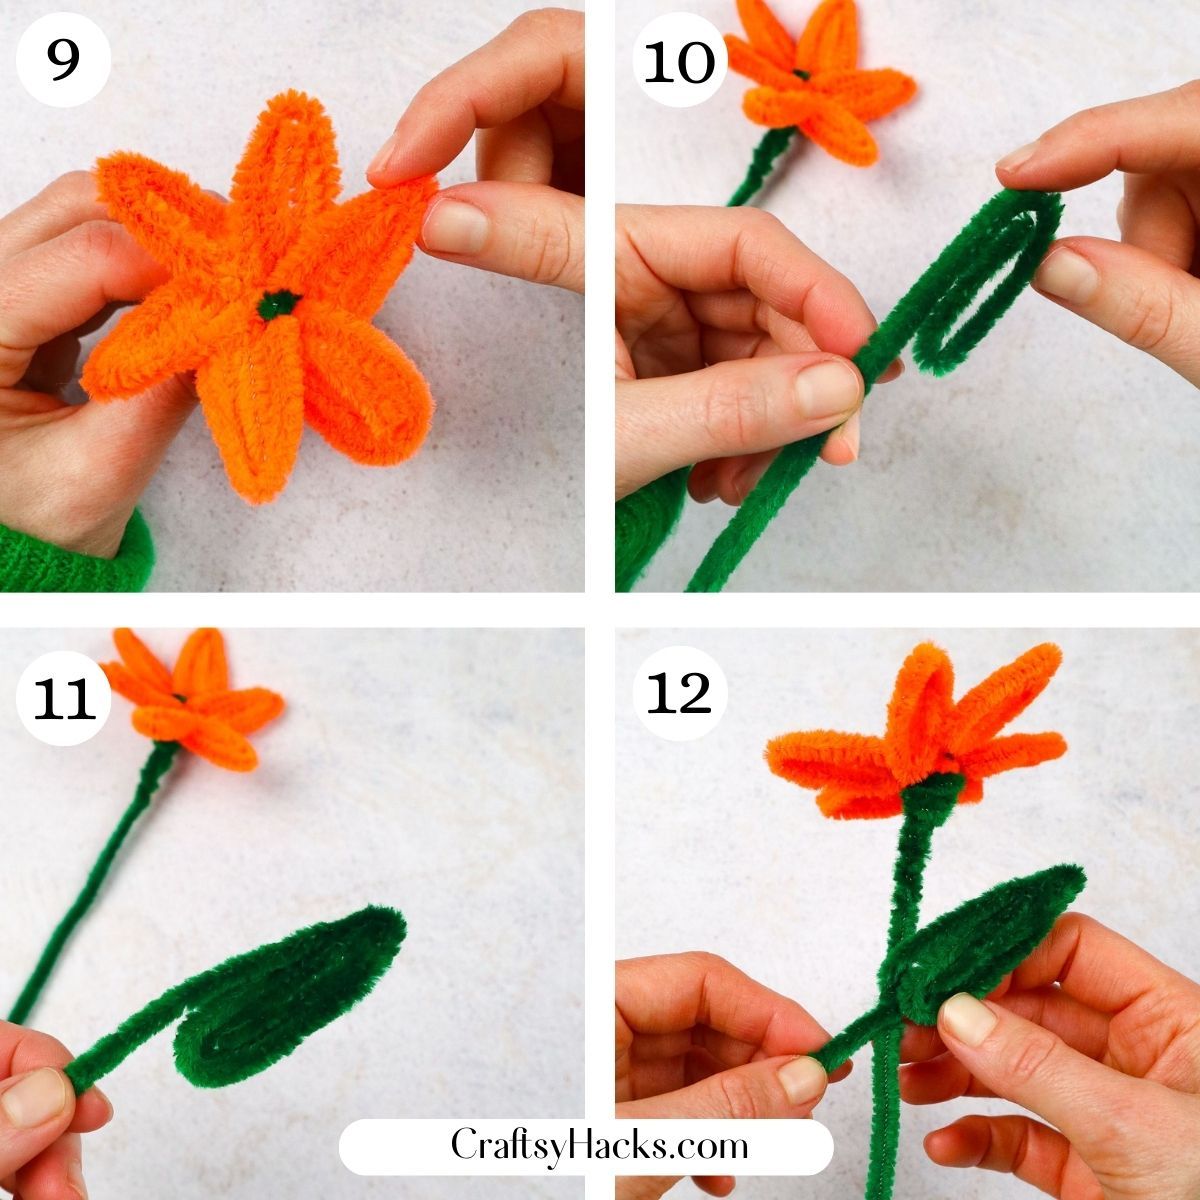
Step 9. Reshape, reorganize your petals or backing, or tweak any last-minute changes if you’ve been working on them throughout the steps.
You can also leave your petals rounded! Whatever works best for you.
Step 10. Grab your other green pipe cleaner and get ready to make a leaf. Start rolling your last pipe cleaner roughly to resemble a paper clip–don’t roll it all the way so it can attach to the flower.
Step 11. Once the leaf is assembled and you have a bit of a tail left, take the tail and start wrapping it around the stem. This placement can be wherever you want!
If you have more green pipe cleaners, feel free to add more leaves.
Step 12. Finish attaching your leaf or leaves and pinching the ends to help cement their place on the flower.
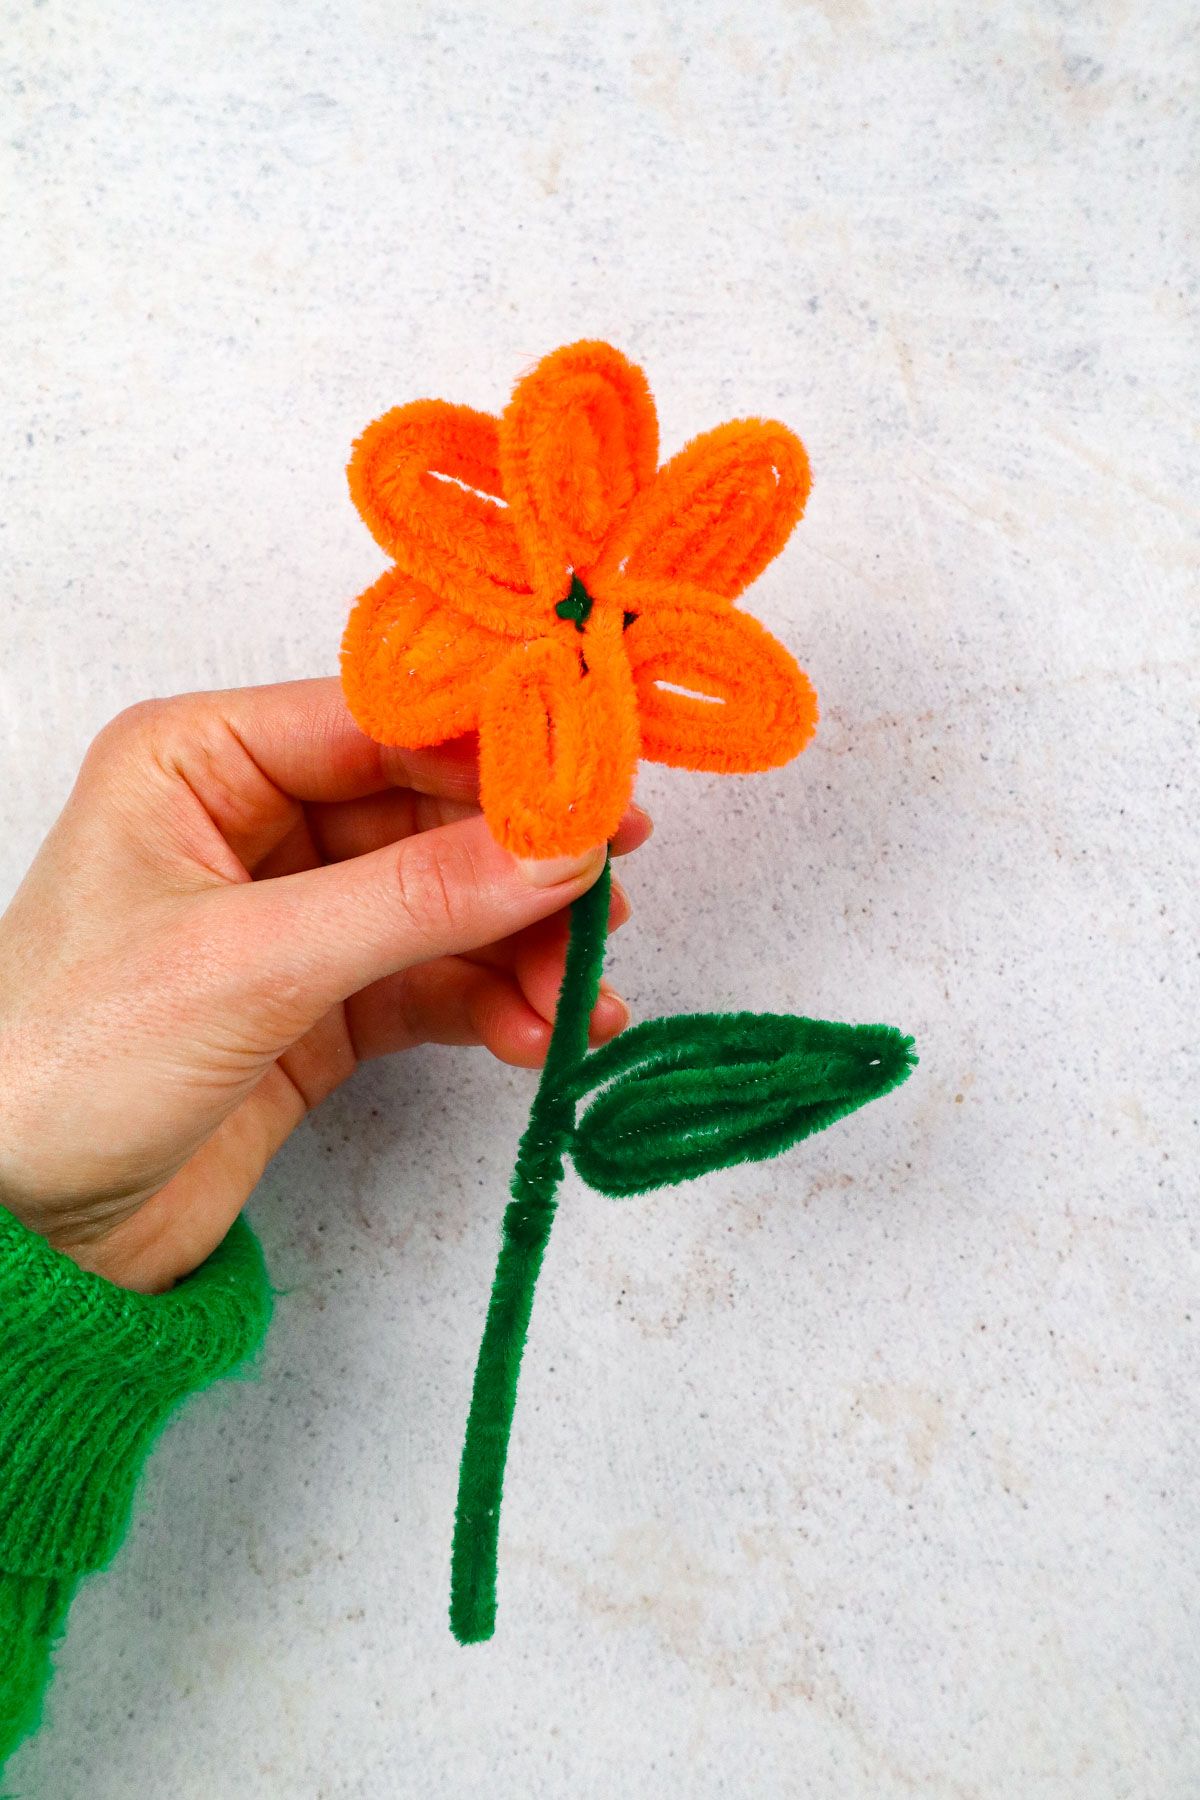
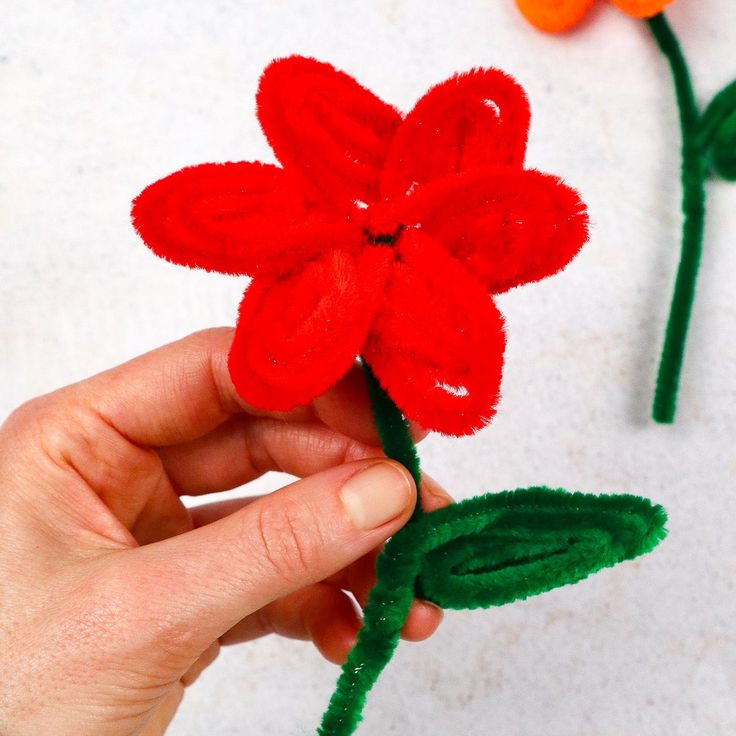
There you have it–an insanely cute DIY Pipe Cleaner Flower!