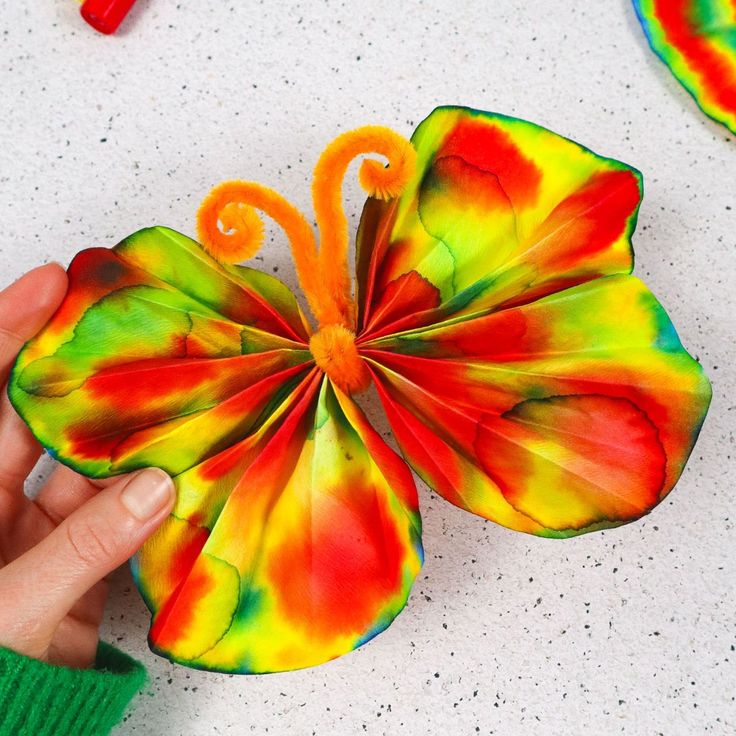
Coffee Filter Butterflies
Coffee Filter Butterflies are a delightful and creative craft project that adds a touch of whimsy to any space! These colorful butterflies are simple to make and bring a sense of joy to both kids and adults. With just a few materials, you can easily transform a plain filter into a beautiful fluttering butterfly. It's a fun and imaginative way to spend an afternoon, creating magical creatures that can brighten up any room. So, grab your supplies and let your creativity take flight with these charming Coffee Filter Butterflies!
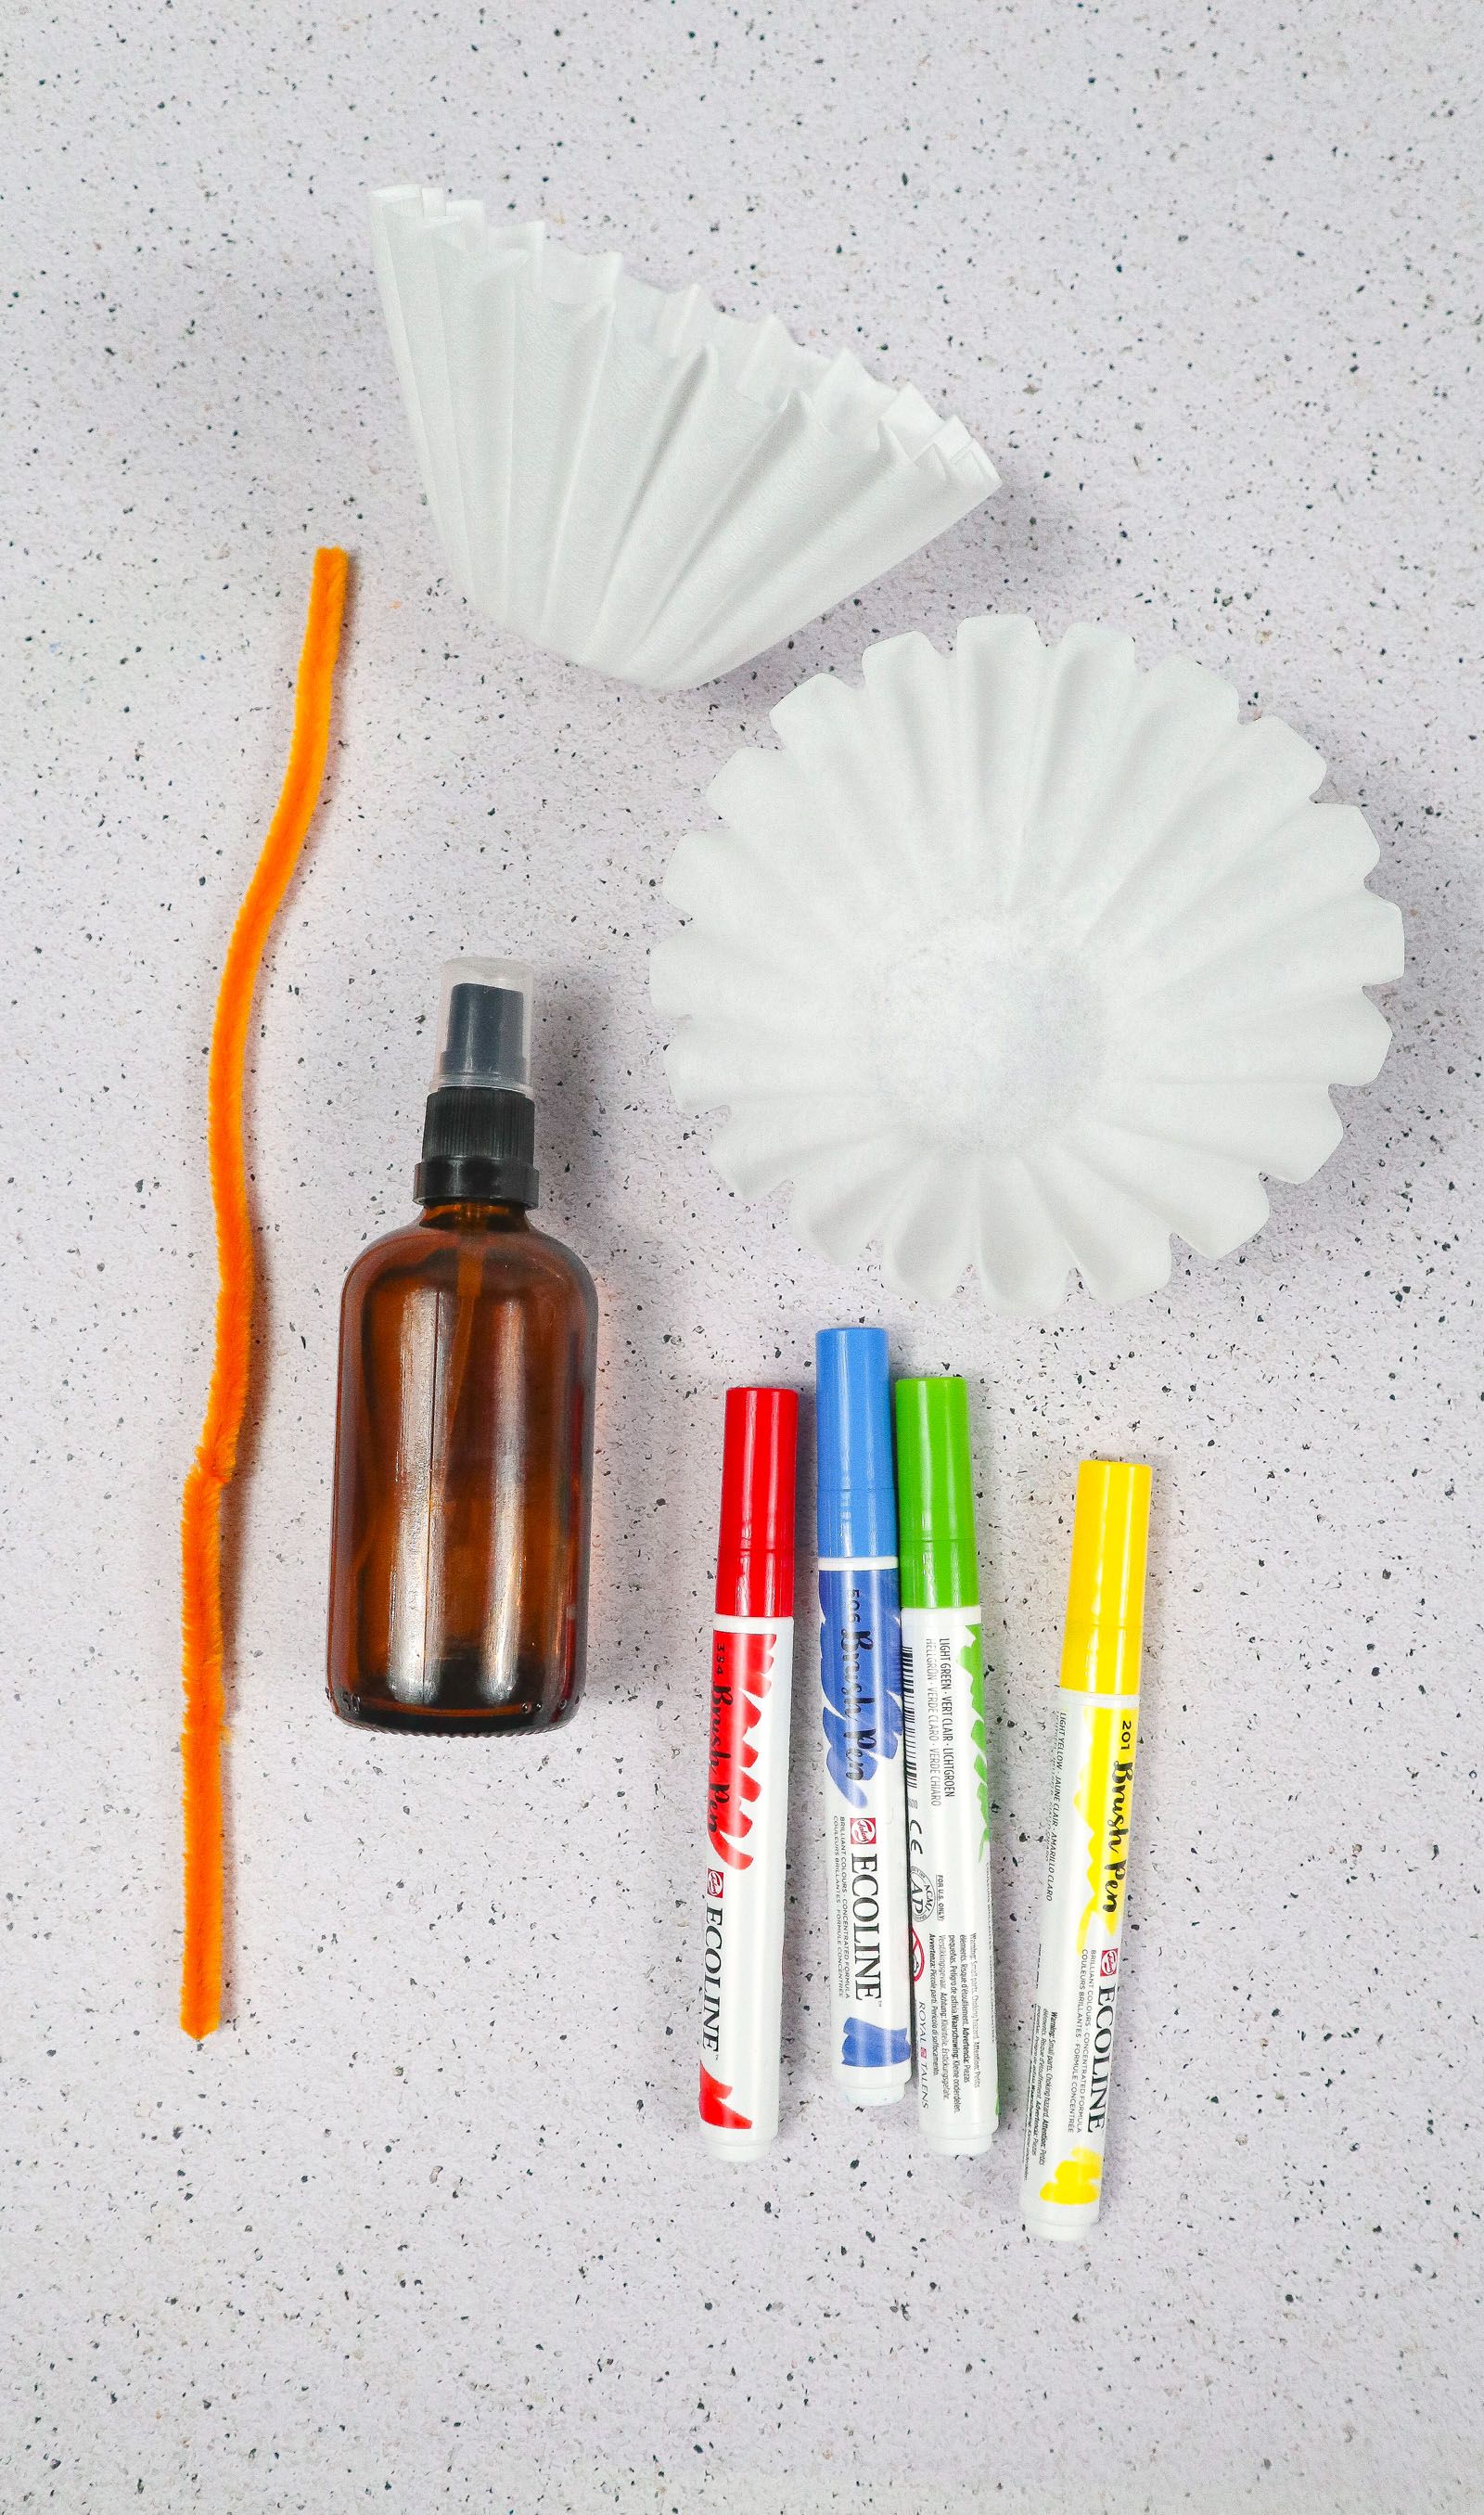
Supplies You’ll Need
2x coffee filters
Washable markers (use saturated, bright colors)
A spray bottle with water (or a large paintbrush, pipette or a glass dropper)
1x pipe cleaner (10′ long)
How to Make Coffee Filter Butterflies
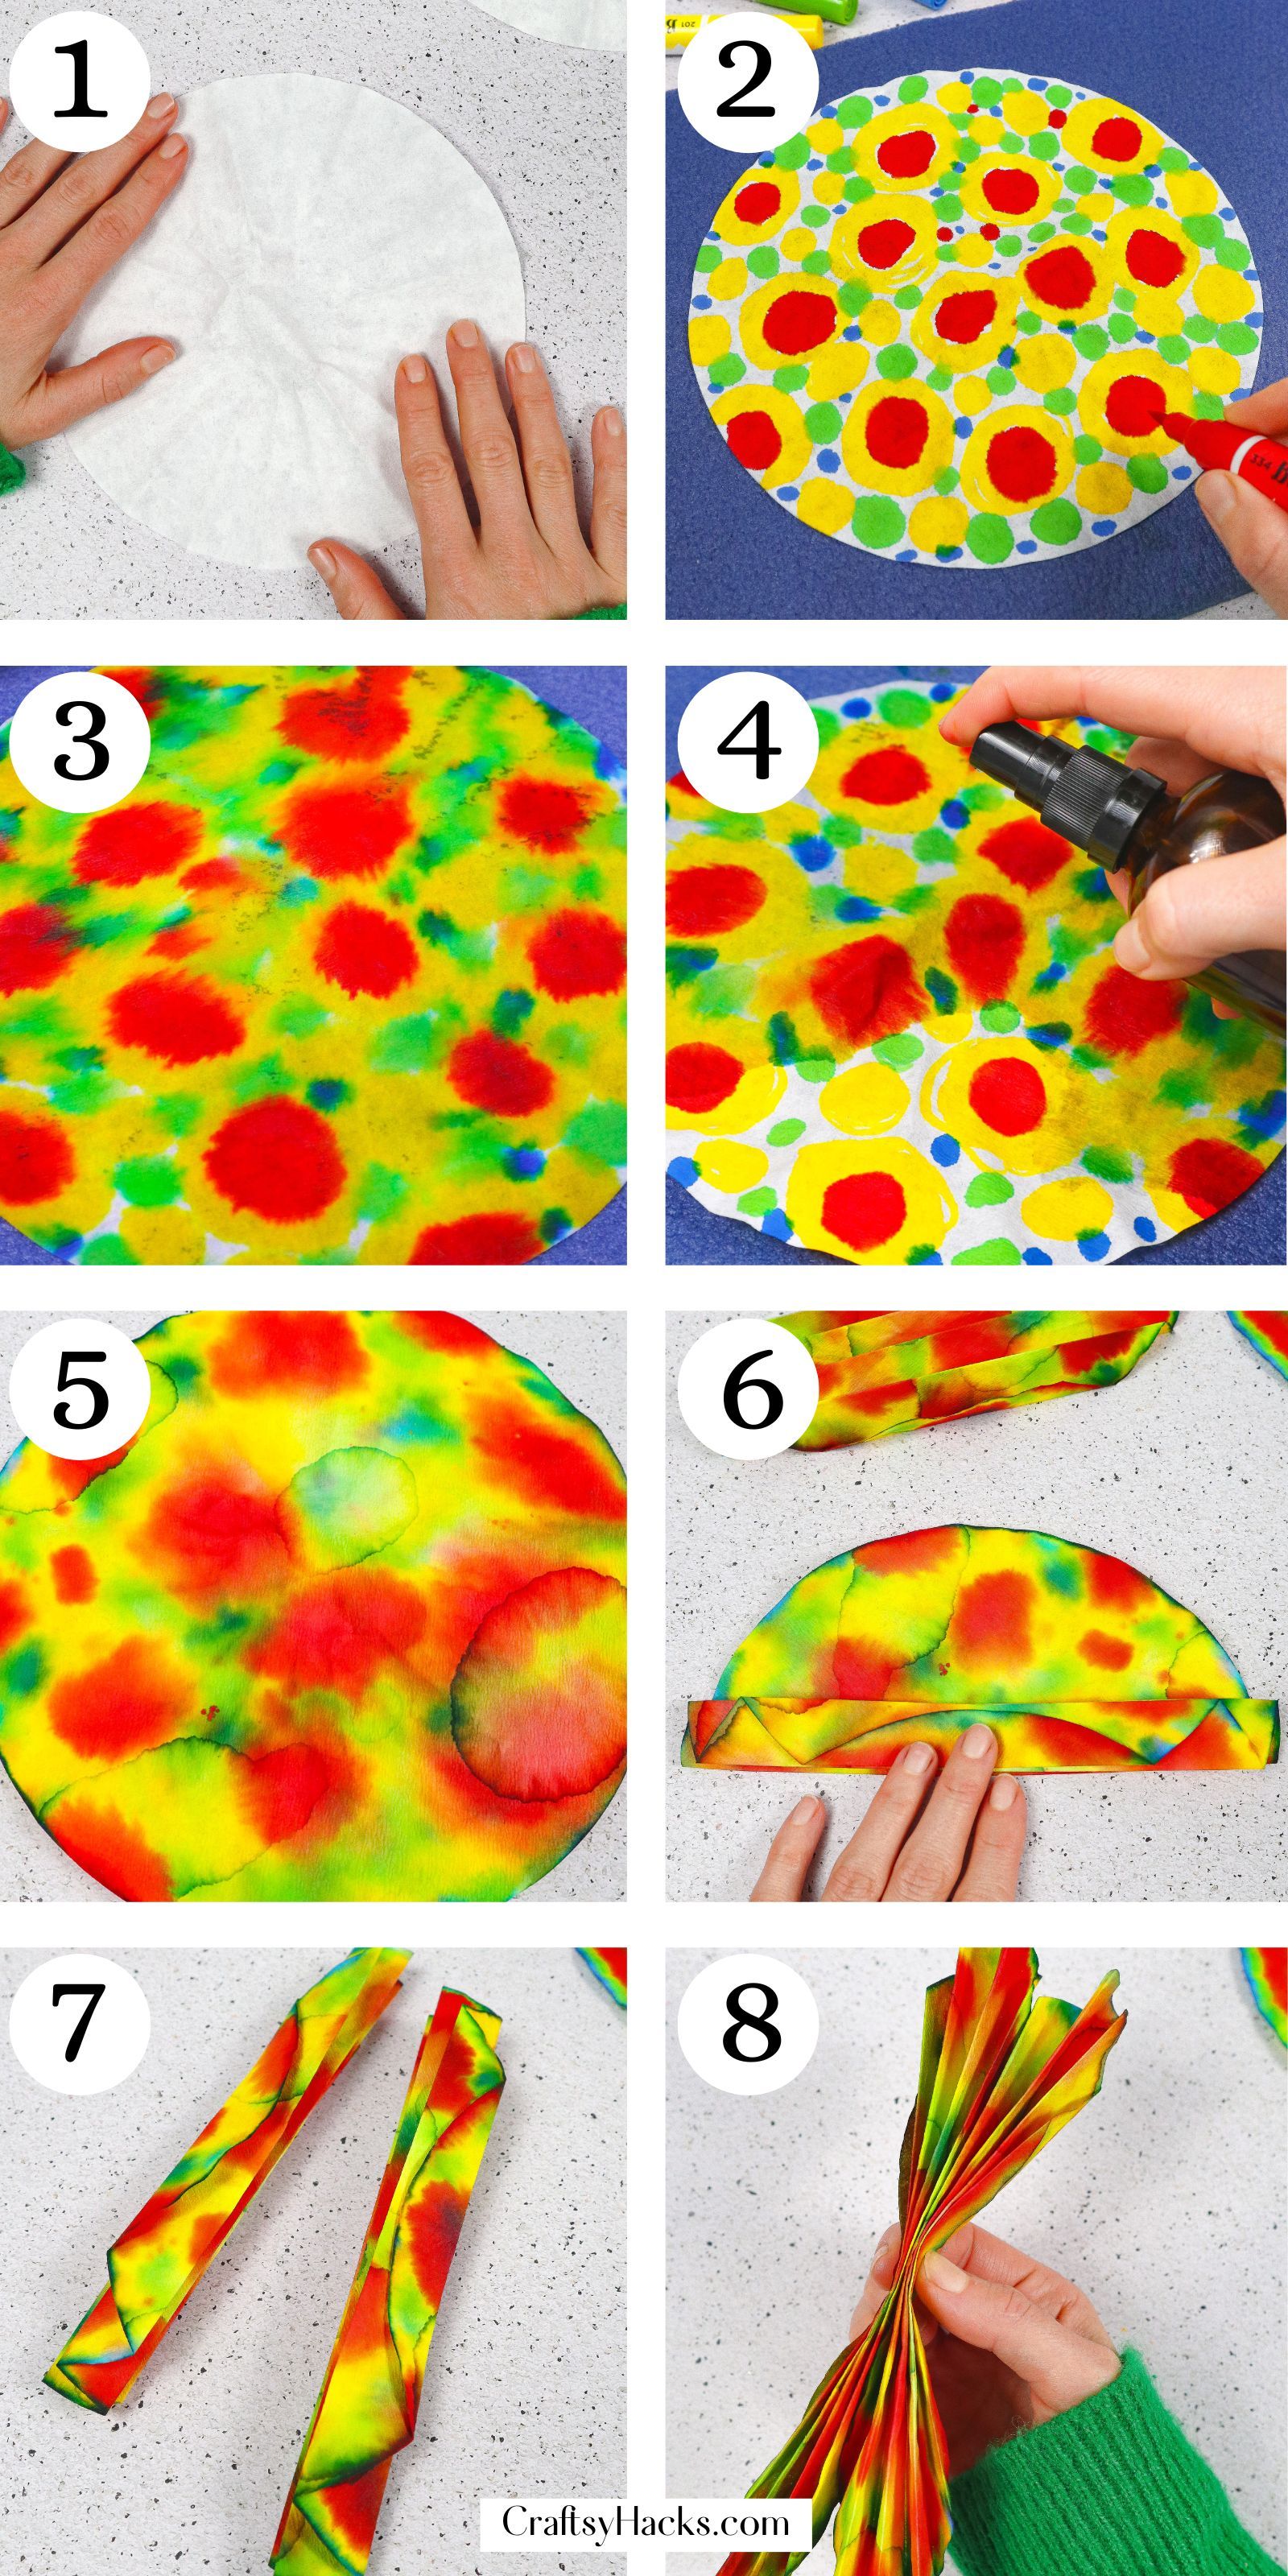
Step 1. Prepare a space to start this sweet butterfly craft. Get your filter or filters in front of you and flatten them.
Pro-tip–If you’d like to make multiples of the same butterfly, stack the filters together. If you stack them, the marker will bleed through onto any other coffee paper it’s touching.
Step 2. Once you have your materials together, it’s time to start the body of your butterfly. Color or design the filter or filters in any fashion you’d like!
It’s important to remember that this craft literally can tie-dye anything, so it’s best to have a protective mat (some items stain more than others).
Step 3. After you’re done creating the pattern or drawing on your winged beauty, it’s time to add water!
Different methods of water application are welcome, depending on what you’d like the intended result to be.
In this post, a spray bottle has been used to spritz the coffee filters. Try playing around with different applications, flicking water, eyedroppers, and even a lightly wet sponge could be fun alternatives.
Step 4. Carefully pick up and separate your filters and bring them to a safe place to sit. Set all wet filters in a safe place to dry.
Step 5. Check up on the coffee filters to see if they are dry, or let them sit overnight for complete insurance of everyone’s being dry.
Step 6. Once completely dry, accordion fold your butterflies by ⅓”. Continue the process across the entire length.
Step 7. Repeat the process with as many butterflies as your home or classroom has made. Make sure the fold sits well enough that it doesn’t completely unfold.
Step 8. Each butterfly then gets picked up and pinched in the middle to bend it in half. This process will help create the wings.
Do it gently since it is fragile, but enough to make the crease.
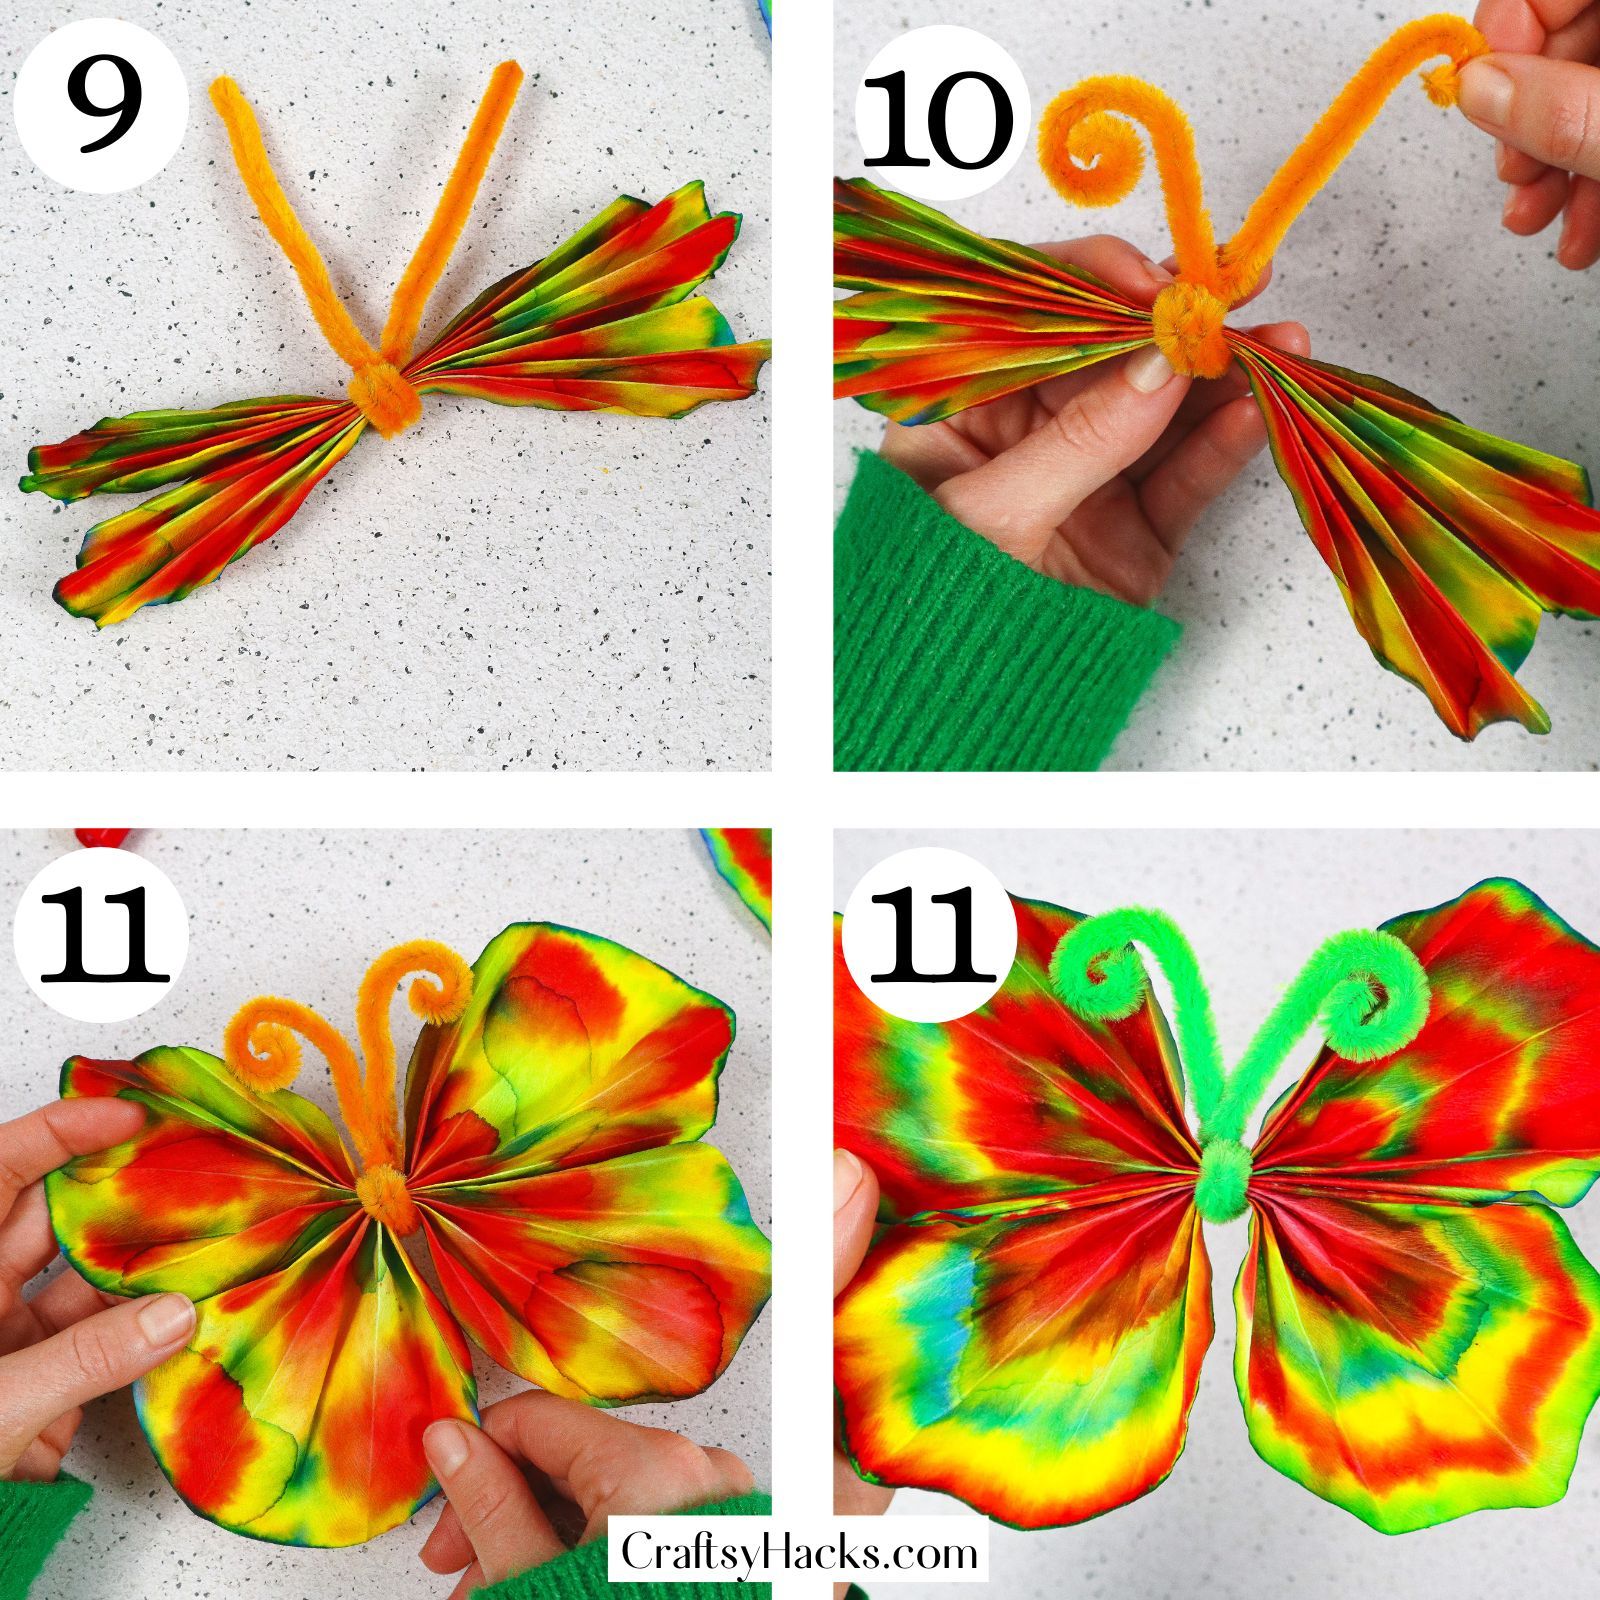
Step 9. Grab your preferred colored pipe cleaner and secure it around the middle of the butterfly. Twist it around and have either end meet so it can become the butterfly’s antenna.
Step 10. Curl the antennas to your liking for your butterfly! The more interesting, the better, in my opinion.
Step 11. Finally, re-adjust or adjust the wings out or as you’d like! With that, you have made your first coffee filter butterfly.
There you have it: an easy and fun coffee filter butterfly! We love these at home as a standalone project or adding them into a bigger project.
No comments
Write a comment