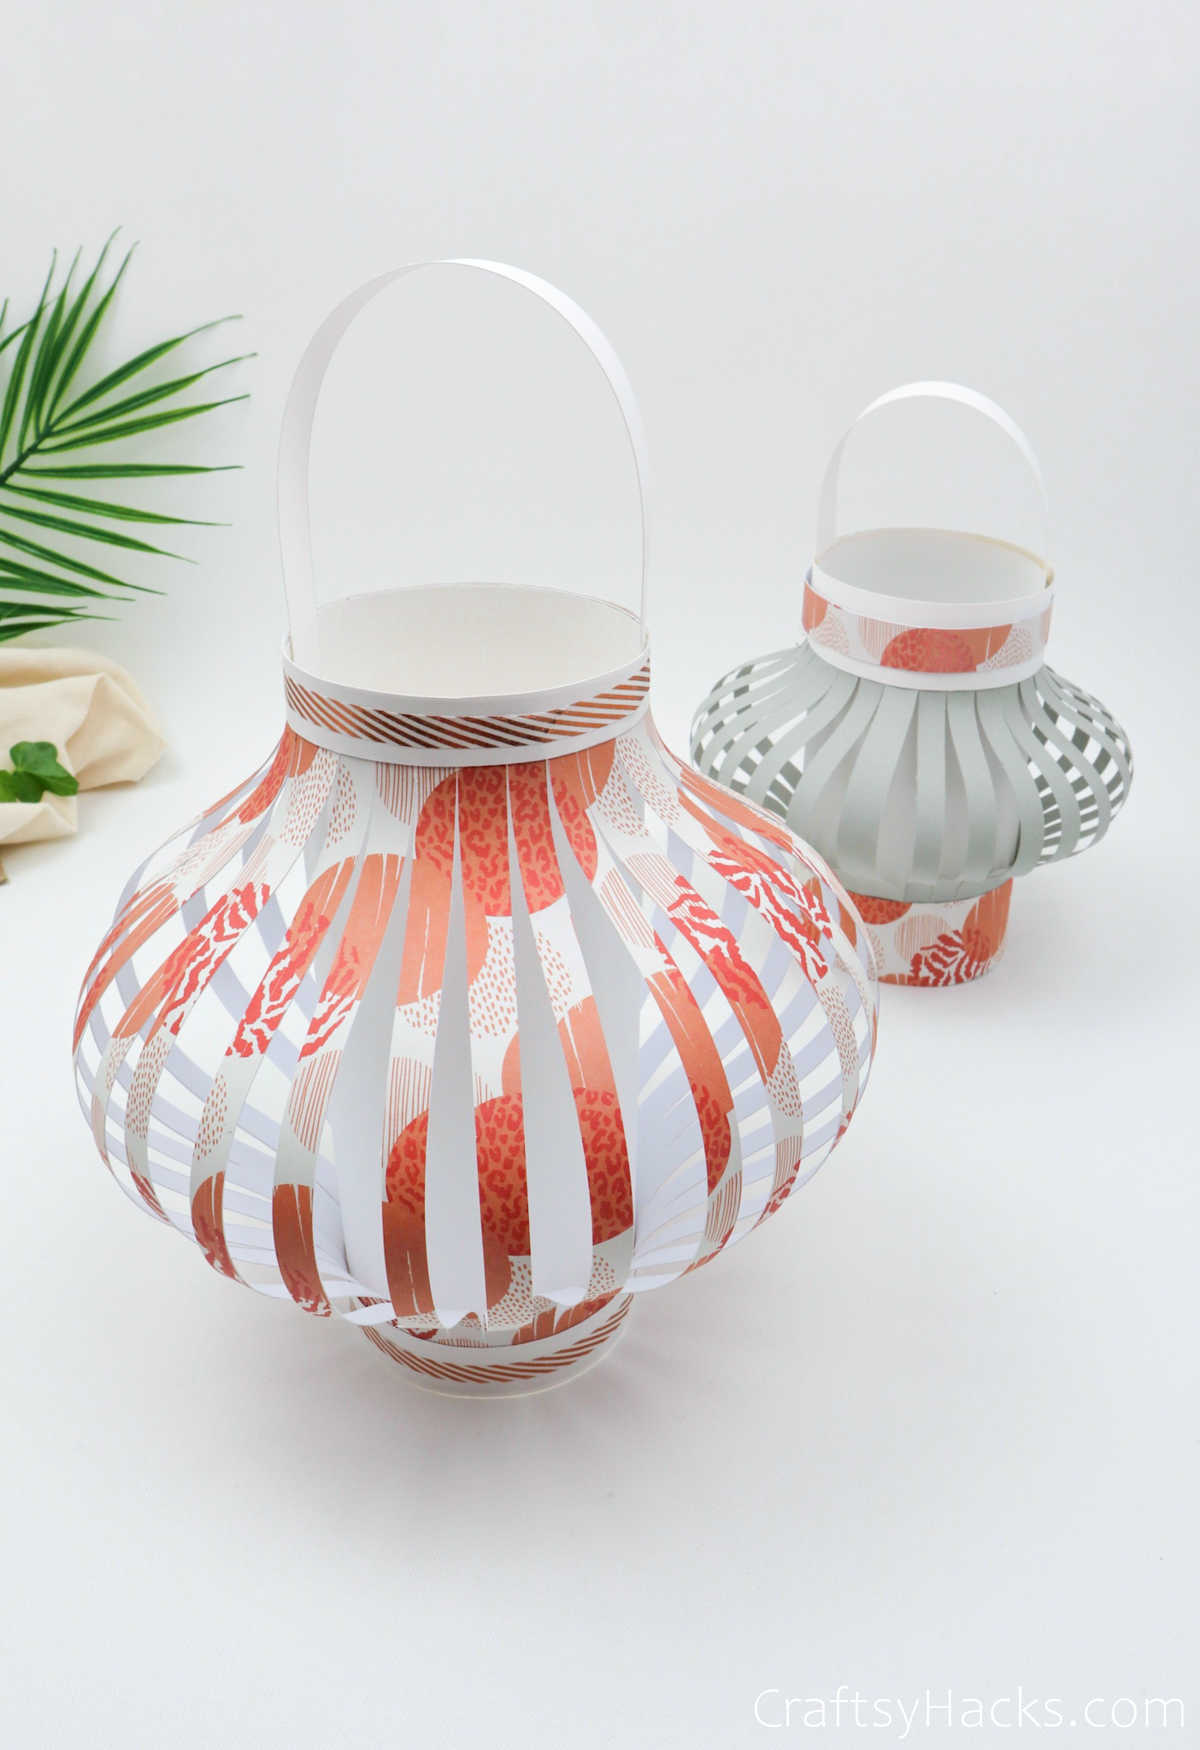
Creating DIY paper lanterns is a fun and charming way to add a touch of whimsy to any space. With just a few simple stated materials, you can craft beautiful lanterns that illuminate your surroundings with warmth and creativity. Feel free to experiment with different shapes, sizes, and patterns to make each lantern uniquely yours. Whether you're decorating for a special occasion or simply sprucing up your home, these handmade lanterns are sure to bring a cheerful glow and a sense of accomplishment to your DIY endeavors. So grab your supplies and get ready to light up your world with these delightful paper lanterns!
Supplies and Tools You’ll Need
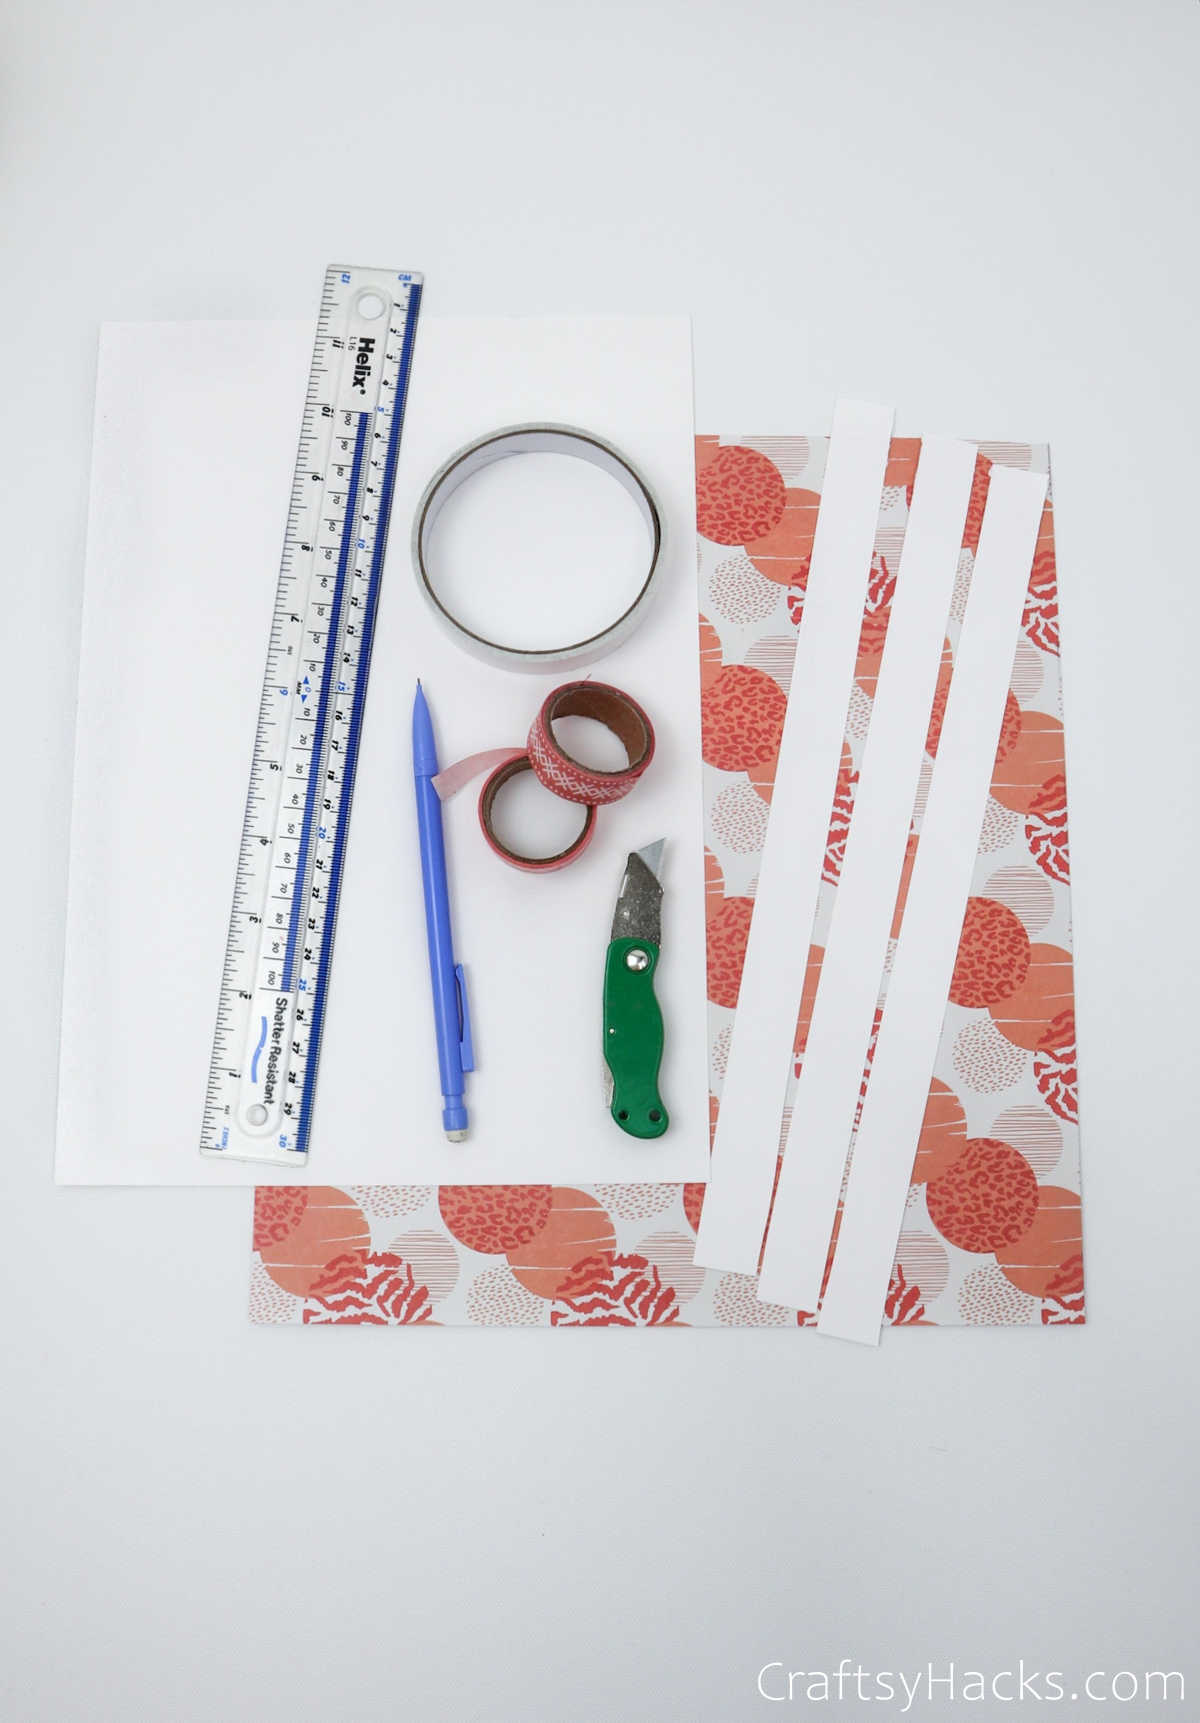
Here’s a list of everything you’ll need for this project:
1x sheet of white paper (10″x 12″)
1x craft paper (12″x 12″)
Pencil
Ruler
Decorative tape
Double-sided tape
Retractable blade knife
3x paper strips (12″x 1″)
How to Make Paper Lanterns
So, if you’ve gathered all the different materials you’ll need, read ahead to find out how you can make your own paper lanterns.
Step 1
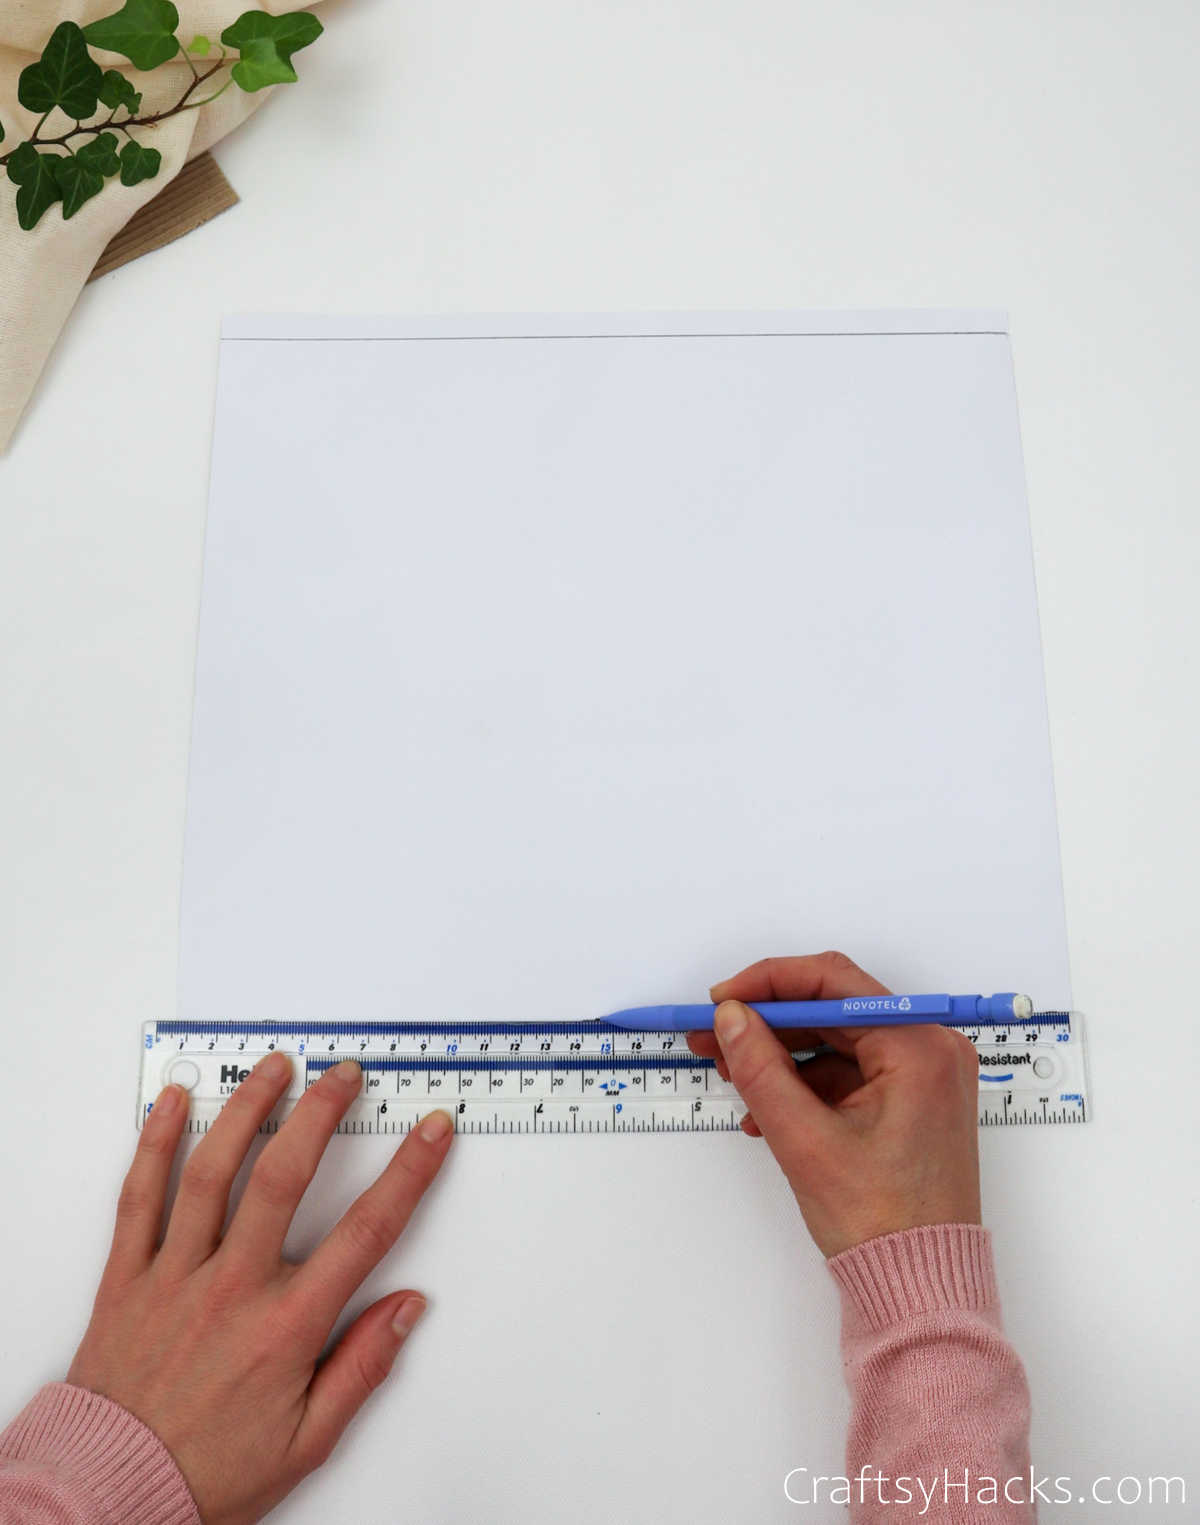
The first step is to pick out craft paper that you really like. You can use textured, colored, and printed paper, as long as it’s colorful and pretty and not too opaque that the light can’t filter out.
So, once you’ve picked out the paper, turn it over on your work surface. Using a ruler and a pencil, draw two lines: one each about half an inch or 1 cm away from the bottom and top of the paper.
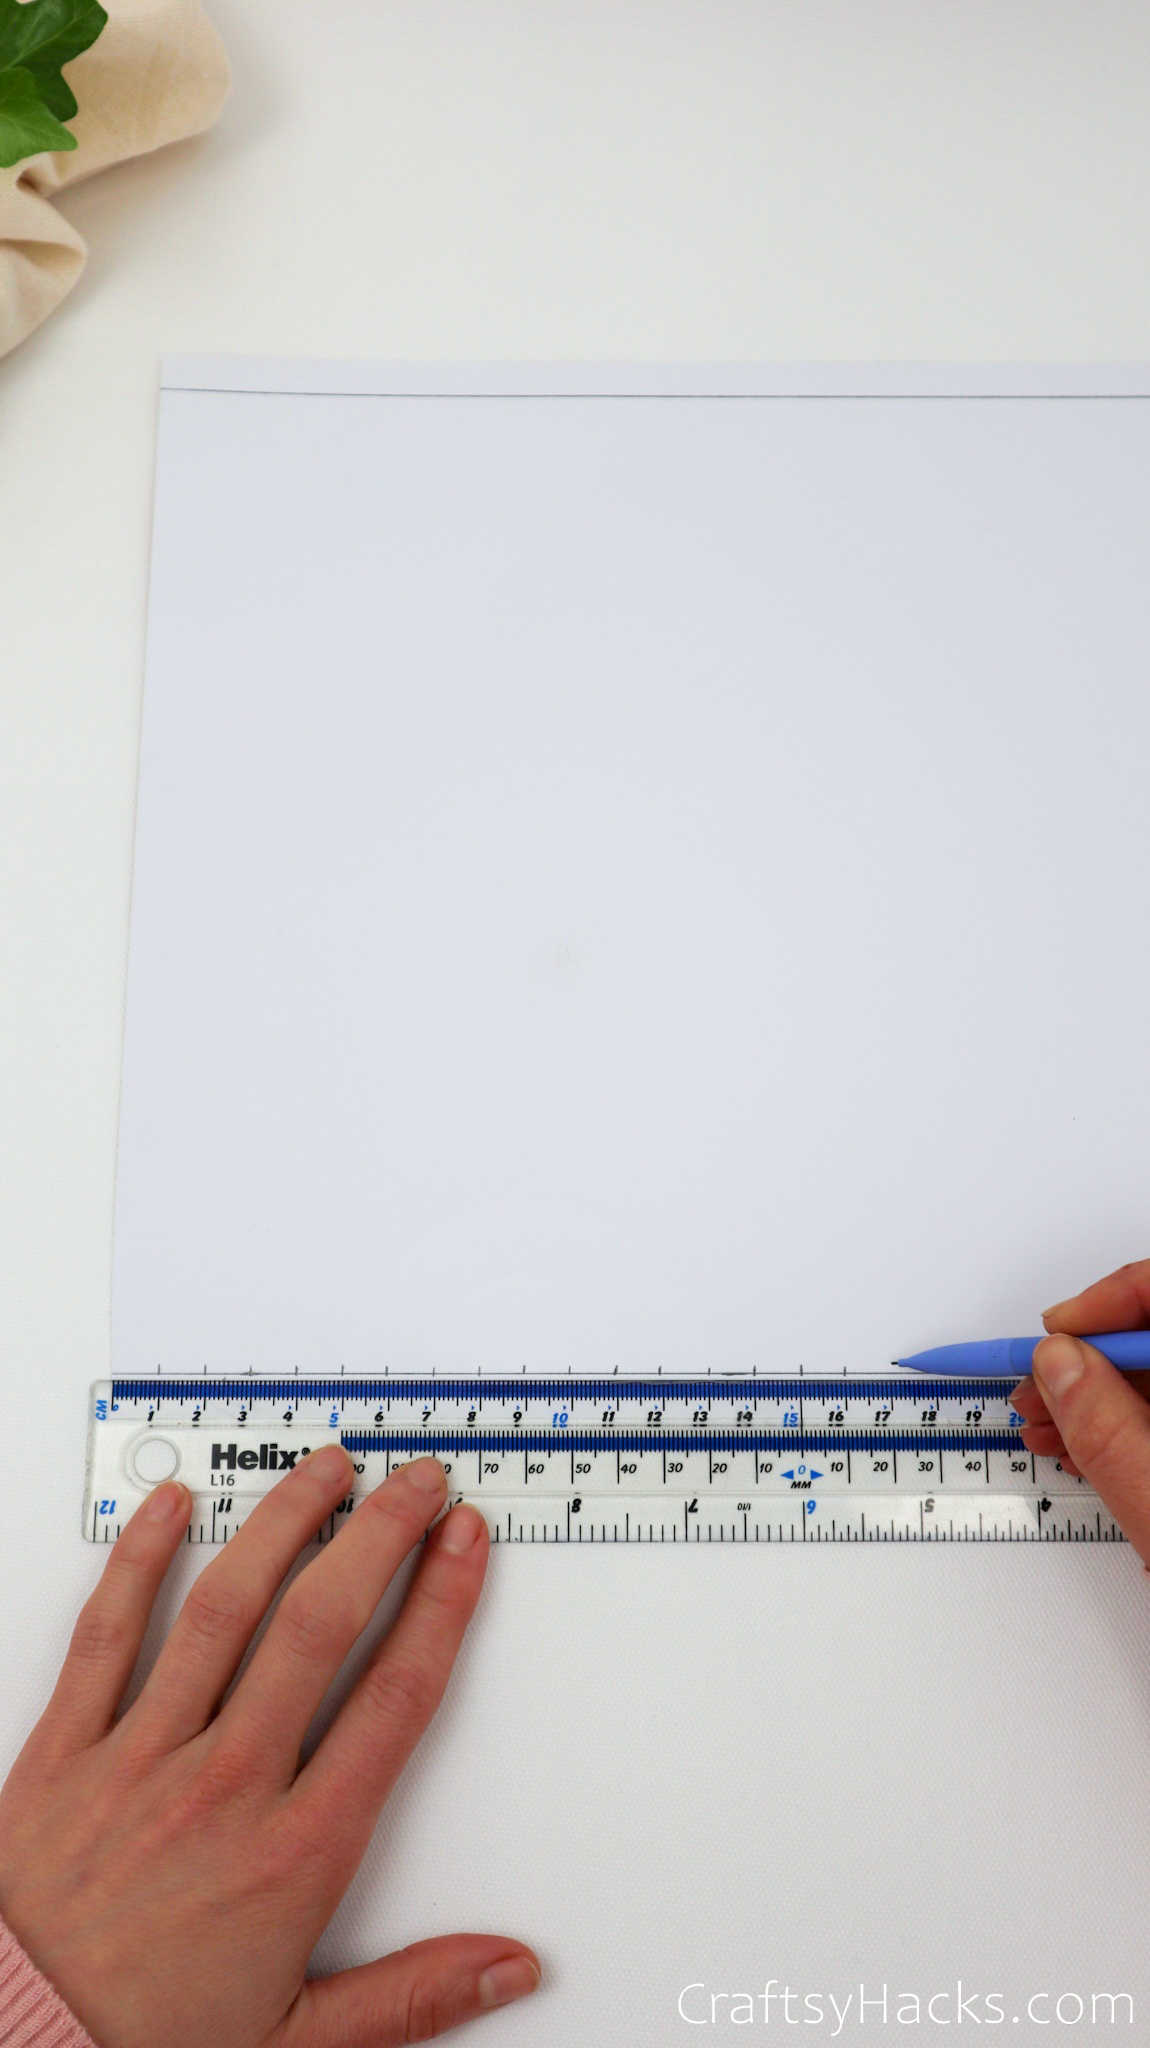
Step 2
Don’t put away your ruler and pencil just yet. Place the ruler over the line you just drew and draw markers along that line at every centimeter gap.
Repeat this for the second line at the bottom of the sheet, too.
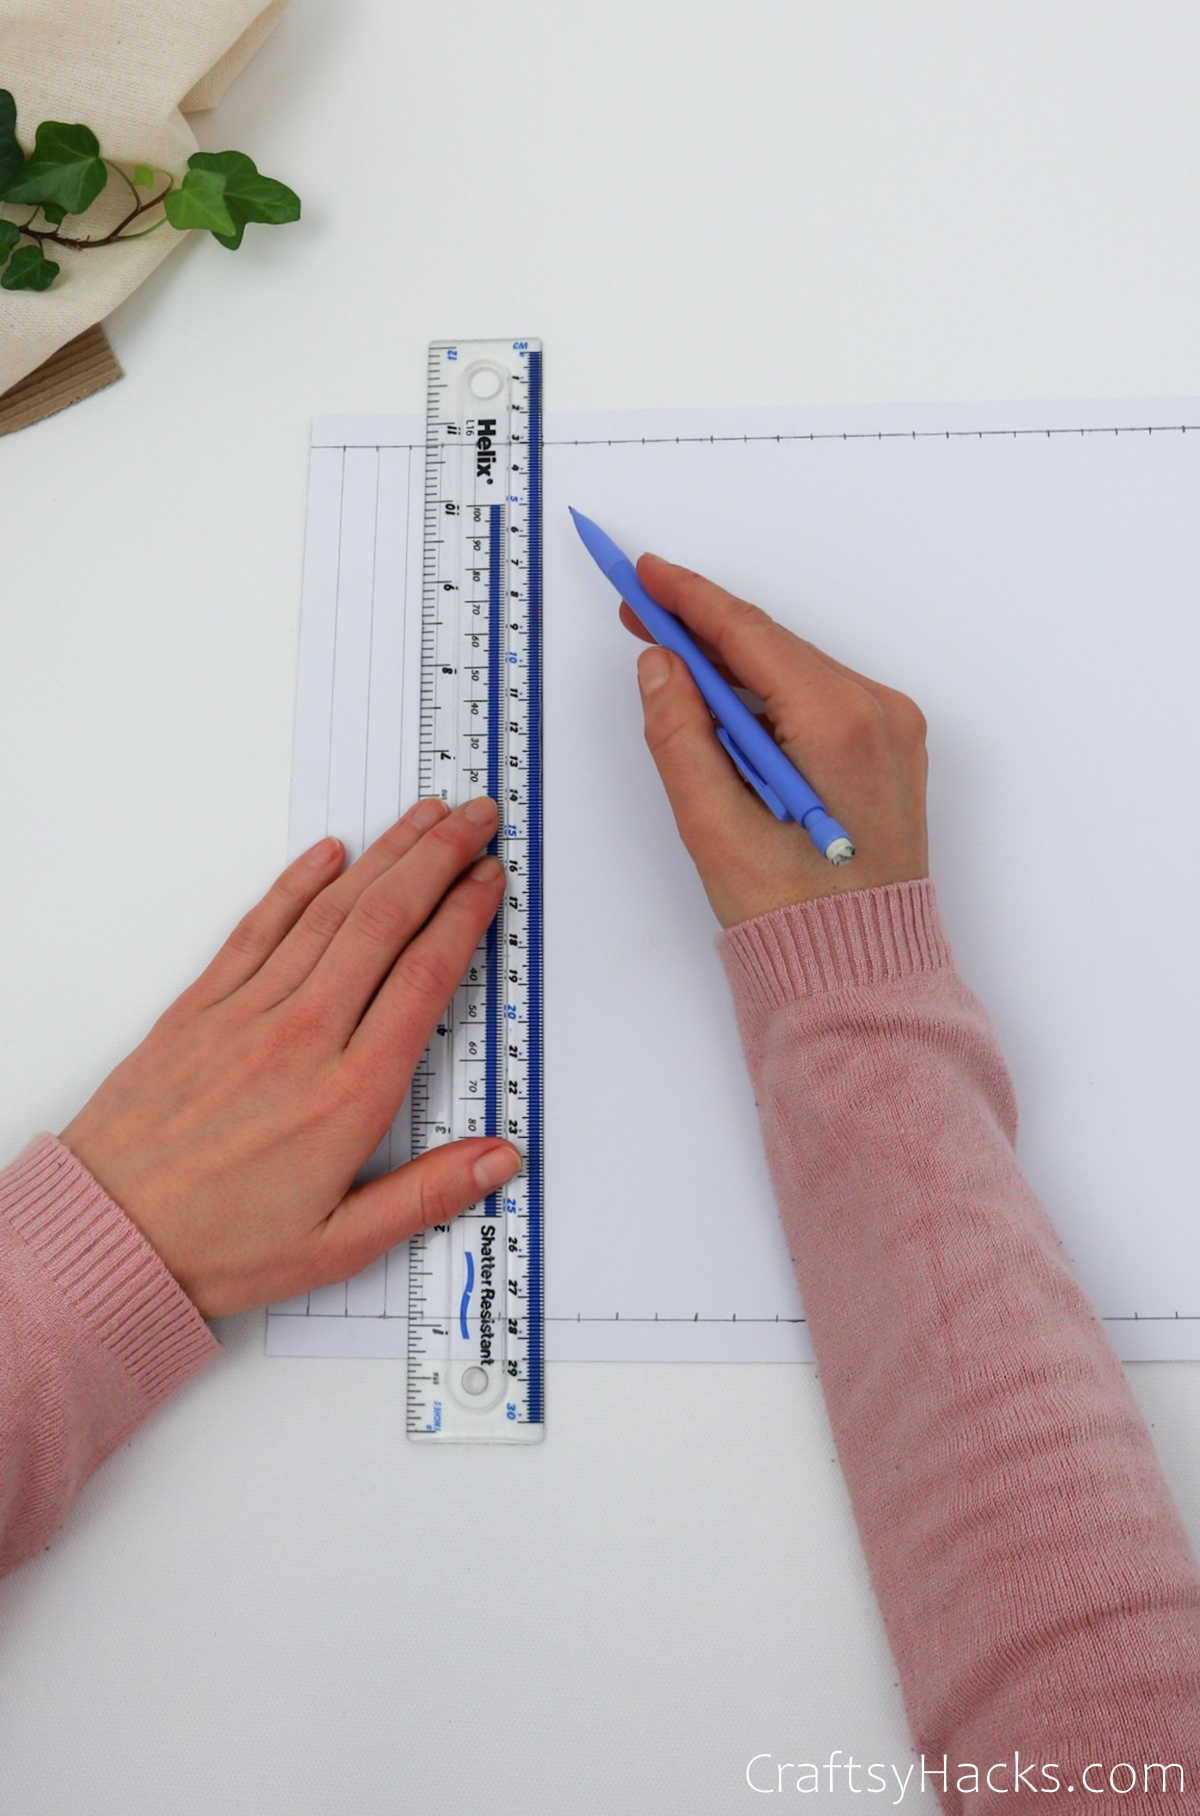
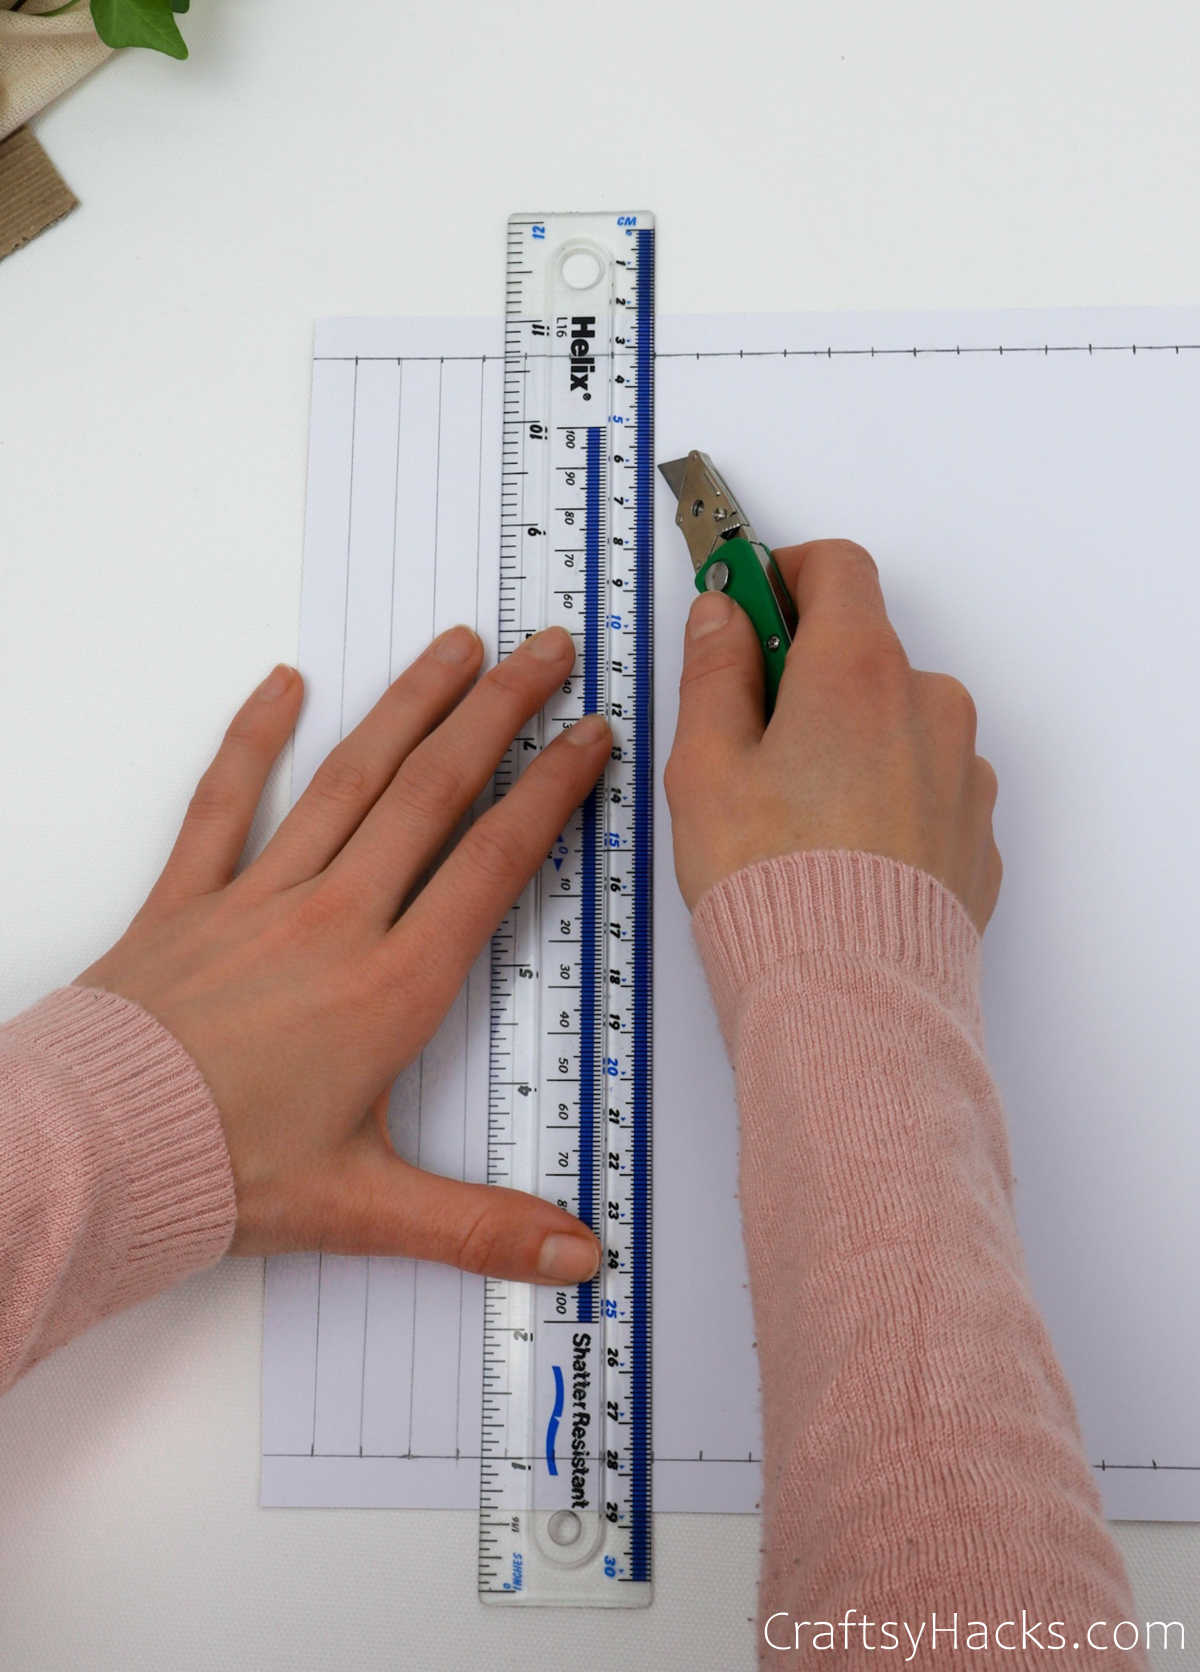
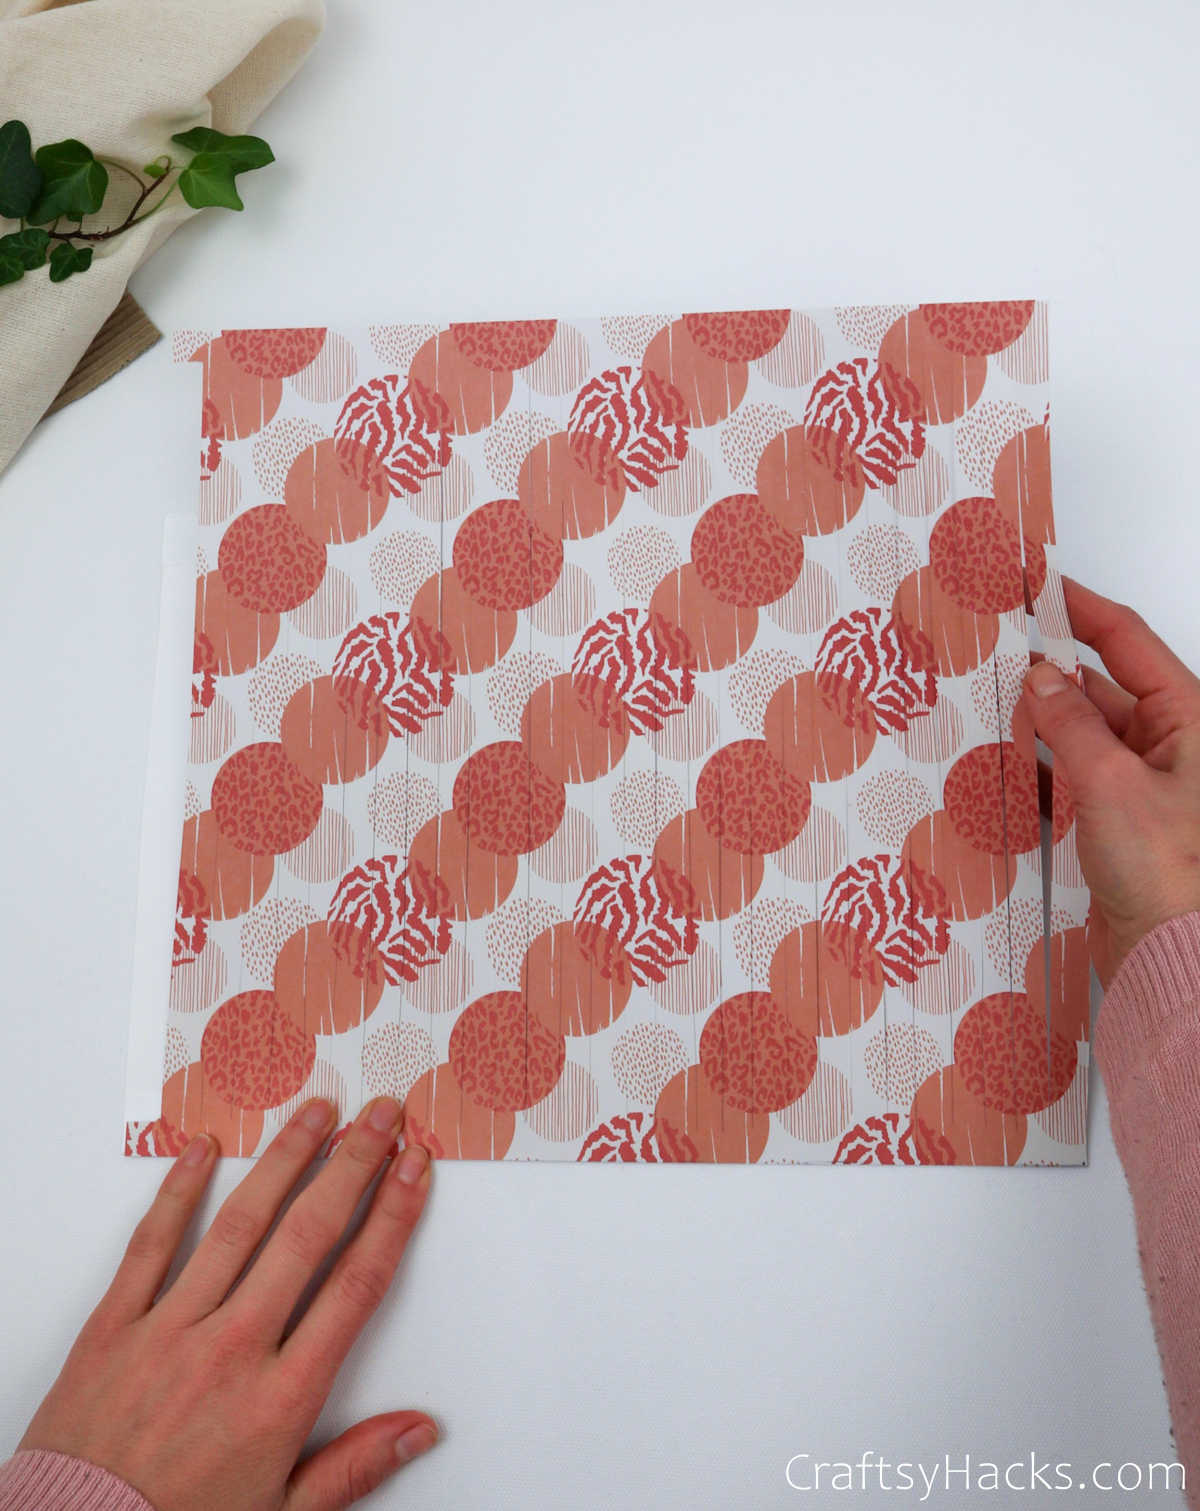
Step 3
Next, turn your ruler around and line it up so that the top edge and bottom edge of the ruler are both on the first markers of both lines. Draw a line connecting the two.
Proceed to draw vertical lines connecting each of the markers across the top line with their subordinating ones.
Step 4
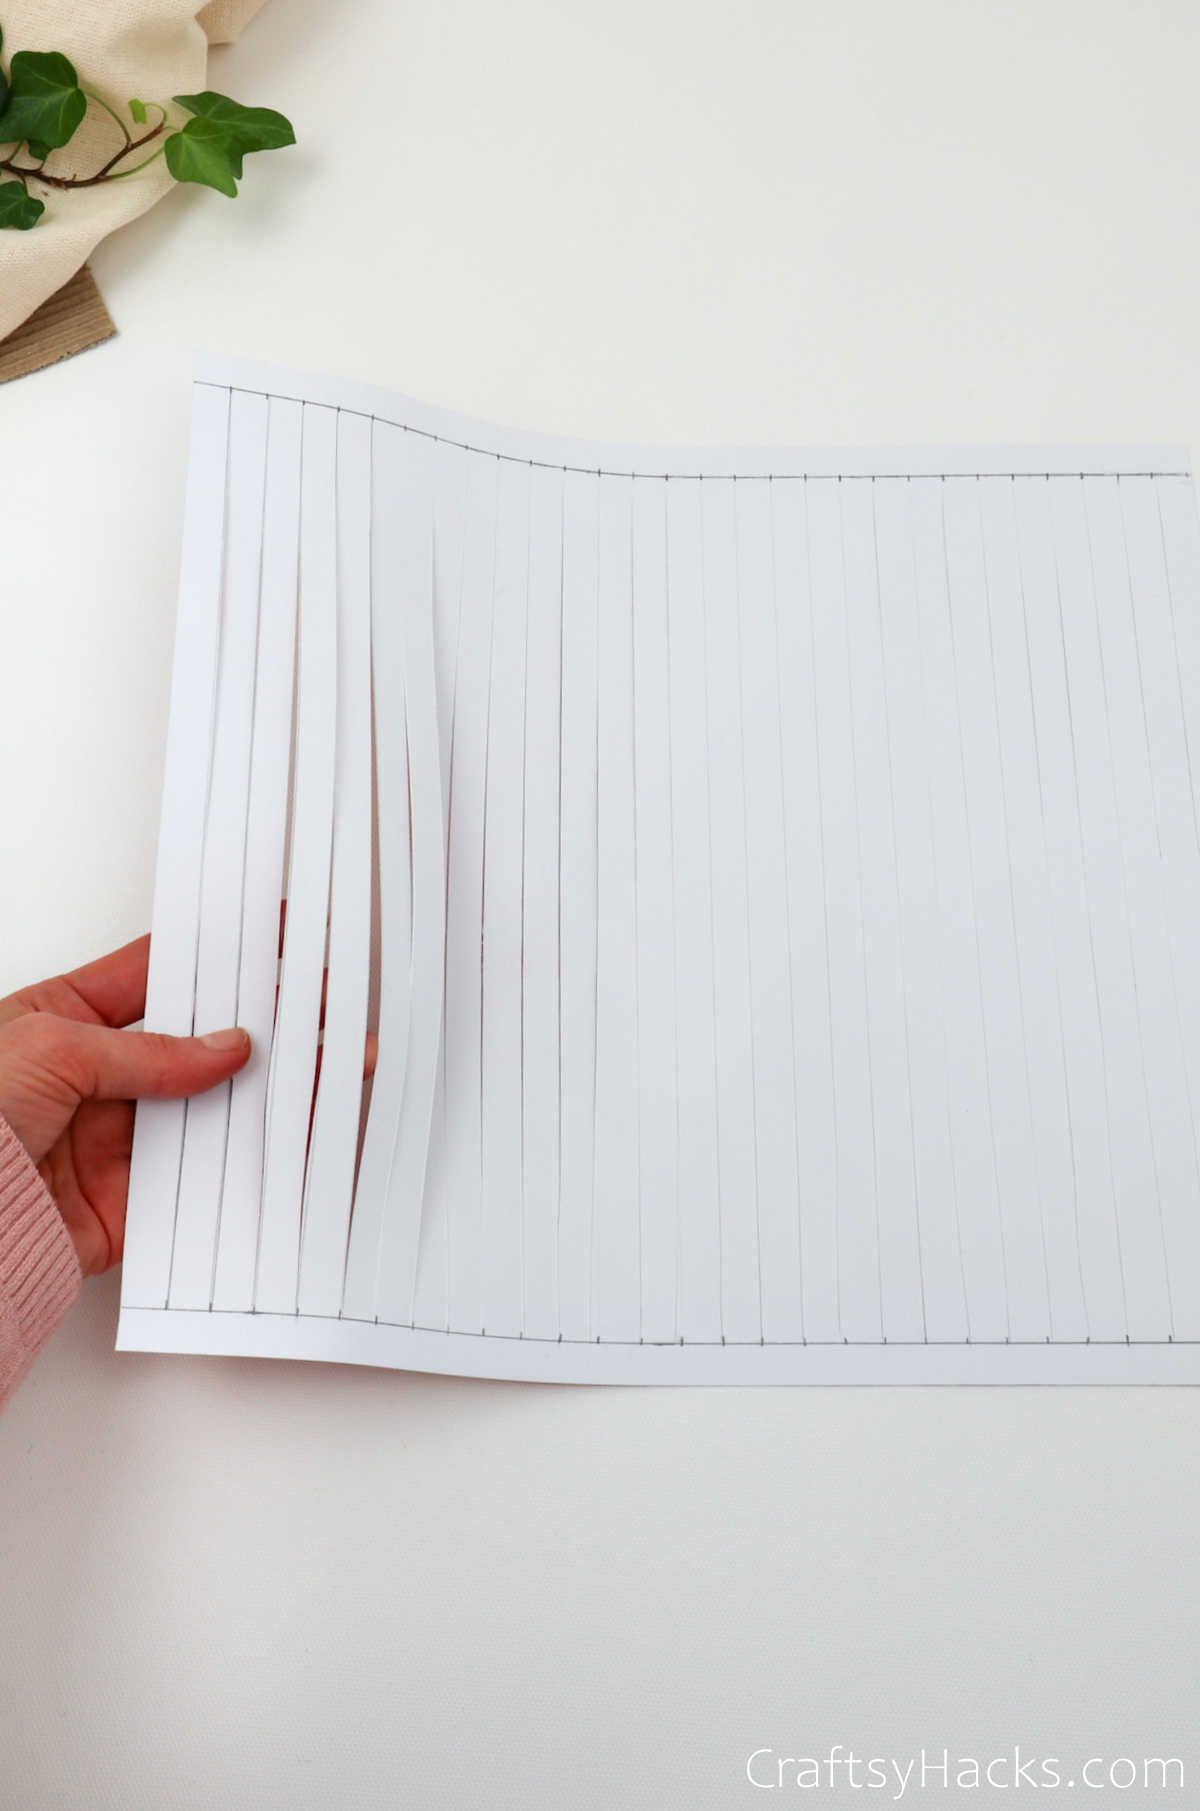
Grab a craft cutter and use your ruler to cut down the lines, as seen below. Just a word of caution: don’t cut beyond the two lines at the top and bottom of the page, or your lantern will just fall apart.
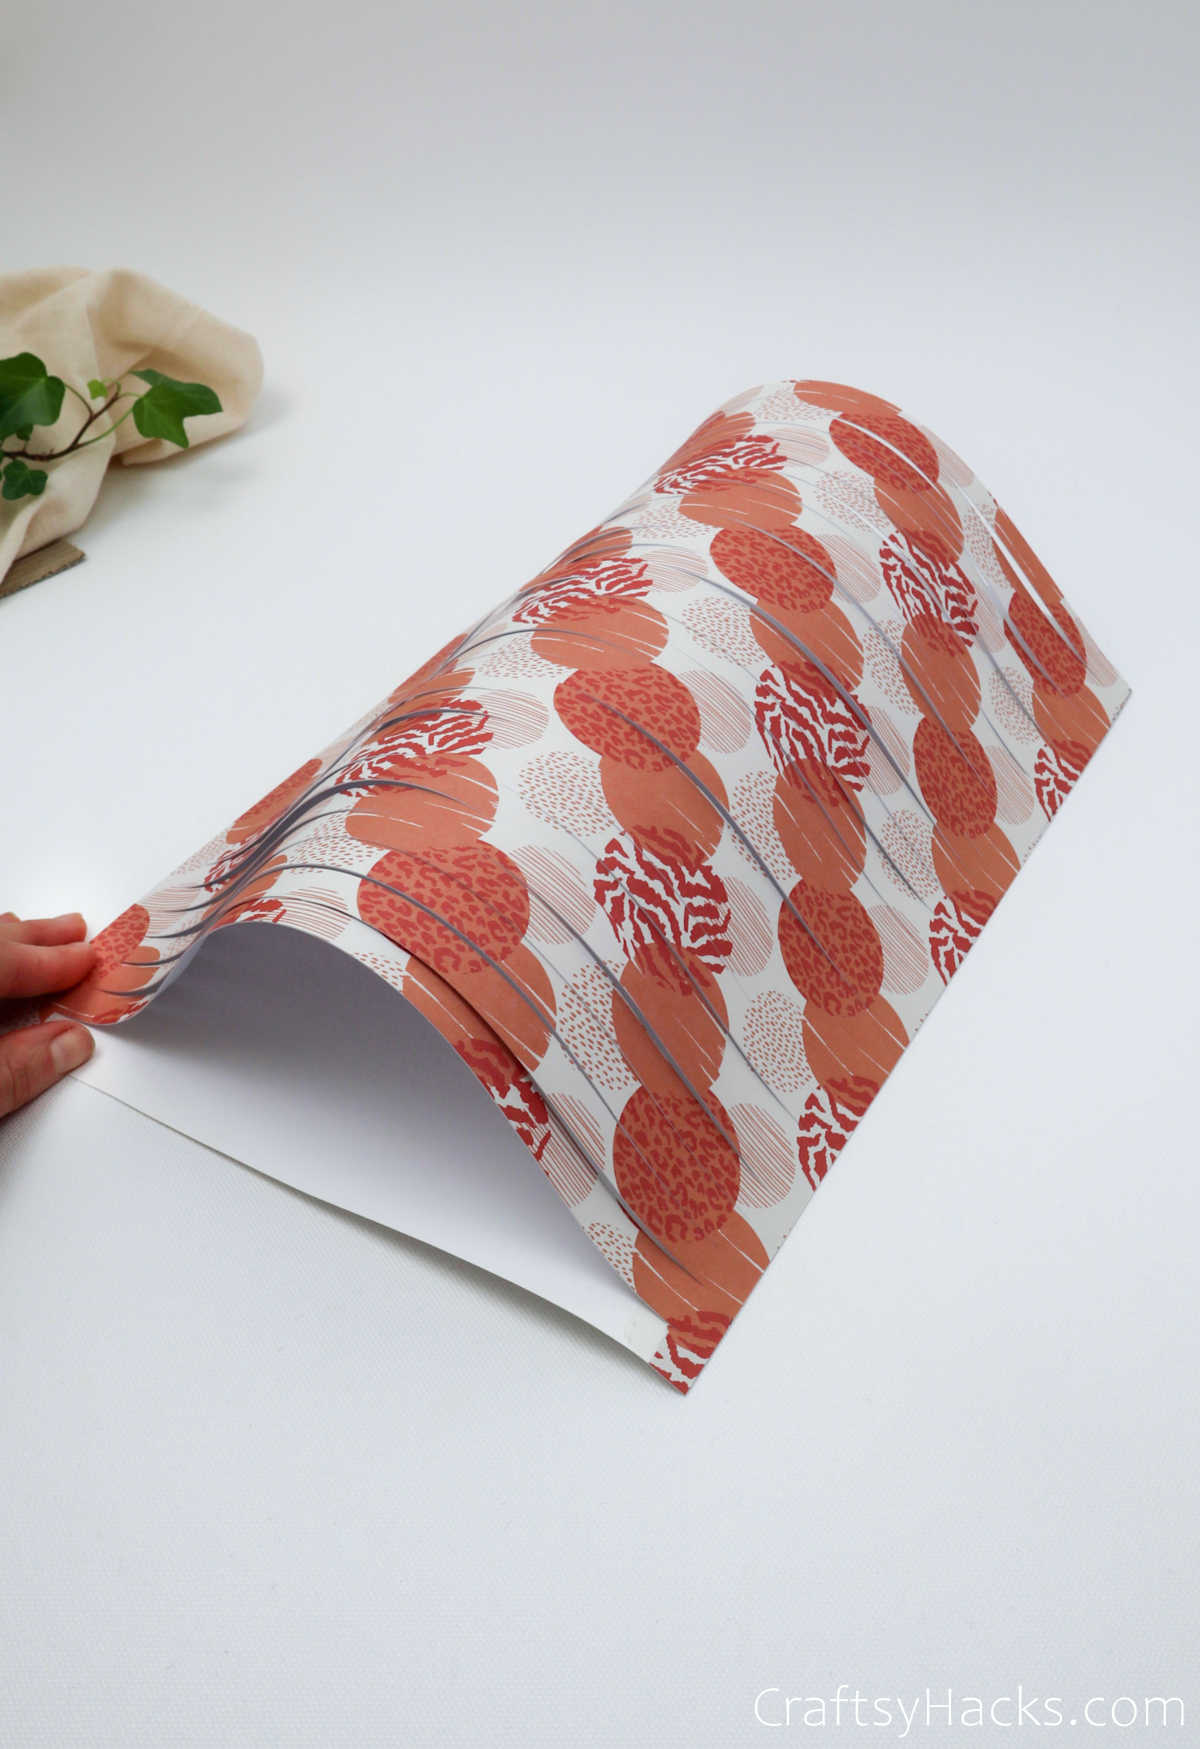
After you finish cutting the paper into strips, your craft paper should look like this.
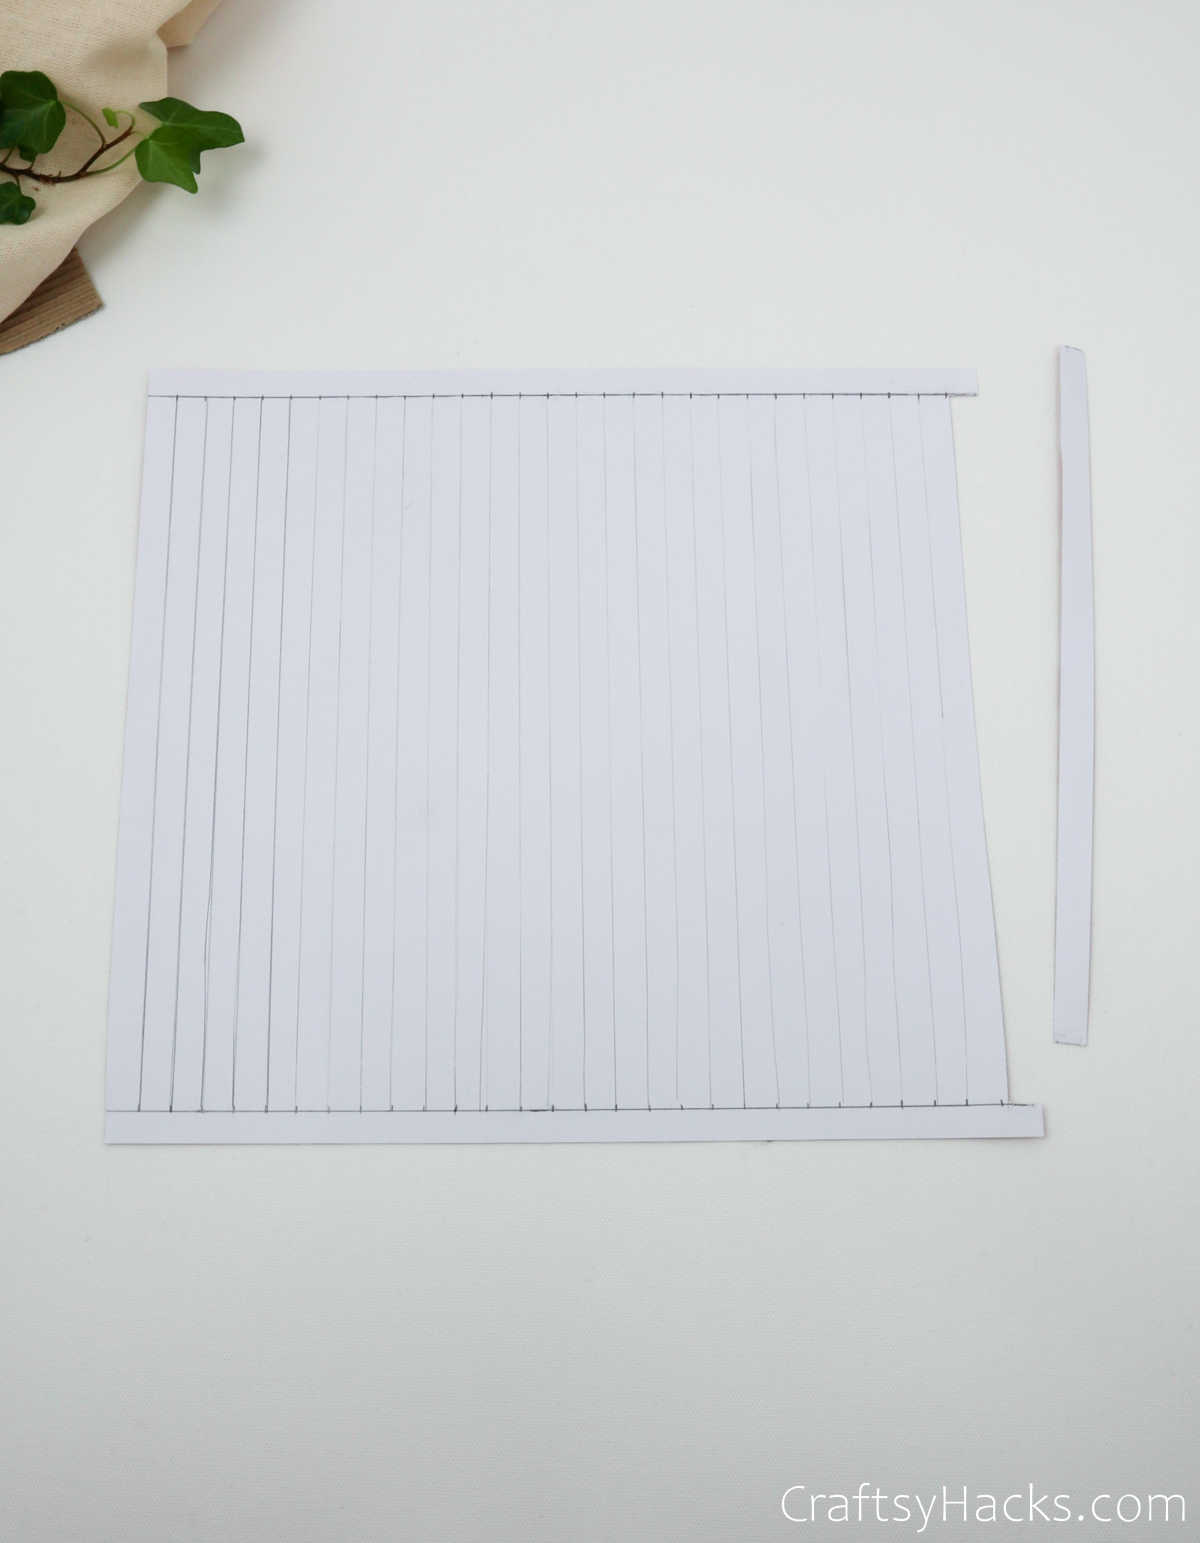
Step 5
Next, use your cutter to remove just one strip right at the end of the sheet so you can make a gap, as seen below.
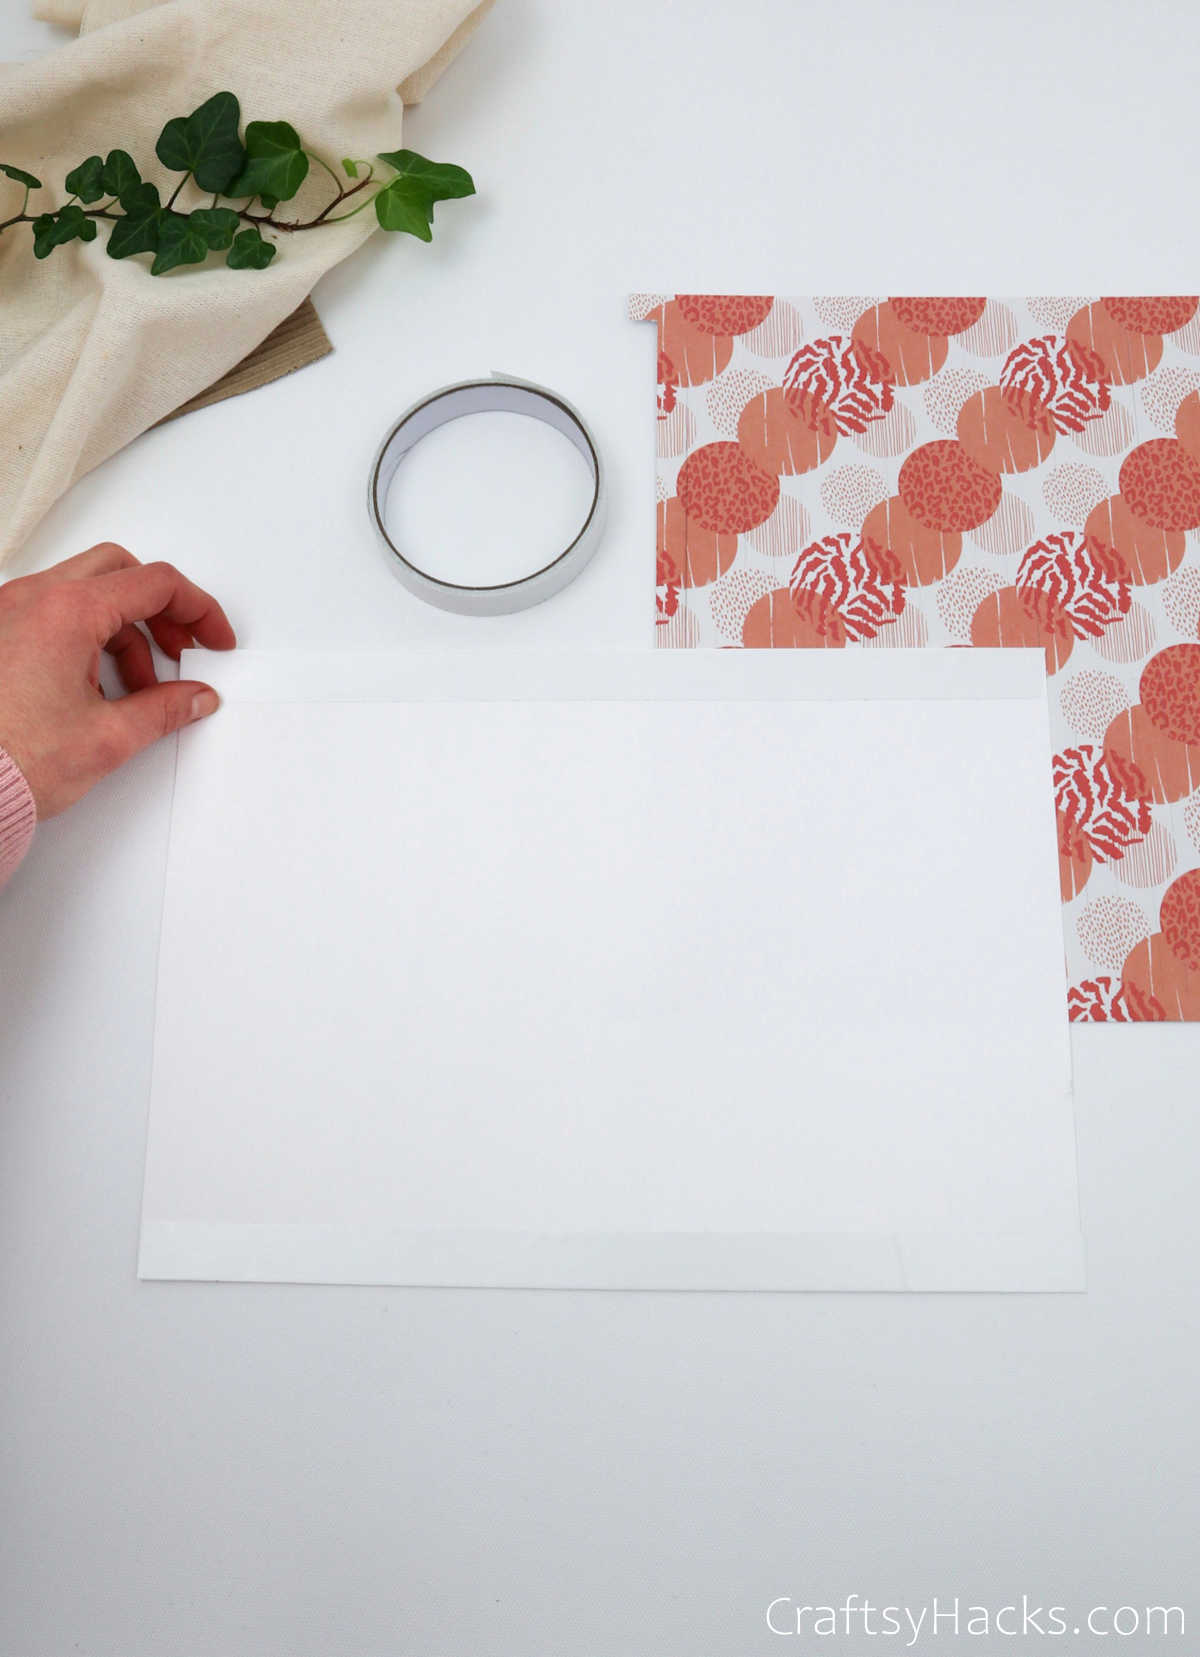
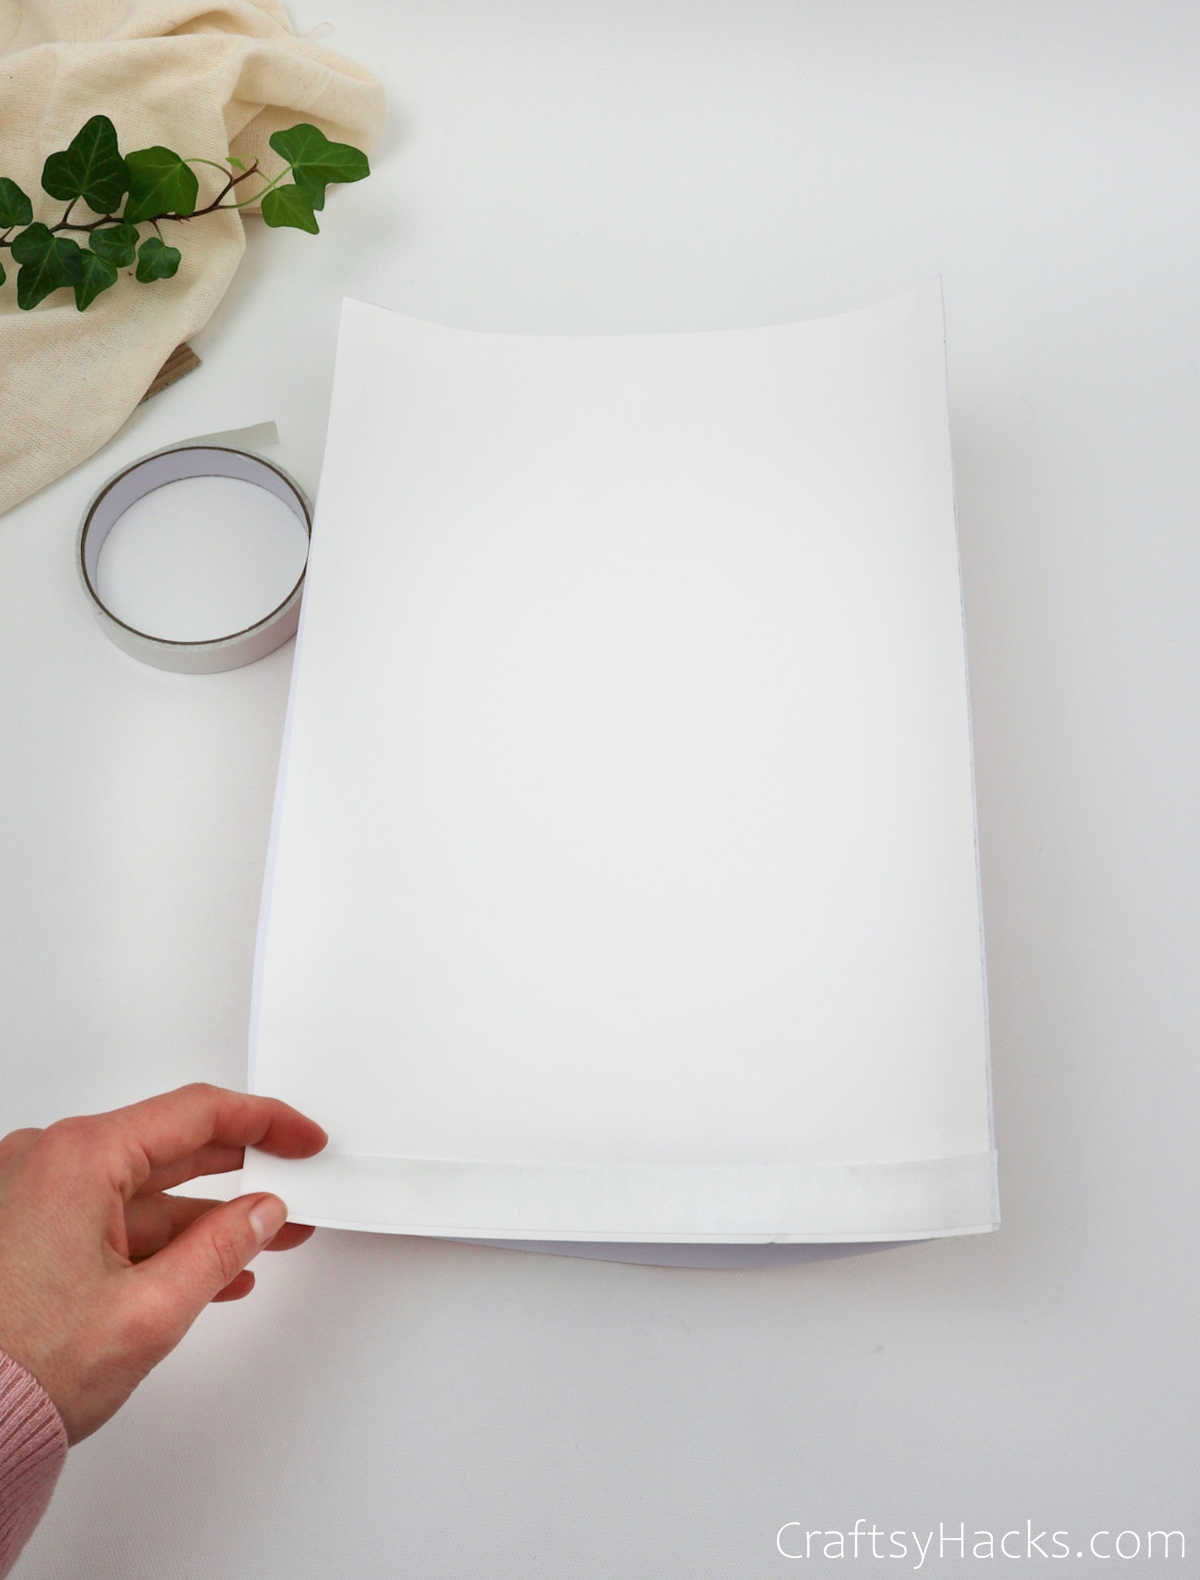
Step 6
Next, grab a roll of double-sided tape and a plain white sheet of paper. Tape two long strips of the double-sided tape at the top and bottom of the sheet.
Step 7
Stick both the top and bottom of the craft paper to the top and bottom of the white sheet.
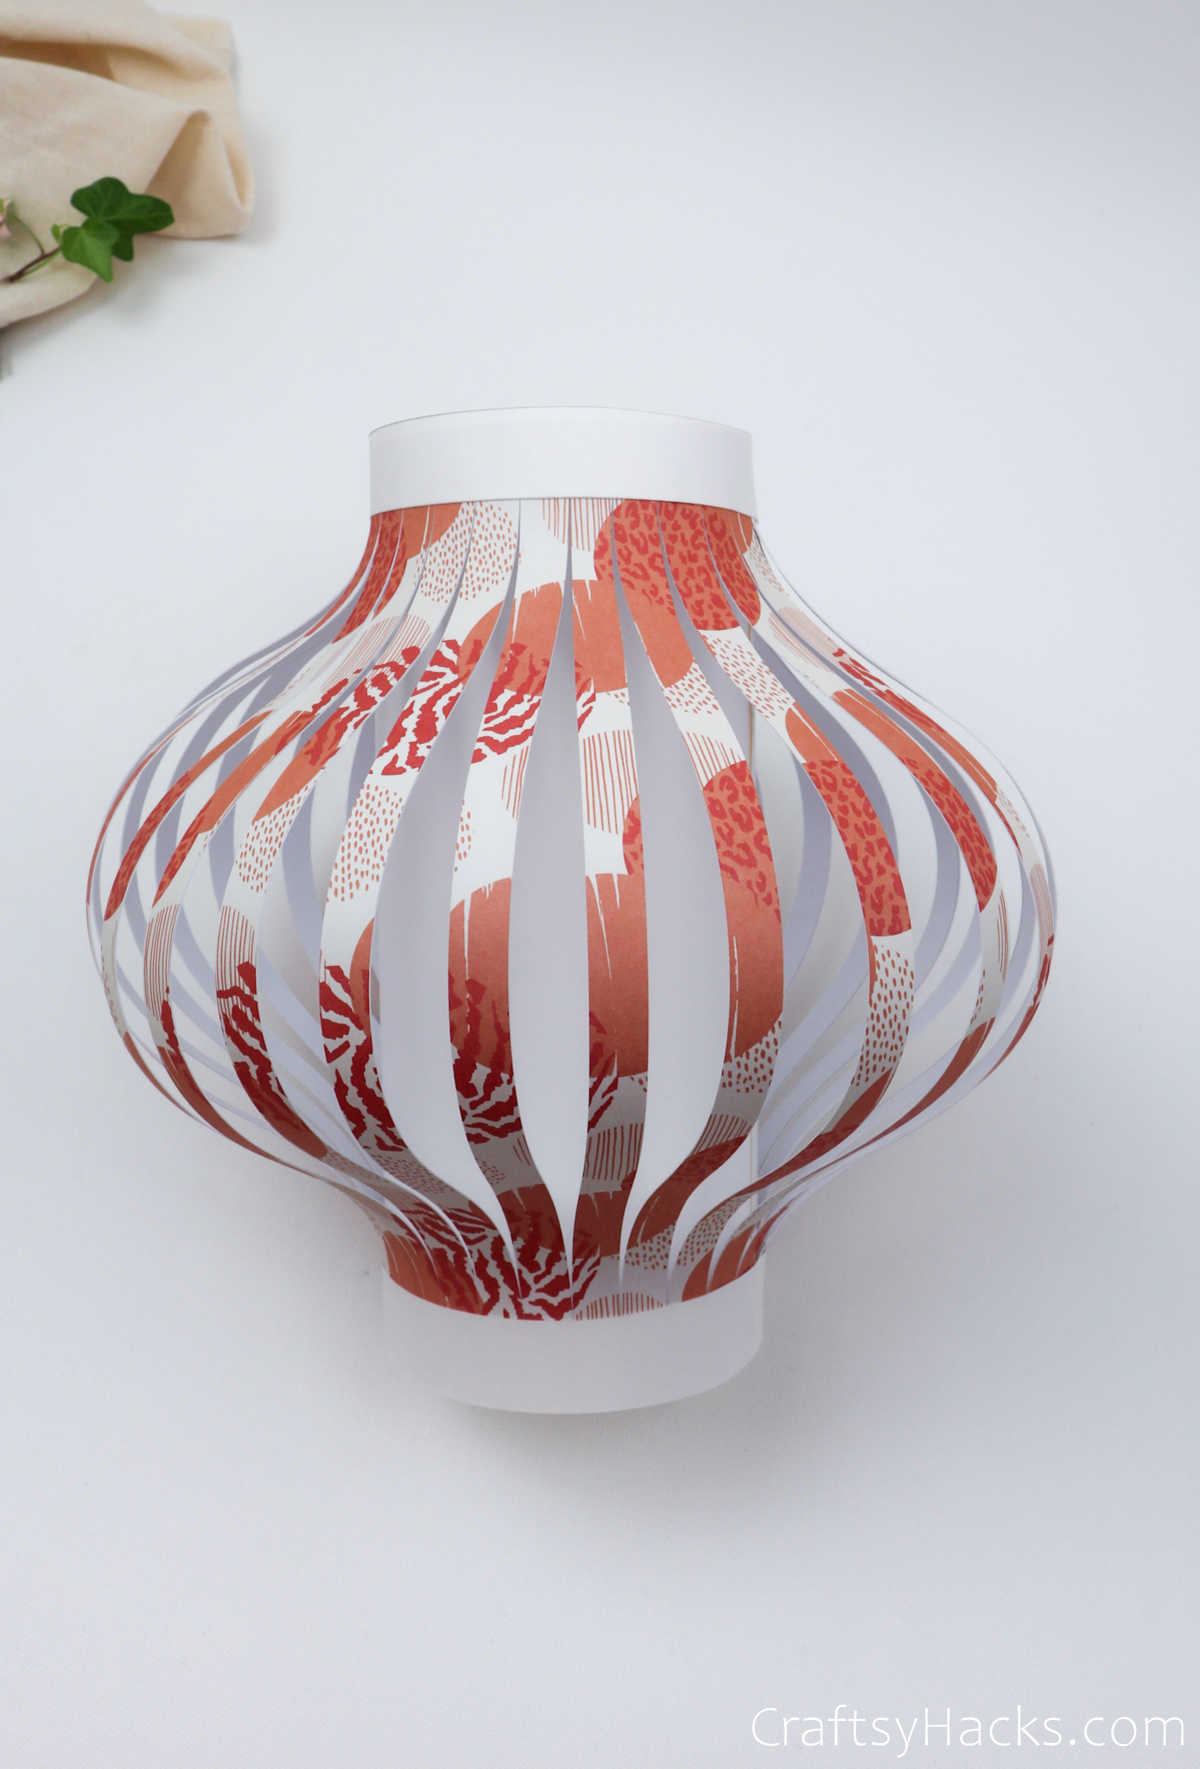
The white sheet is smaller than the craft paper, so when you tape them, you’ll find that the latter will create a tunnel or mound-like bubble down the middle.
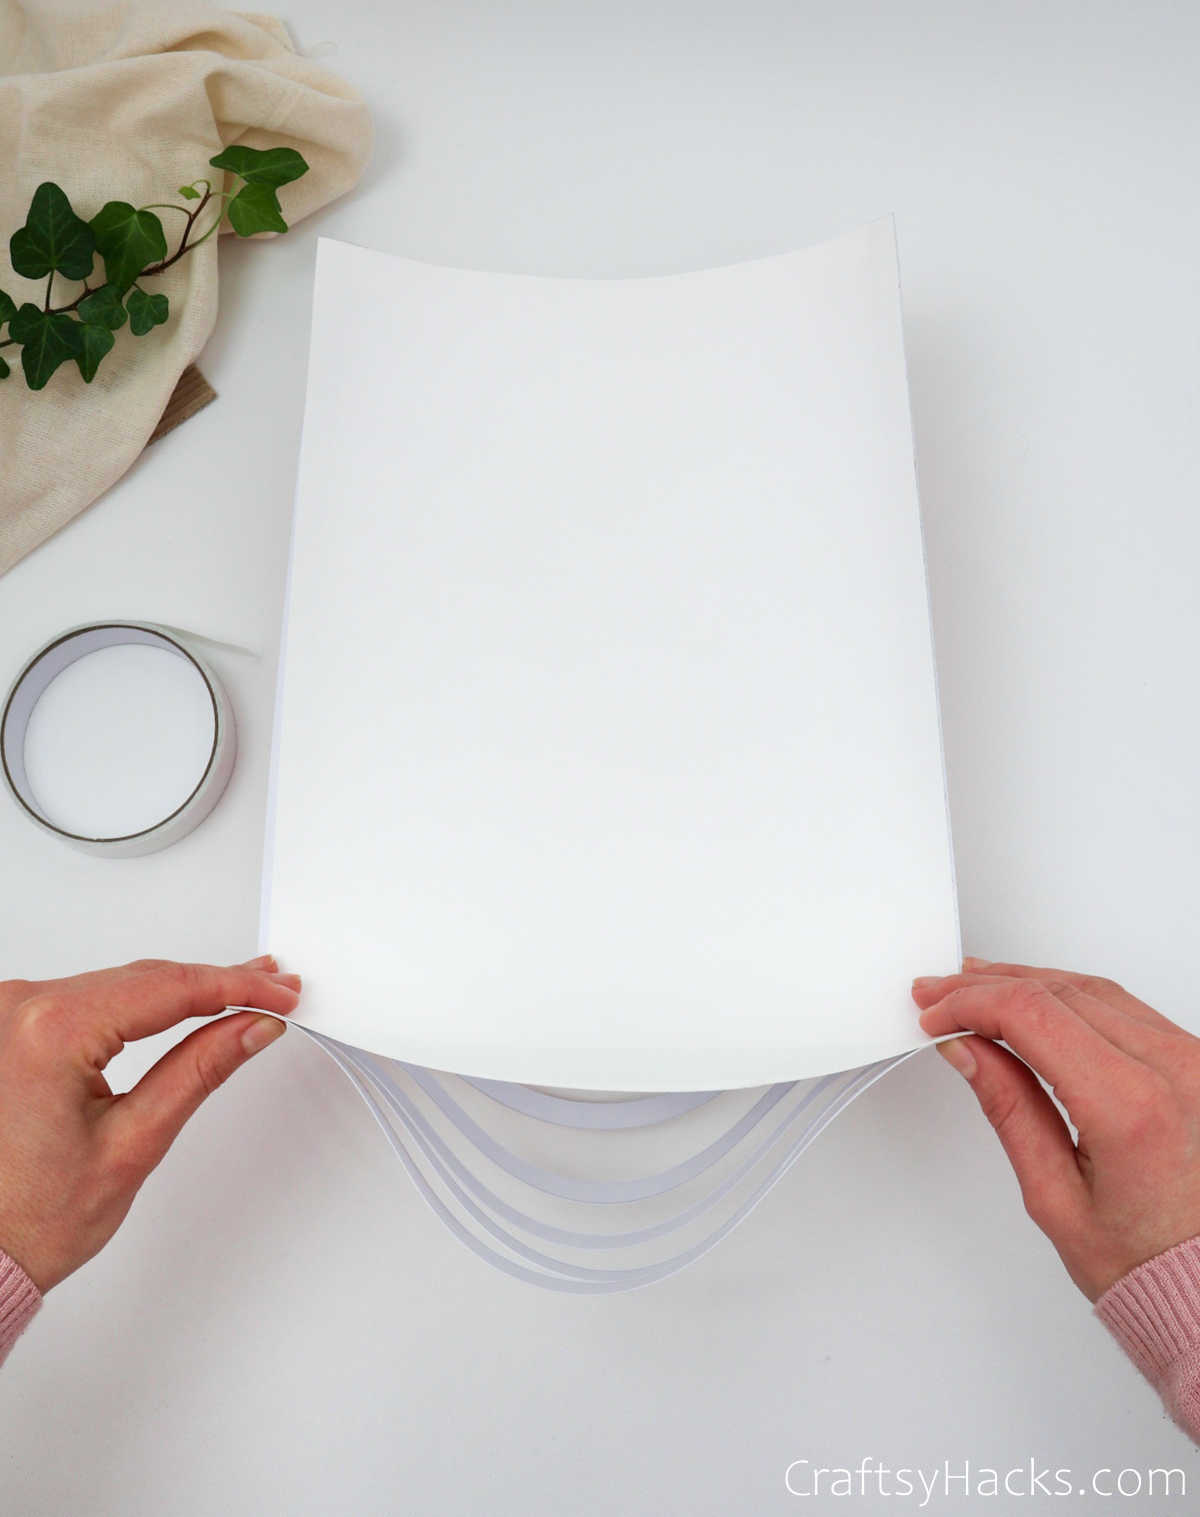
Step 8
Turn the paper around and tape another strip of double-sided tape, this time on the side of the paper, as seen here. Don’t worry; just trust the process, and you’ll see why we’re all out of proportion at the moment.
Step 9
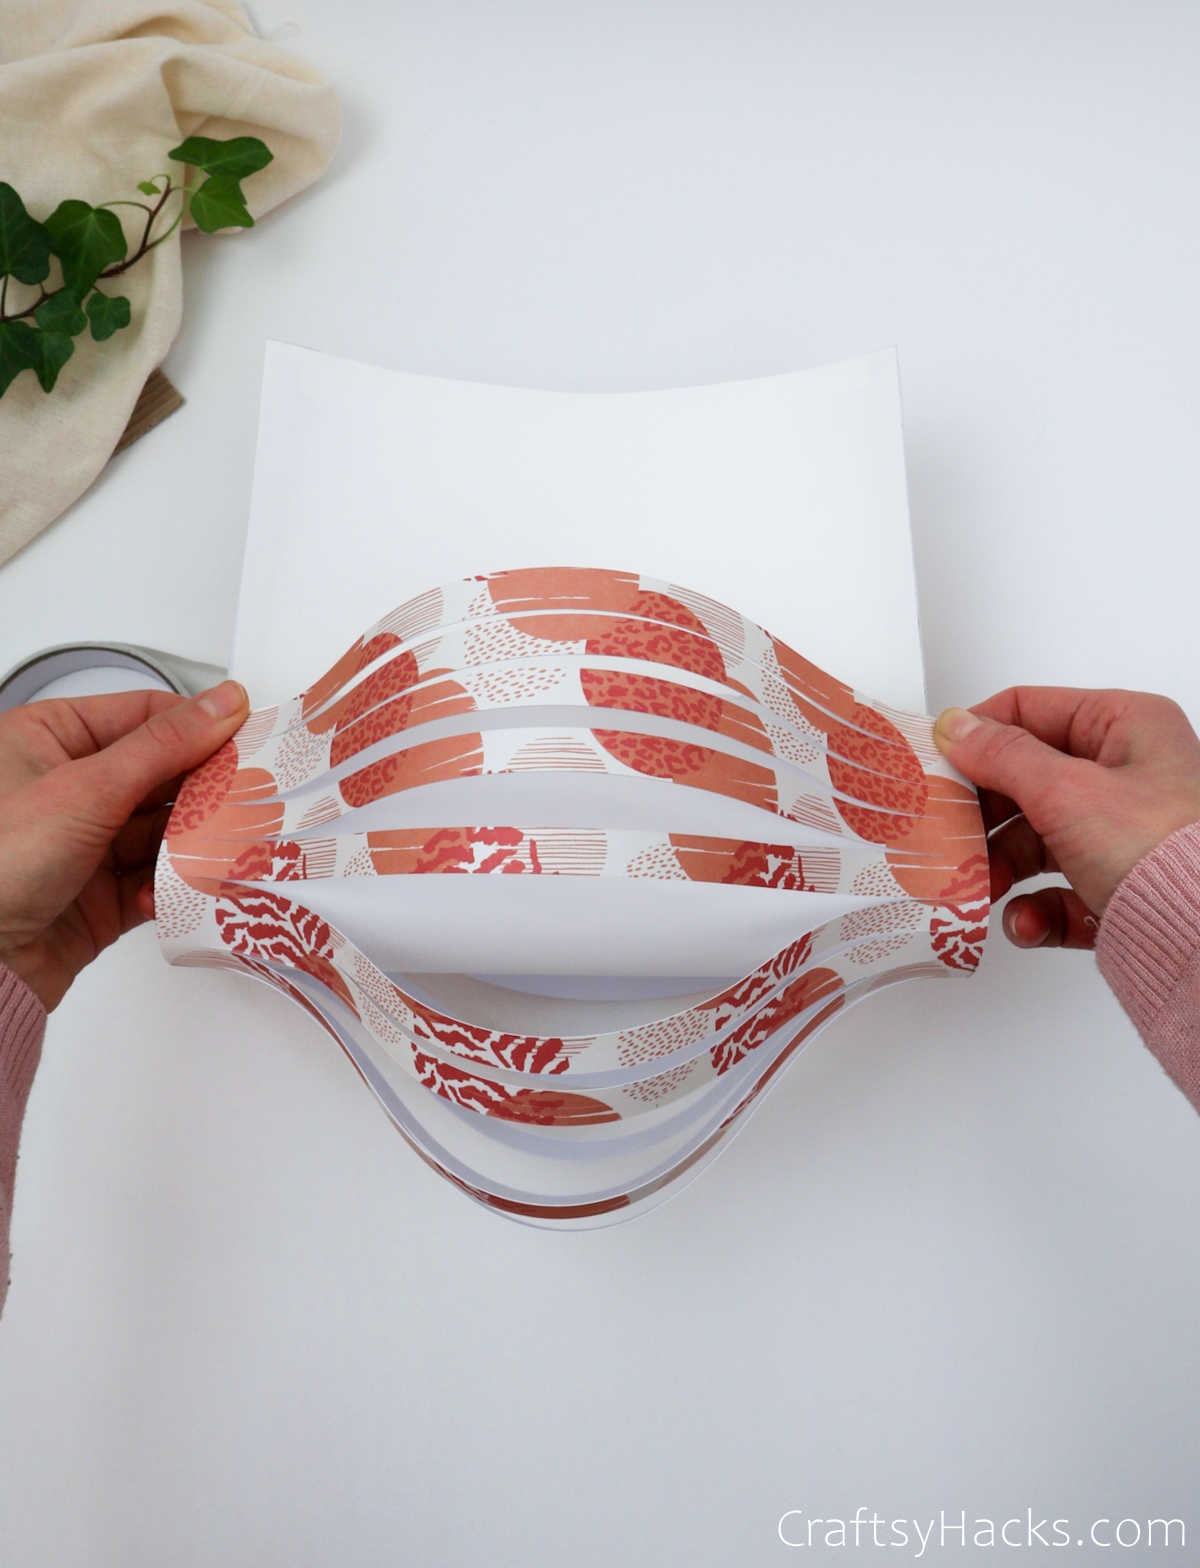
Next, grab the side you just taped and carefully fold it over to the opposite end.
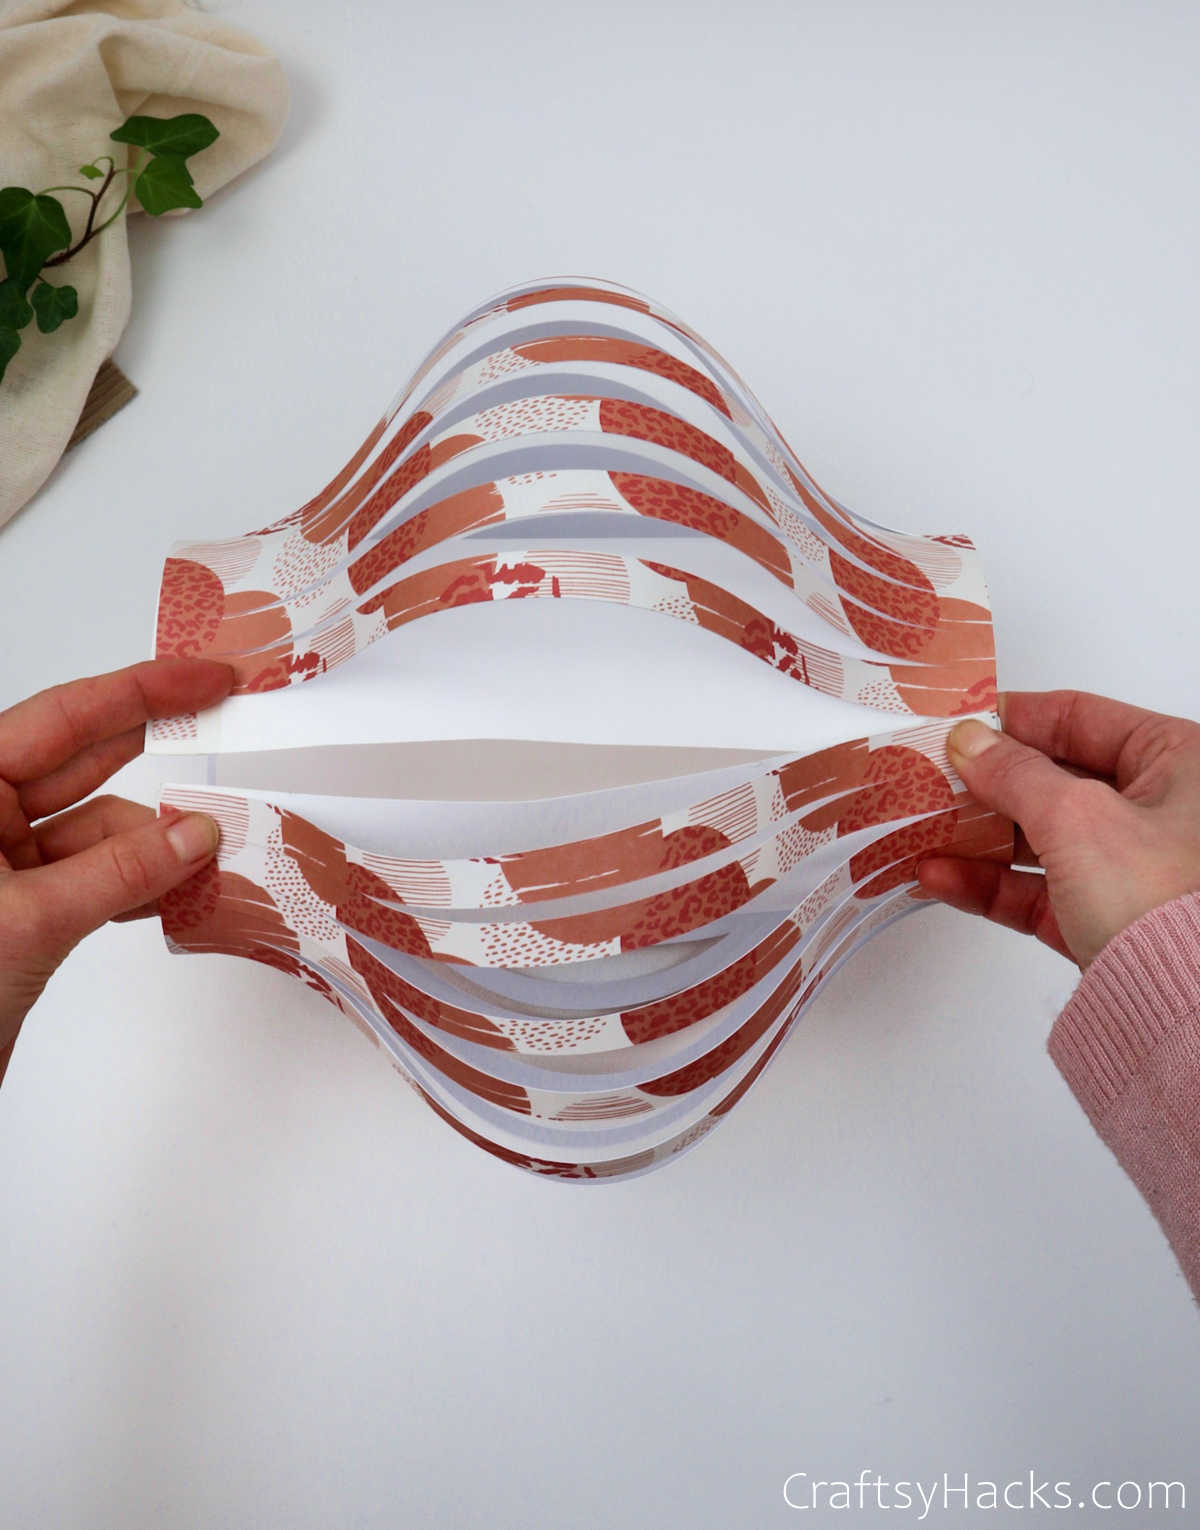
Remember when you cut out one strip to leave a gap on that end? Well, you’re going to stick the taped side to that end of the paper. Don’t you just love how the craft paper strips are billowing out?
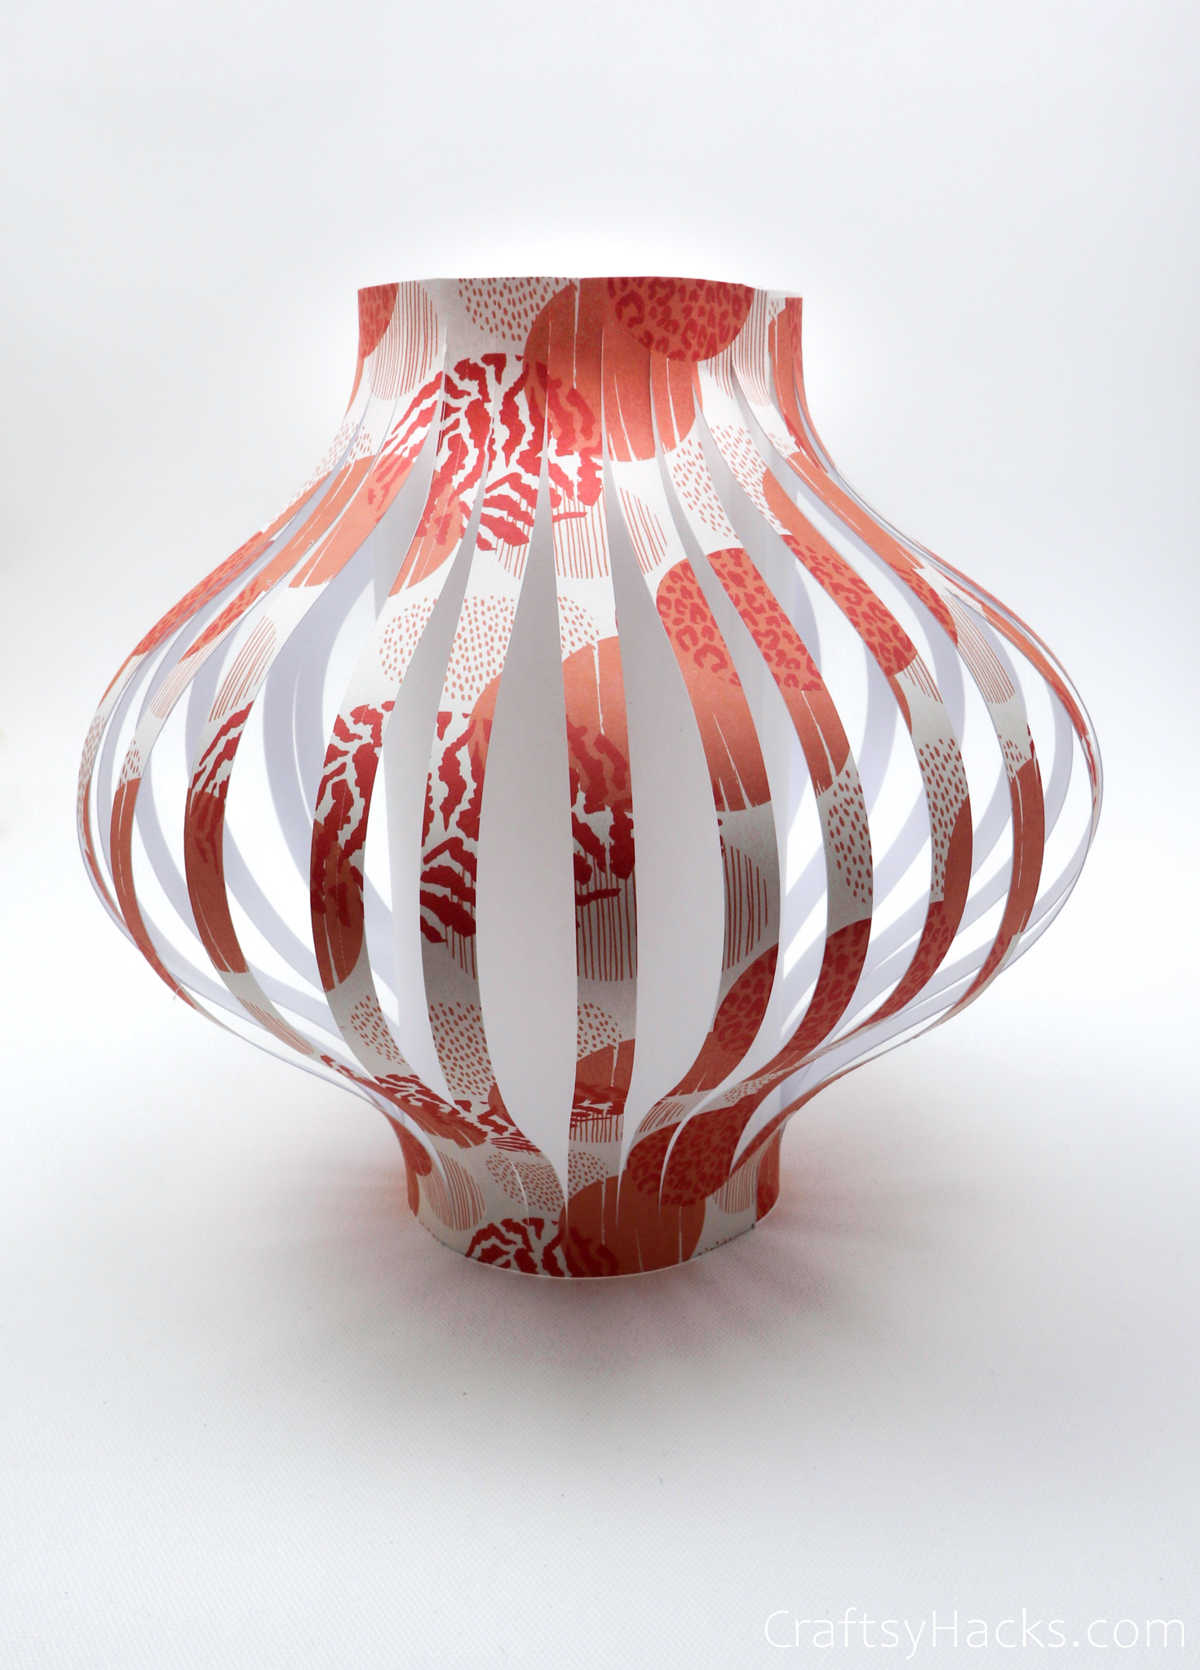
Your lantern should look something like this once you’ve taped the ends together.
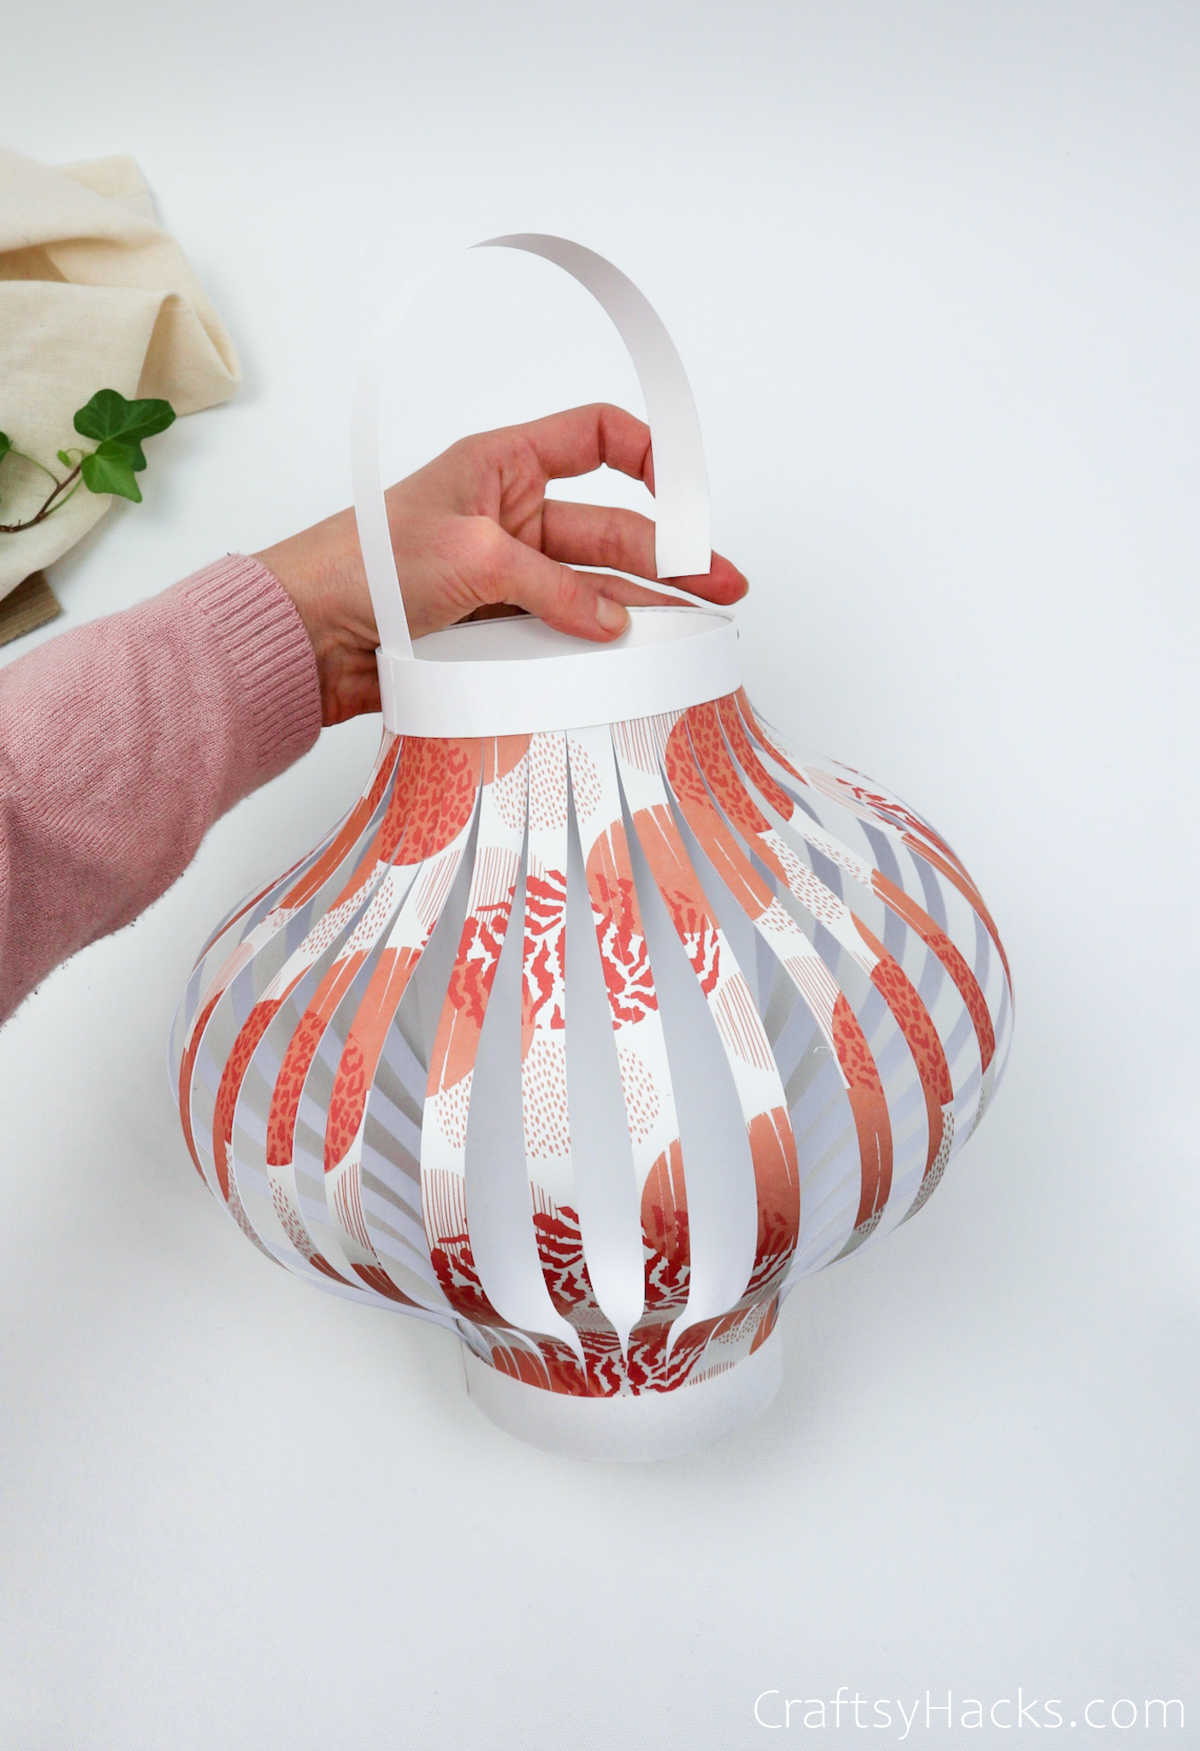
Step 10
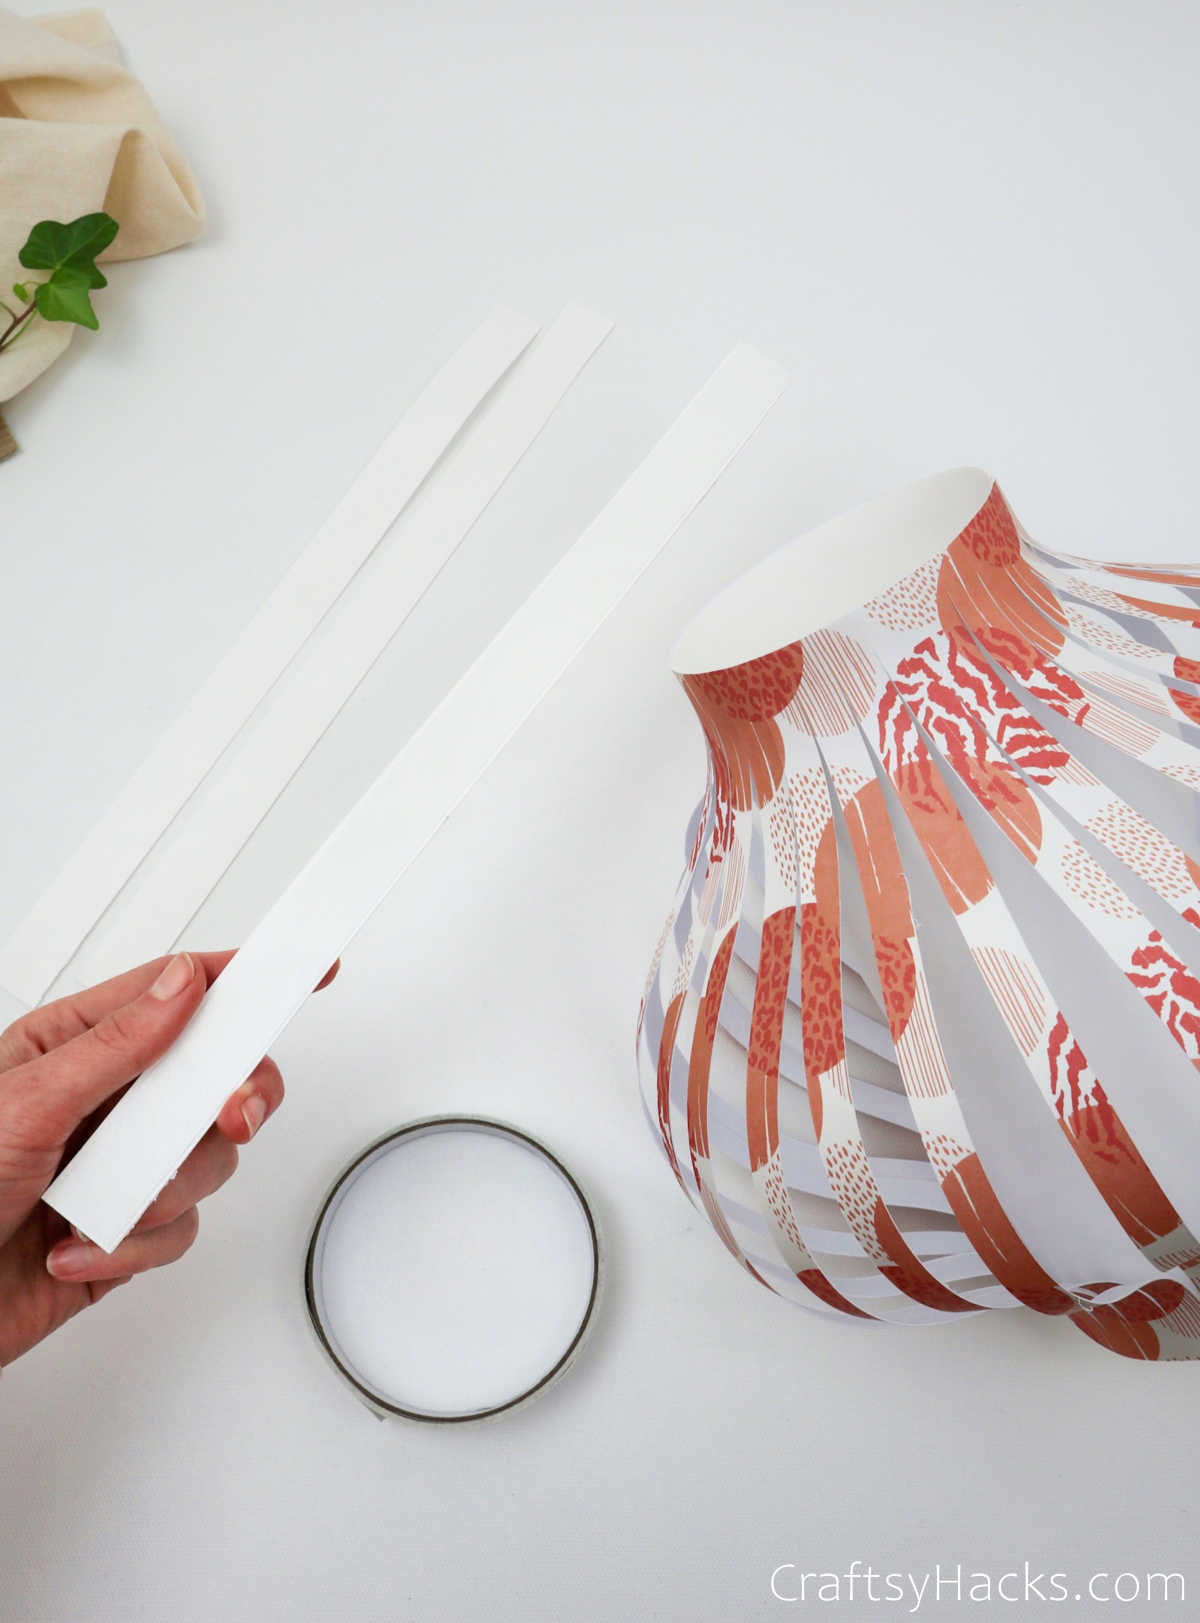
But we’re not quite done just yet. If you want a little extra jazz and a better finish for your lantern, then start by cutting two strips—three strips if you want a handle—of white paper.
Step 11
Tape a bit of double-sided tape along two of the strips and stick them around the top and bottom of the lantern.
With the last strip, simply tape either end of the paper and fold it into a curved handle as you stick it in place at the top.
Step 12
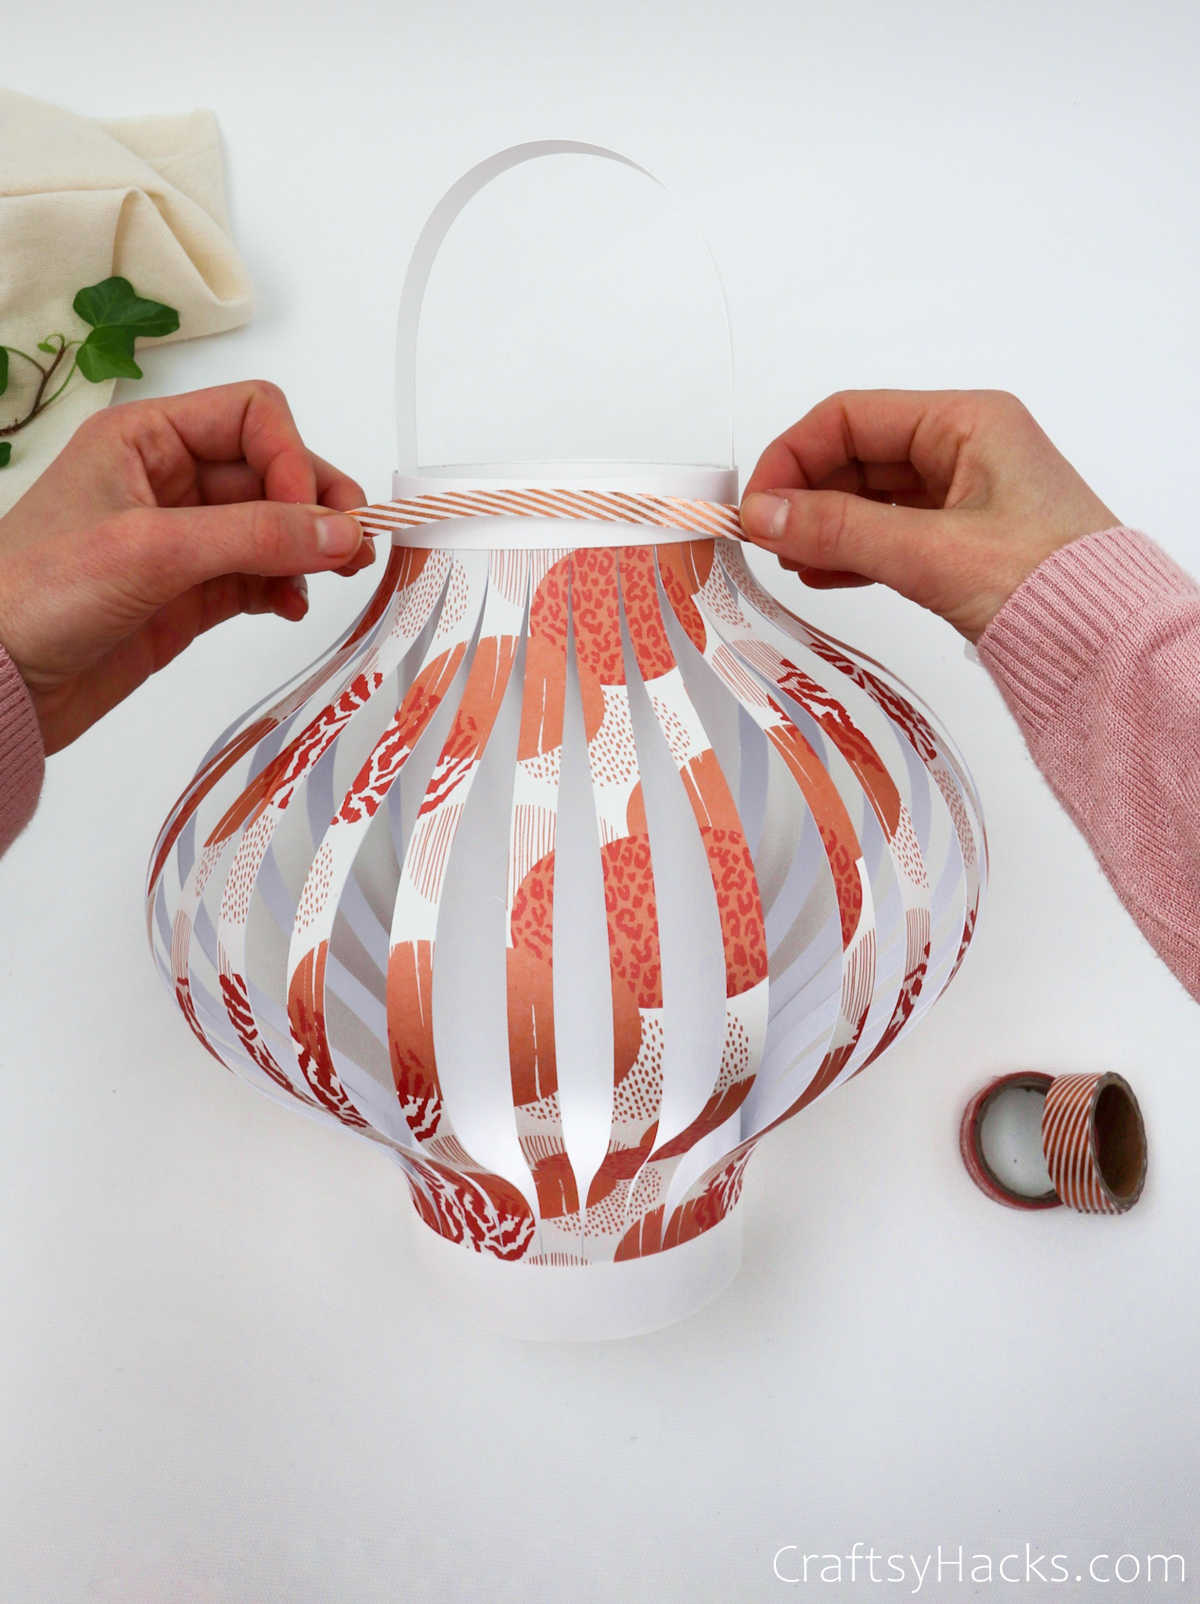
Feel free to decorate your paper lantern with washi tape, glitter, and any other embellishments you can think of.
You can also place an electric tea light candle inside to light it up.