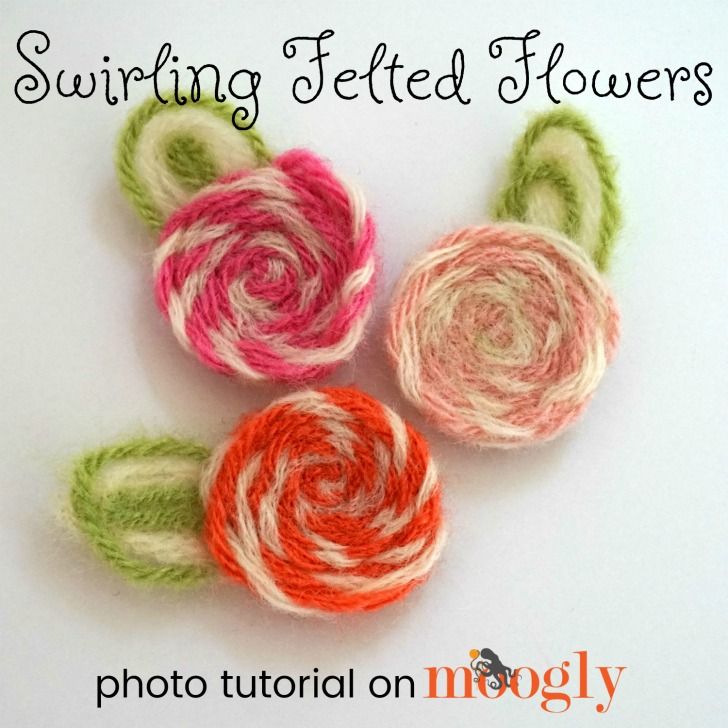
Crochet Swirling Felted Flowers
Crochet Swirling Felted Flowers are a delightful and fun project that brings colorful blooms to life through the art of crafting. These whimsical creations add a touch of charm to any room or outfit, making them a perfect way to showcase your creativity and spread a little cheer. With their unique swirling design and cozy felted texture, these flowers are sure to brighten up your day and bring a smile to your face. Whether you're a seasoned crocheter or just starting out, crafting these flowers is a joyful and rewarding experience that you'll love to share with friends and family.
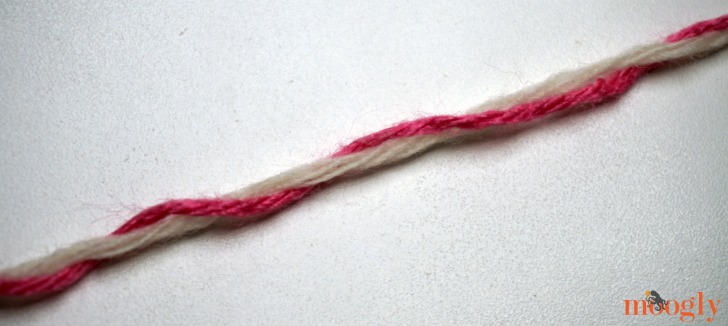
Step 1 - Cut a 30" length of Vanna's Palette (any color) and a 30" length of Fisherman's Wool. (For larger flowers cut longer lengths, for smaller flowers cut shorter lengths, just make sure they are the same length).

Step 2 - Twist the yarns together - they'll want to come untwisted, just keep twisting them together as you continue the next steps!
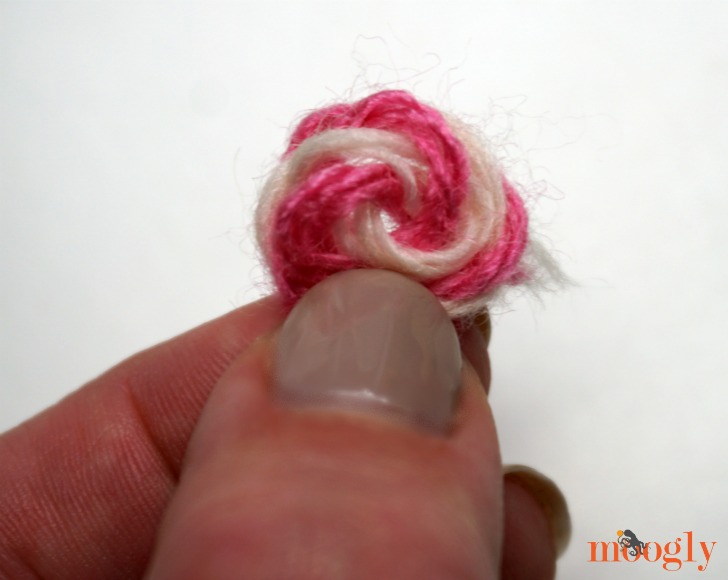
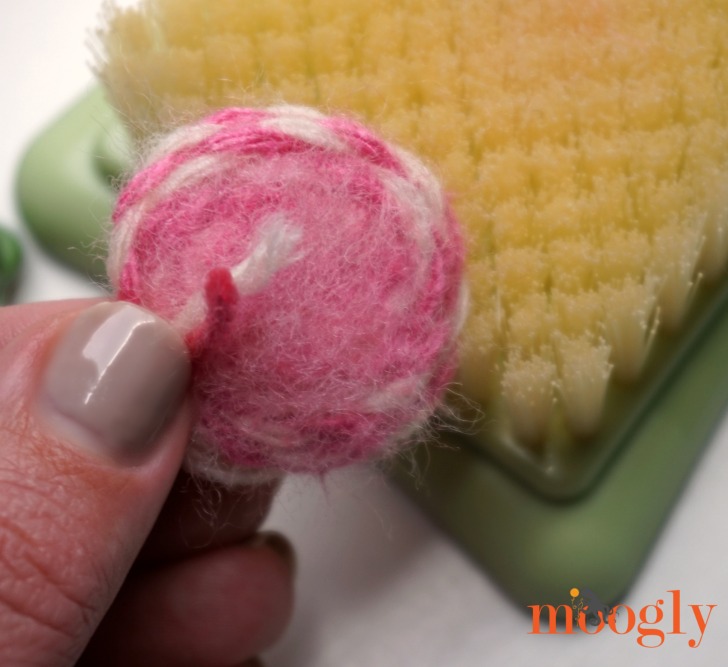
Step 3 - Start swirling the yarns at one end of the lengths, until you have a small circle. This can be a little fiddly, just try to get them in a circle with the ends on the bottom.
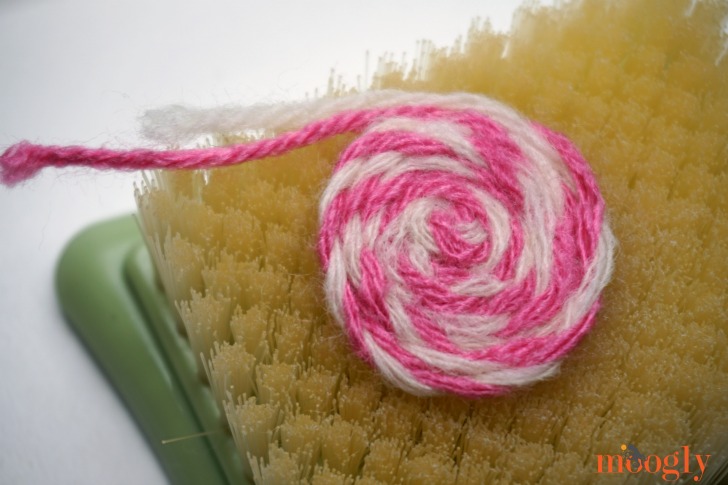
Step 4 - Place the swirled portion on the felting mat, and use your felting tool to start felting the yarns together - you can use the claw to hold it in place and save your fingers! Just keep poking the yarns together until they adhere to each other.

Step 5 - Keep swirling and stabbing, creating a flat disk. Be sure to twist the yarns together as you go! You need the acrylic yarn to be wrapped in the wool yarn so that it will be trapped inside the project.
Step 6 - When you come to the end (or your flower is big enough), trim off the excess yarn and tuck the ends underneath. Felt these down securely, and set the flower disk aside.

Step 2 - Pinching the yarns together in the middle, use your fingers to create a leaf-y shape and the needle felting tool to stab it until it comes together - be sure to watch your fingers!
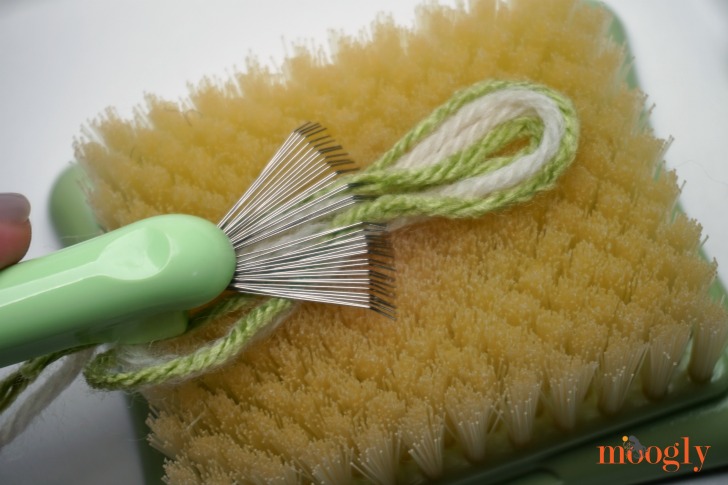
Step 3 - After the leaf portion is formed, cut off the excess yarn leaving unfelted ends to be attached to flower.
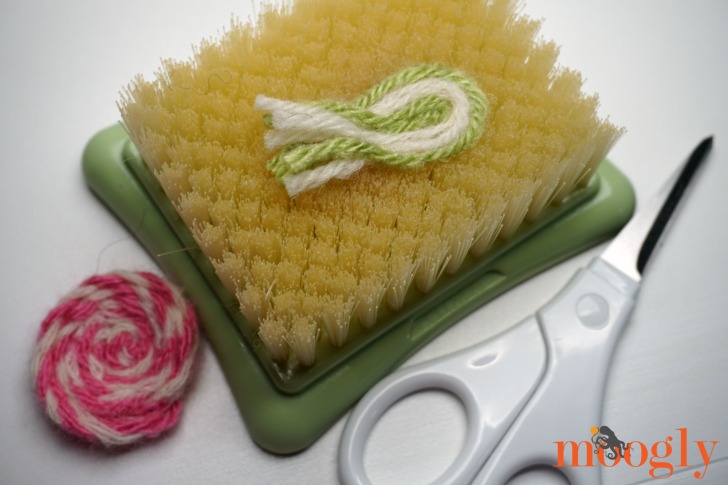
Step 4 - Place the flower, right side up, on top of the un-felted ends of the leaf. Stabbing time! Use the needle felting tool to poke the flower until the leaves are attached.

That's it.