These delightful Fabric Bunny Treat Bags are the perfect addition to any Easter celebration or springtime event! With their charming bunny design and pastel colors, they add a touch of whimsy to your festivities. These treat bags are not only adorable but also practical, making them a fun way to share goodies with friends and family. Whether you use them for Easter egg hunts or as party favors, these bags are sure to bring smiles to everyone's faces. So hop on over and grab some of these cute Fabric Bunny Treat Bags to add a playful touch to your next gathering!

Supplies
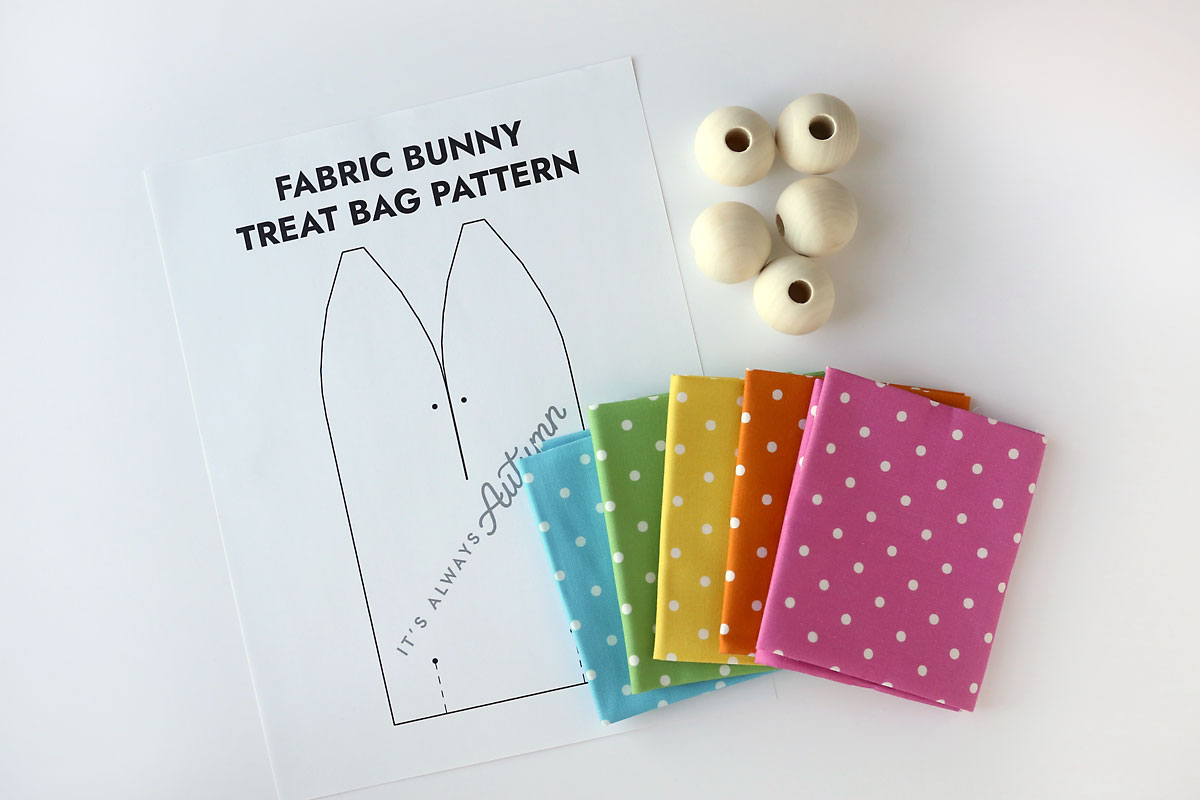
Here’s what you need to make fabric bunny treat bags:
Lightweight cotton fabric: for each bunny you’ll use two pieces of fabric that are each 5×9 inches, making this a great project for using up scraps. You can make four bunnies out of one fat quarter.
Wood Bead: for each bunny you’ll need one large wood bead with a large hole in the middle. I used these 35mm wood beads with a 10mm hole found on Amazon.
Sewing machine, thread, scissors
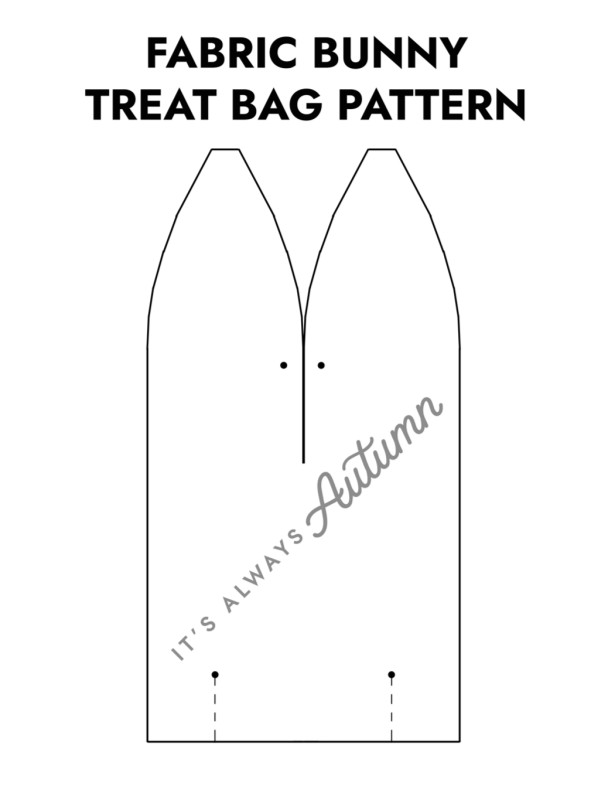
Pattern
How to Make Fabric Bunny Treat Bags
Cut the Pattern Pieces
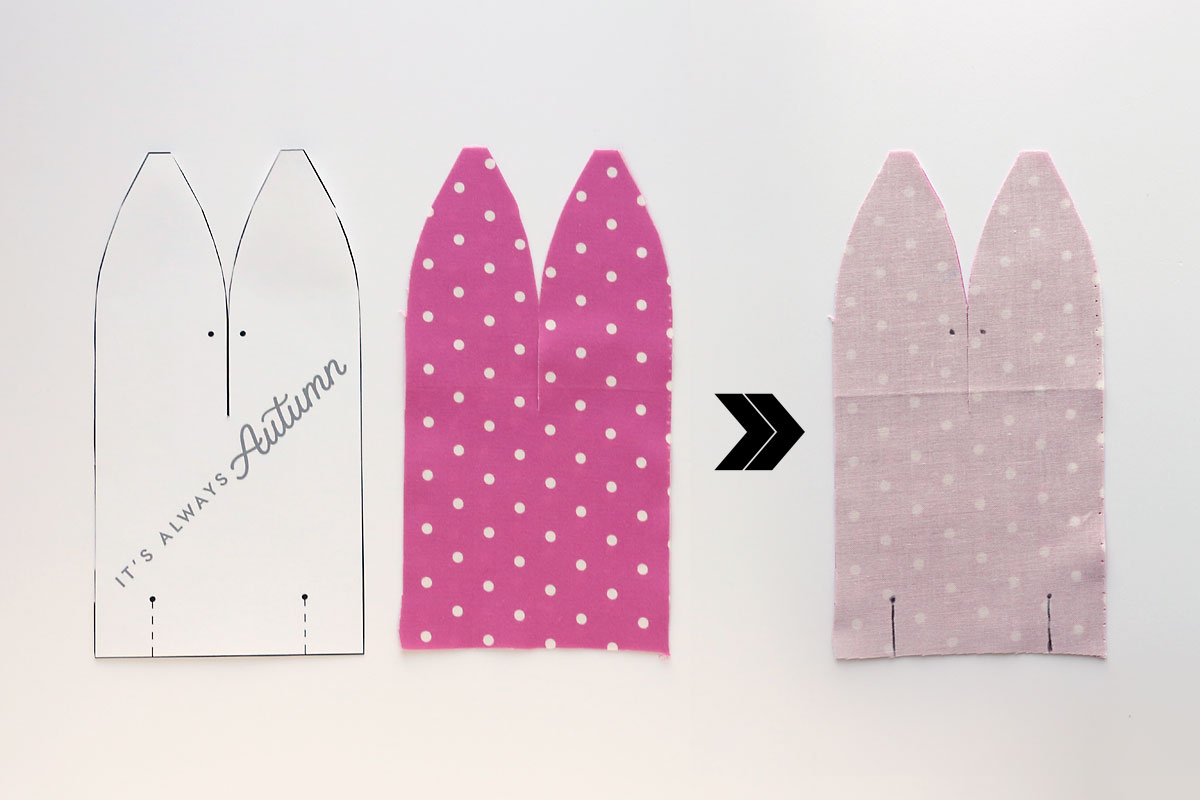
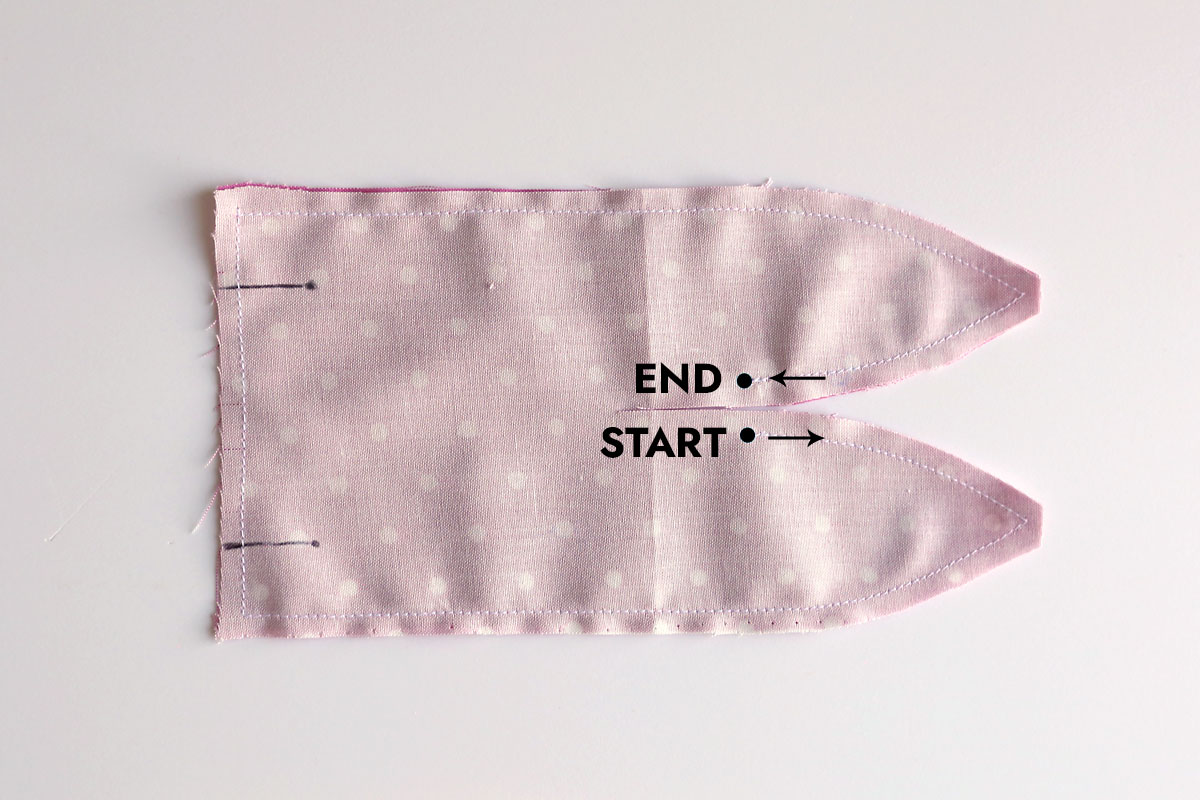
Begin by printing out the sewing pattern and cutting it out. Then use the pattern to cut two pieces from your lightweight cotton fabric. Cut on all the solid lines, noting that in the center between the ears the cut line extends down a ways. Then place the two piece right sides together. There are some dots and dashed lines on the pattern; transfer those to the wrong side of the fabric with a pencil or pen that will not bleed through the fabric.
Sew the Bunny Together
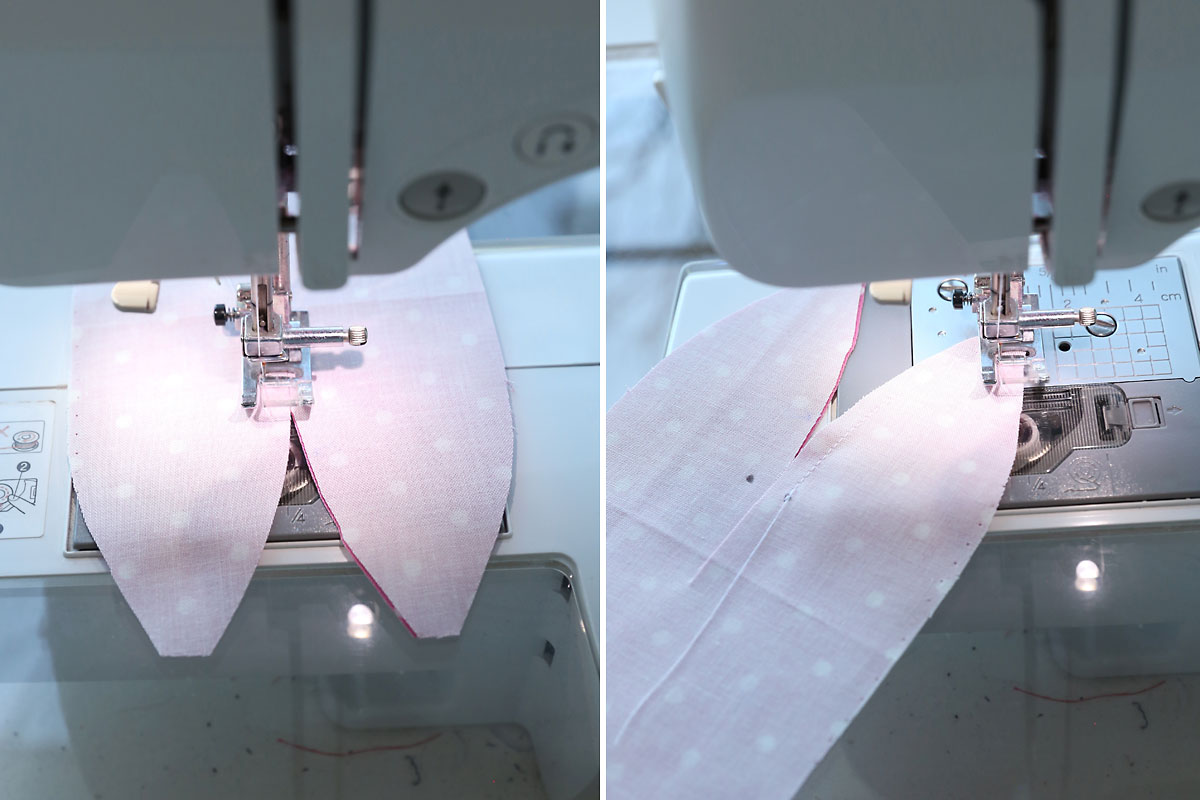
Now it’s time to sew the two pieces together. Use a 1/4 inch seam allowance. You will begin sewing at one of the dots on an ear, sewing out toward the end of the ear first, then down the ear and side, across the bottom, back up the other side and ear, and down the inside of the second ear until you hit the dot. Backstitch when you start and finish.
The first photo below shows how the fabric will look in your machine when you begin sewing. When you need to turn a corner, put the needle down then lift the presser foot up and rotate the fabric as needed. Put the presser foot back down and continue sewing.
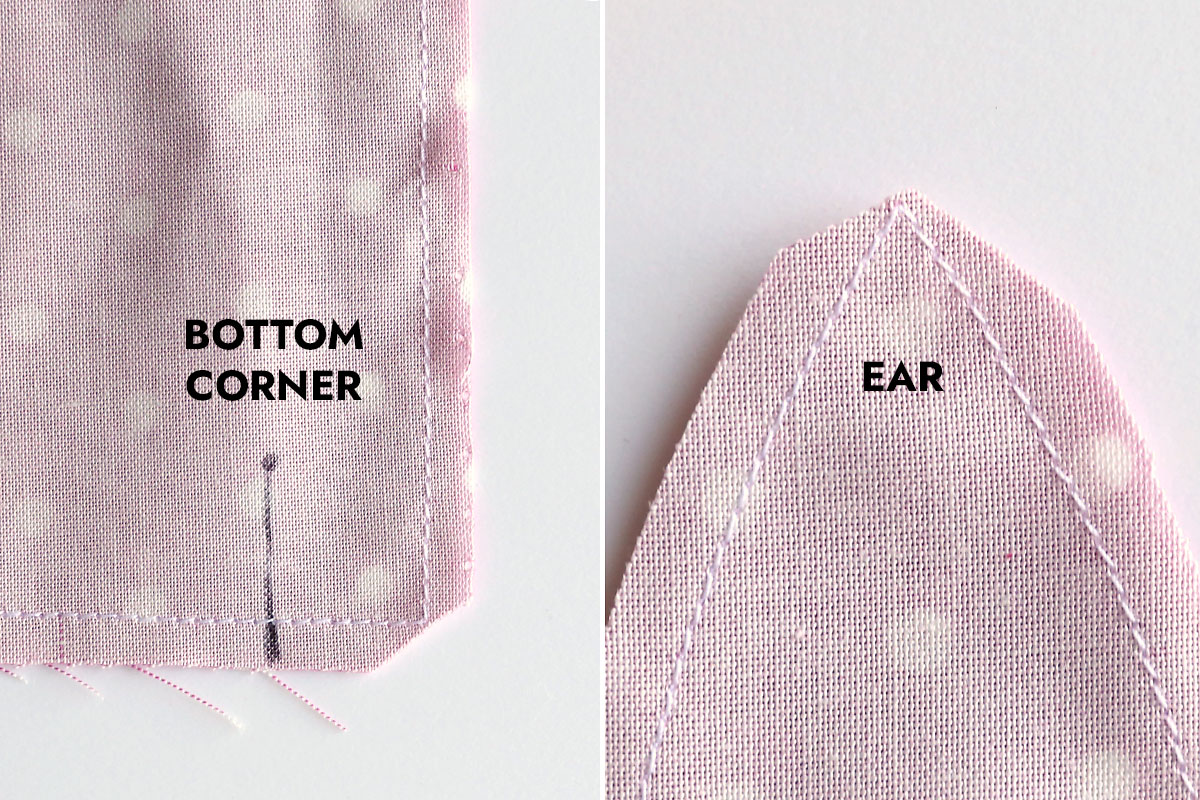
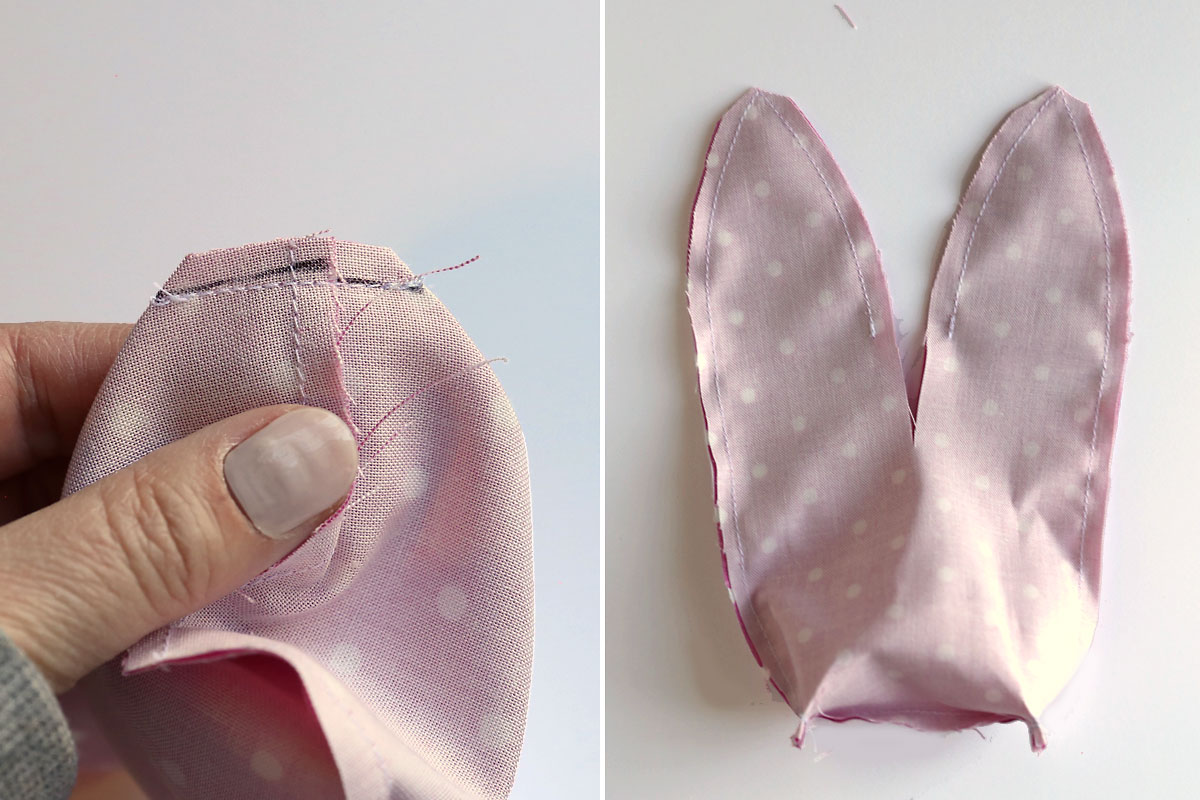
Clip the Corners
Now that the two pieces are sewn together, you need to “clip the corners”. Along the bottom corners, cut away the seam allowance at a diagonal as shown in the first photo below. Cut close to the corner of the seam, but do not cut through it. Also cut away the seam allowance at the top of the ears as shown in the second photo below. This helps the bunny look nicer when you turn it right side out.
Box the Corners
The last sewing step is to “box” the corners to give the bunny a cuter shape. Hold the bunny so you can see the dot and line you transferred near one of the bottom corners. Imagine a diagonal line from the corner to the dot (first photo below). You are going to pinch the bottom seam and side seam together, creating a fold along that imagined diagonal line. Be sure to pull the two layers of fabric apart as you do this, and make sure the seams are lining up. As you do so, you will see the line you transferred from the pattern creating the bottom of a triangle (second photo below).
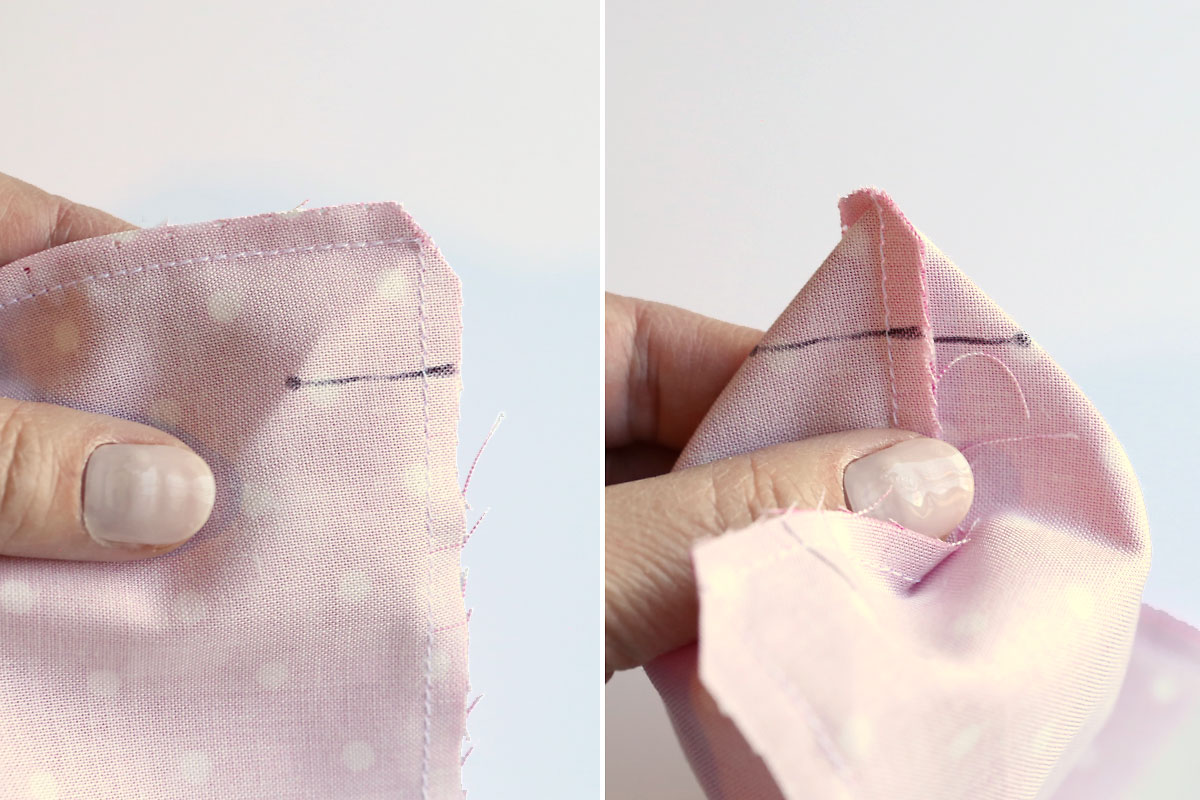
Sew along that line, backstitching at the beginning and end. Then trim off the corner. Repeat with the other corner. You can see that doing this gives the bunny bag some dimension:
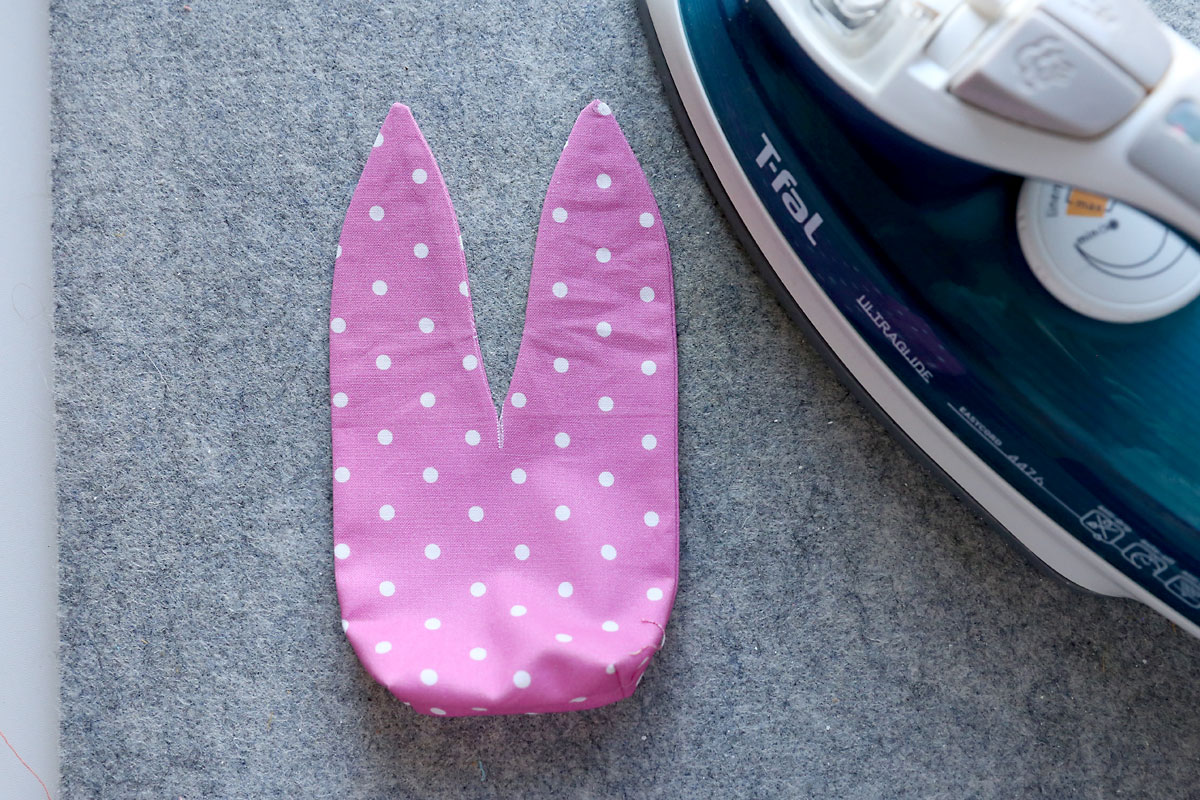
Turn and Press
Now you can turn the bunny right side out. Use a pencil or chopstick to push out the corner at each ear. Use an iron to press the side seams, but do not iron the bottom where the corners were boxed.
Fill and Finish
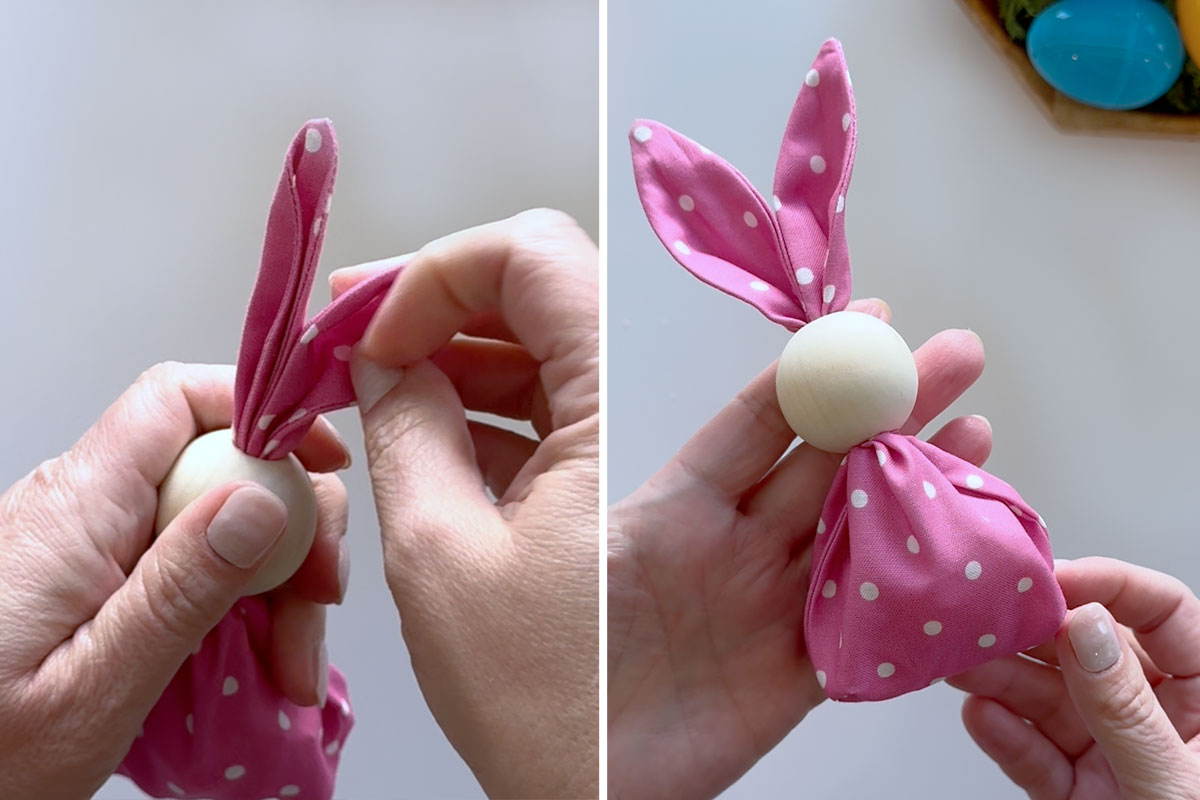
Now it’s time to fill the bunny with treats! Slide them in through the opening in between the ears. NOTE: if you just want to use these as decorations, not treat bags, you can stuff the body of the bunny with polyfil instead.
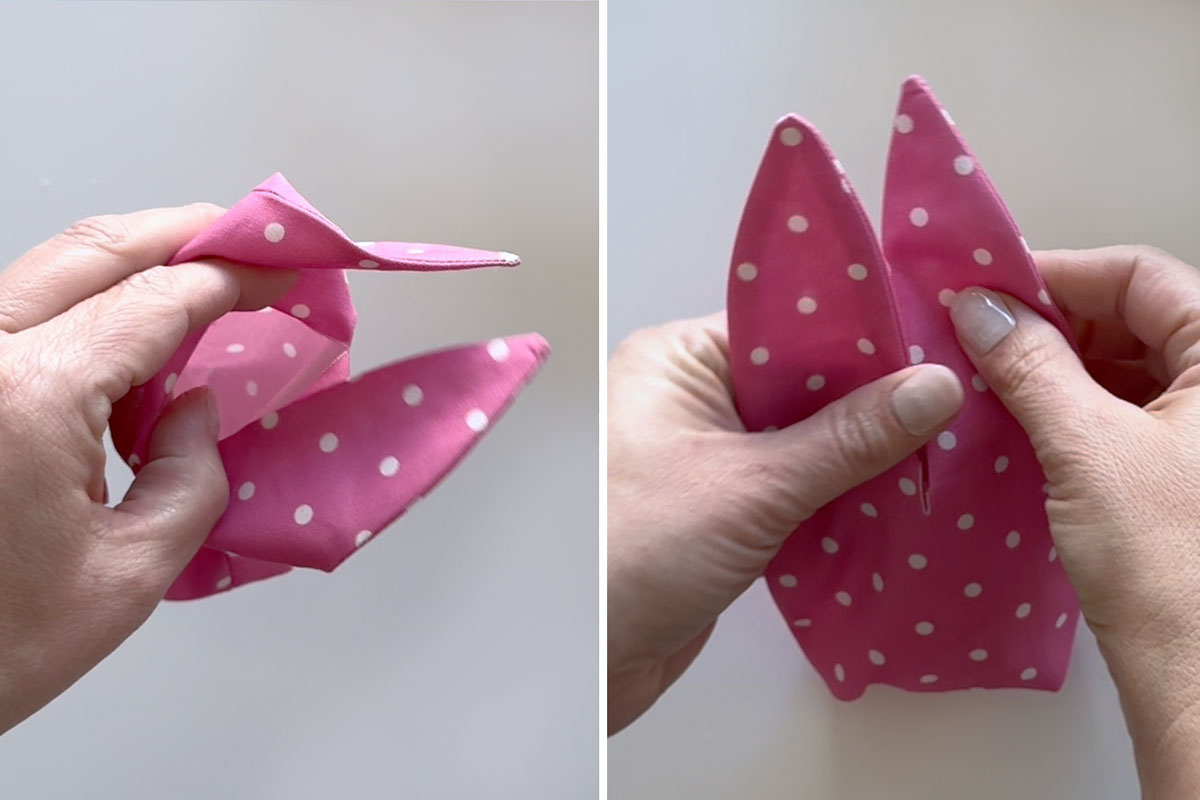
Now fold each ear on itself, then slide the ears through the hole in a large bead. You will likely need to fold each ear more than once, and twist the bead back and forth as you work the ears through it.
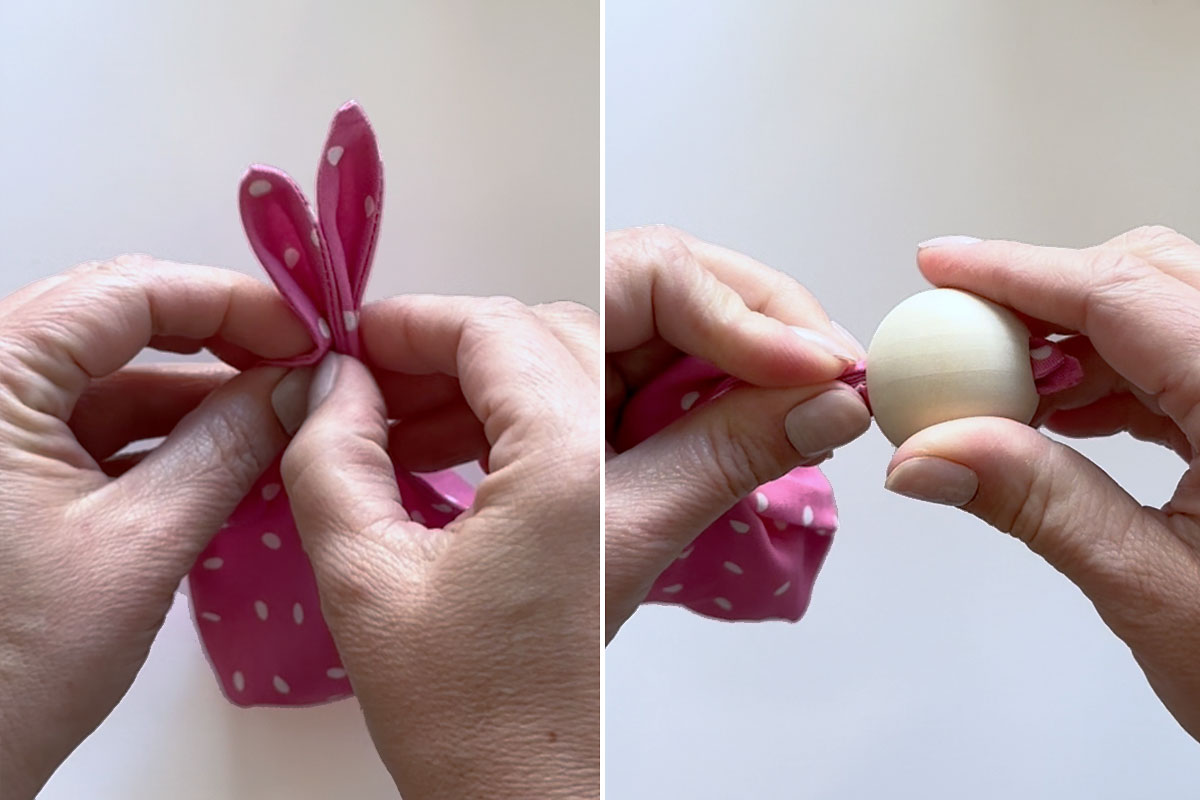
Pull the ears all the way through the bead, then straighten them out a bit as desired. Your bunny is ready to give away!