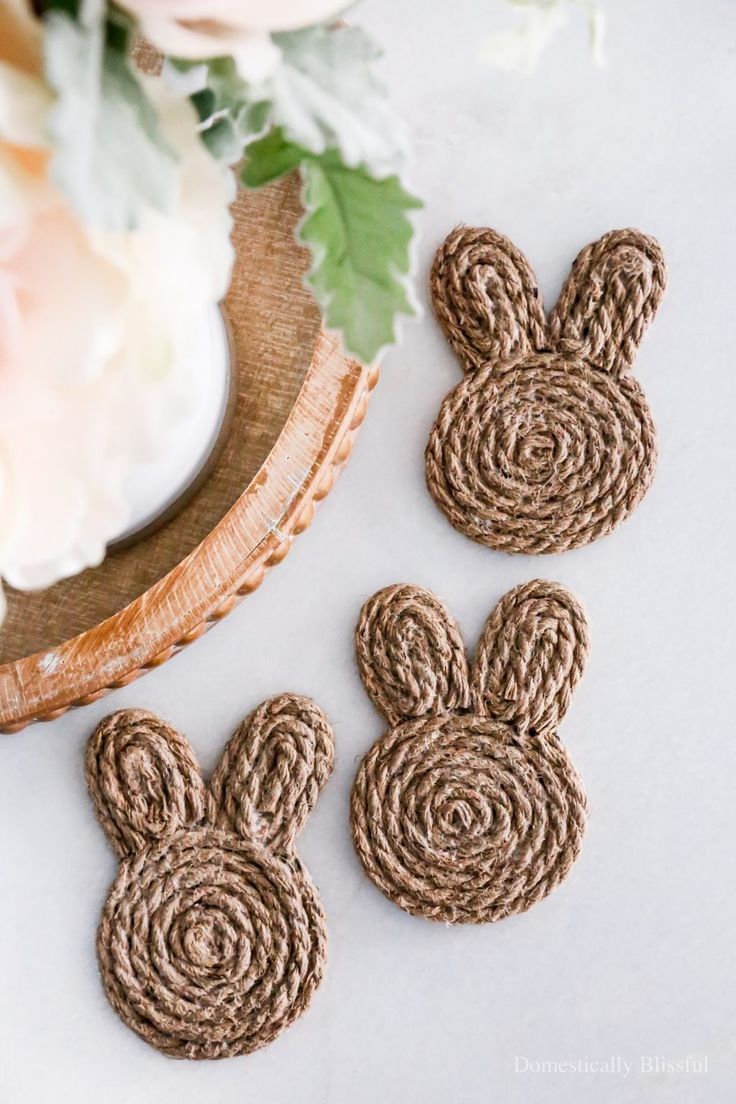
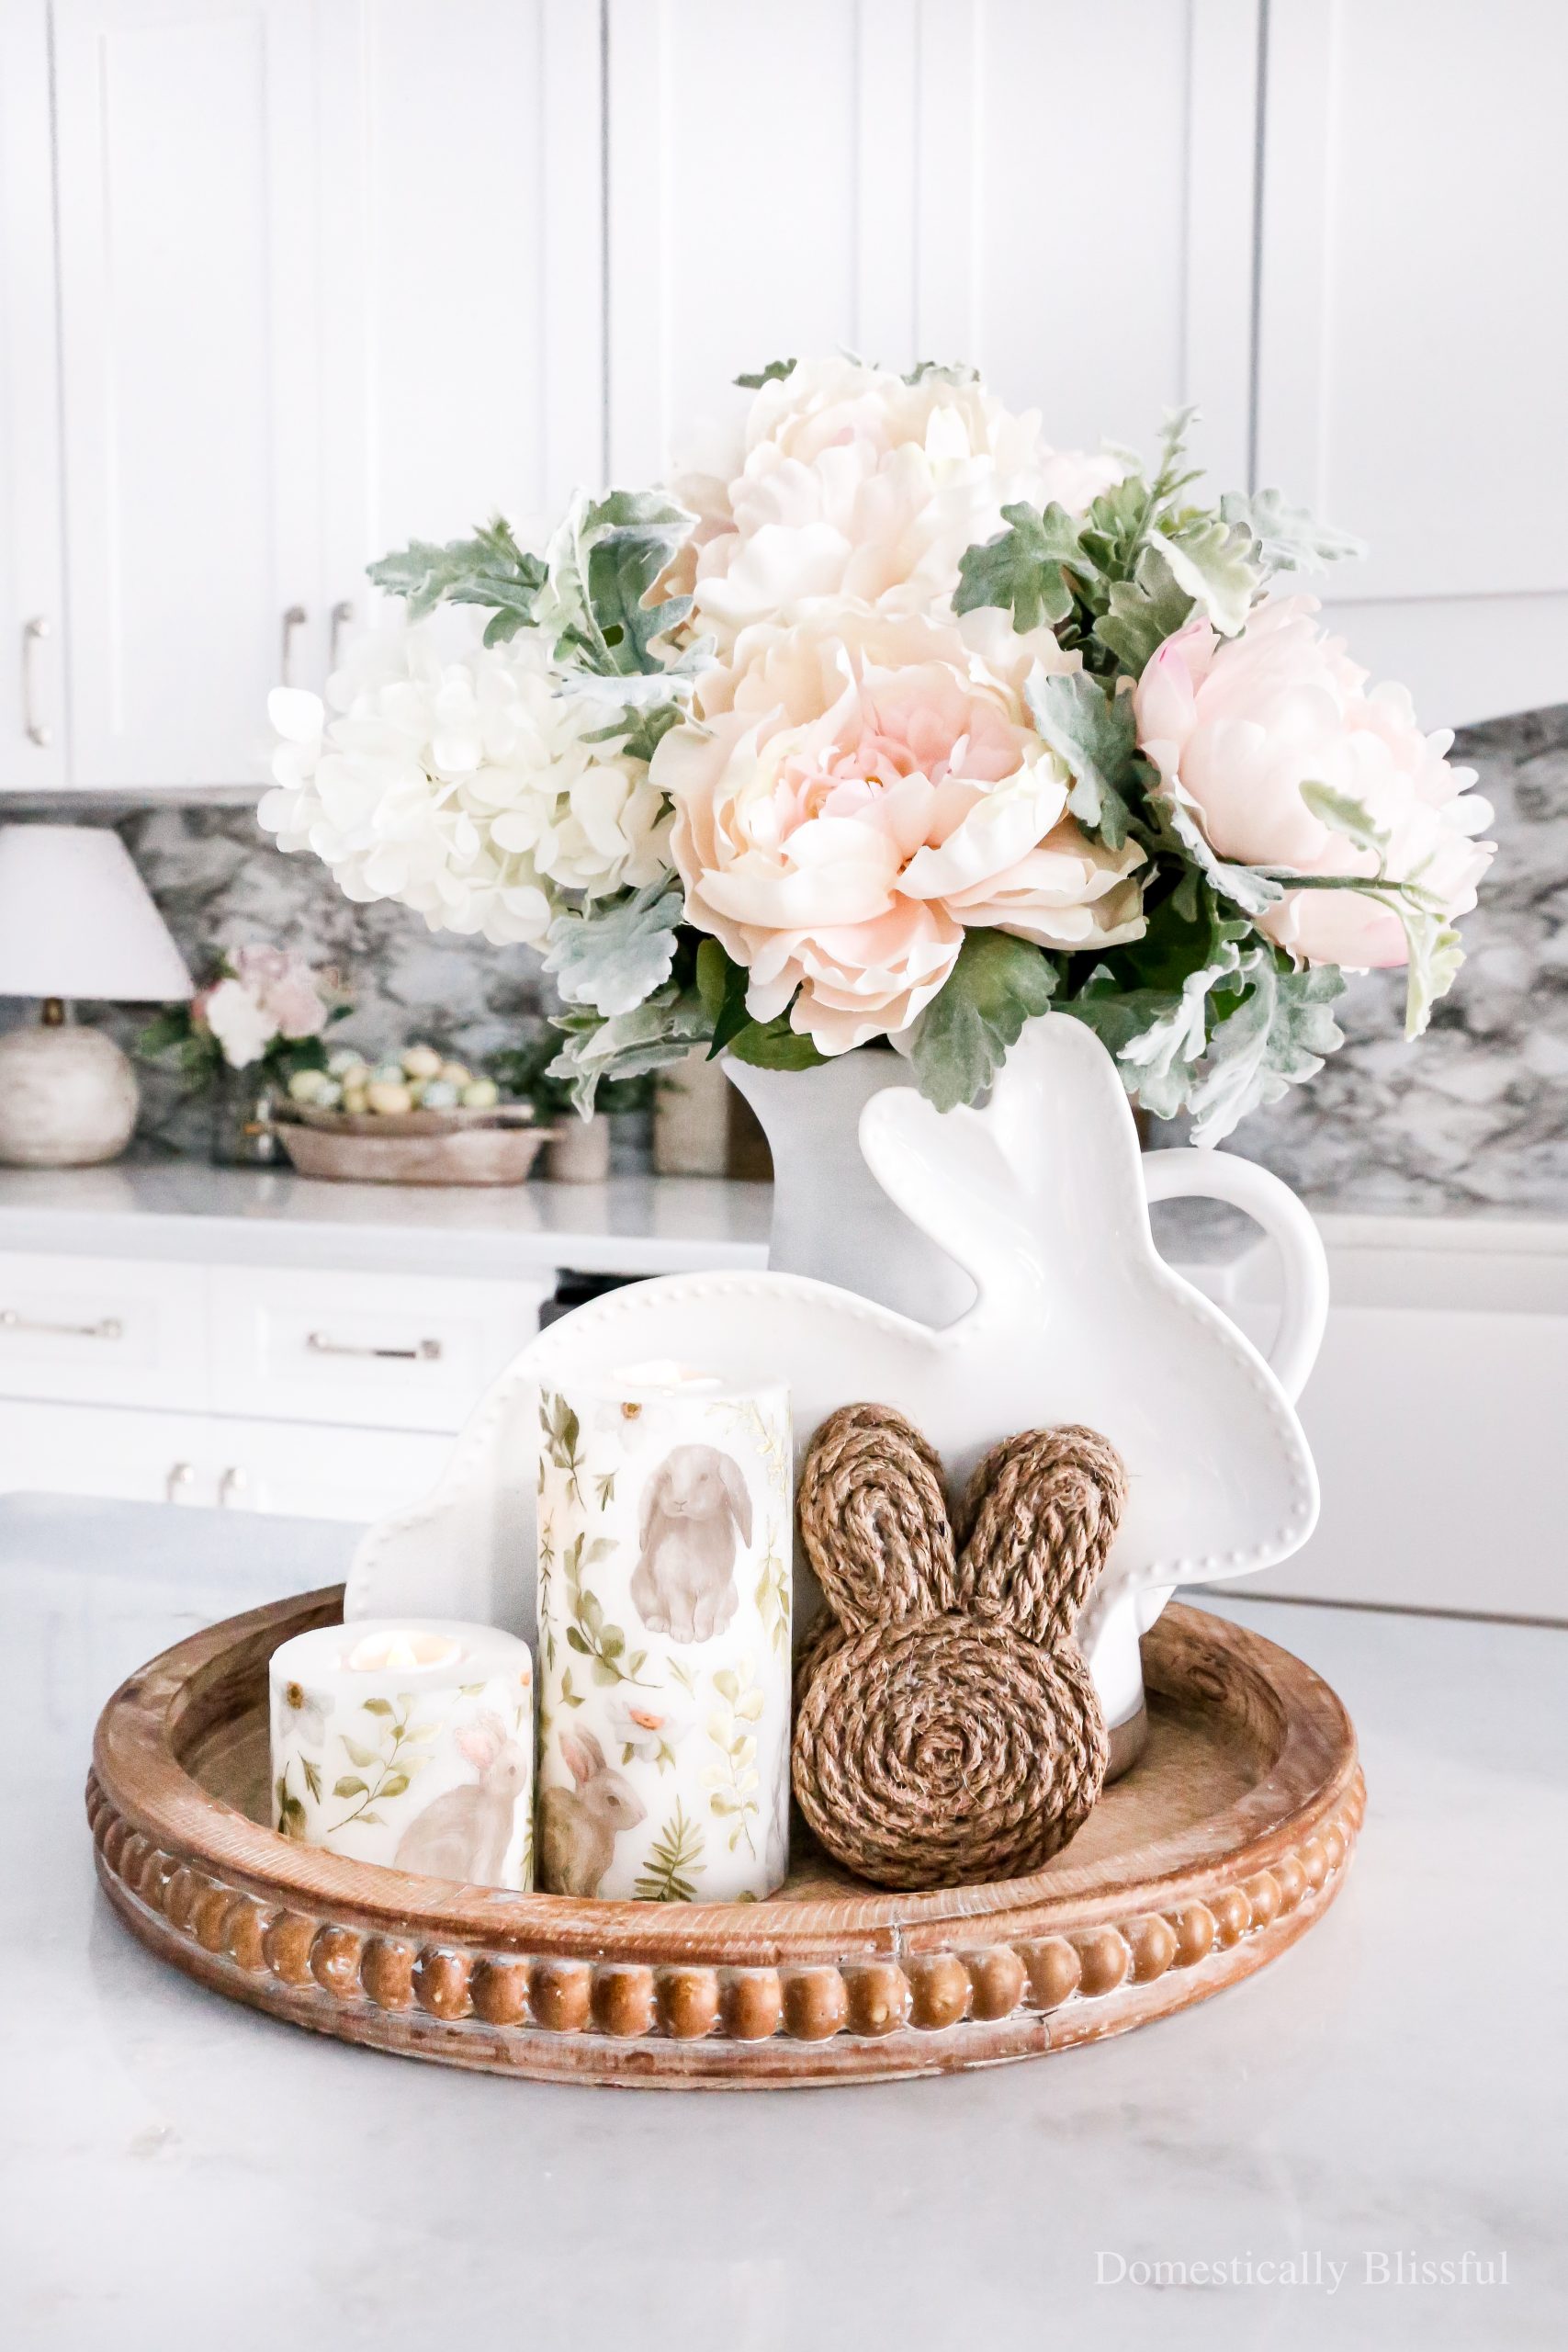
DIY Bunny Coasters
If you're looking to add a touch of charm to your home decor, why not try making DIY bunny coasters? These adorable coasters are not only practical but also bring a whimsical touch to your table settings. Whether you're hosting a spring gathering or just want to brighten up your coffee table, these DIY bunny coasters are sure to bring a smile to your face every time you use them. So hop to it and bring some bunny magic into your home today!
Materials:
- 7mm Rope
- Permanent Marker
- Felt
- Hot Glue Gun (low heat) & Glue
- Scissors
- Mod Podge
Instructions:
1. First, print and cut out a bunny printable.
2. Trace the printable bunny onto the felt with a permanent maker and cut out each felt bunny. I made 3 coasters so I traced/cut out 3 felt bunnies.
3. Take the end of the rope and hot glue it to the edge of the circle, and then continue to hot glue the rope in place around the edges of the felt bunny circle working around towards the center. Cut off the excess and hot glue the end to the center of the circle.
4. Next, hot glue the rope onto each bunny ear. I did a single piece on the outside of the ear and then swirled the rope in towards the center of the bunny ear. Cut off the excess and hot glue the end to the center of each ear.
5. Once the rope covers the entire felt bunny, brush Mod Podge over the whole bunny to seal it.
6. Let dry and enjoy!
No comments
Write a comment