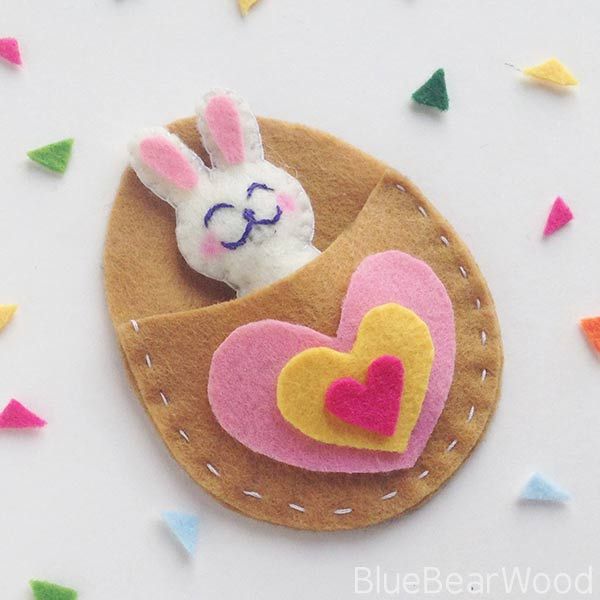
Creating your very own DIY felt bunny is such a fun and rewarding project to dive into! With just a few simple materials like felt, scissors, and stuffing, you can bring this adorable little critter to life. The best part is that you can customize it with different colors, patterns, and even add cute details like a bow or button eyes. So gather your supplies, get crafty, and before you know it, you'll have your own fluffy felt bunny hopping around to bring a smile to your face!
Materials Needed For The Felt Bunny Craft
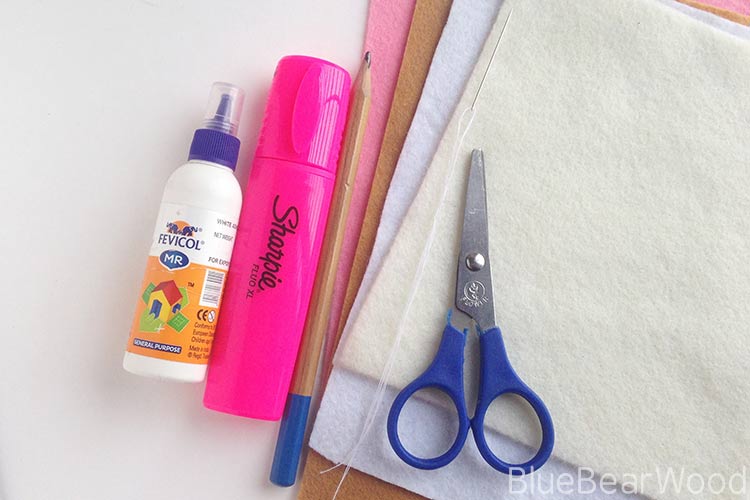
- You can use any coloured felt for this project but make sure the felt used is a wool mix. 100% synthetic felt is quite stiff, and in my opinion, does not work well in sewing projects like this
- Felt fabric – we used white, ivory, yellow, pink, bubble gum pink, and latte/caramel. The names vary depending on who you purchase them from.
- Sharp scissors
- Craft glue or fabric glue (tacky white glue works well)
- Needle and thread
- Pink highlighter or felt tip
- Pencil – for tracing template
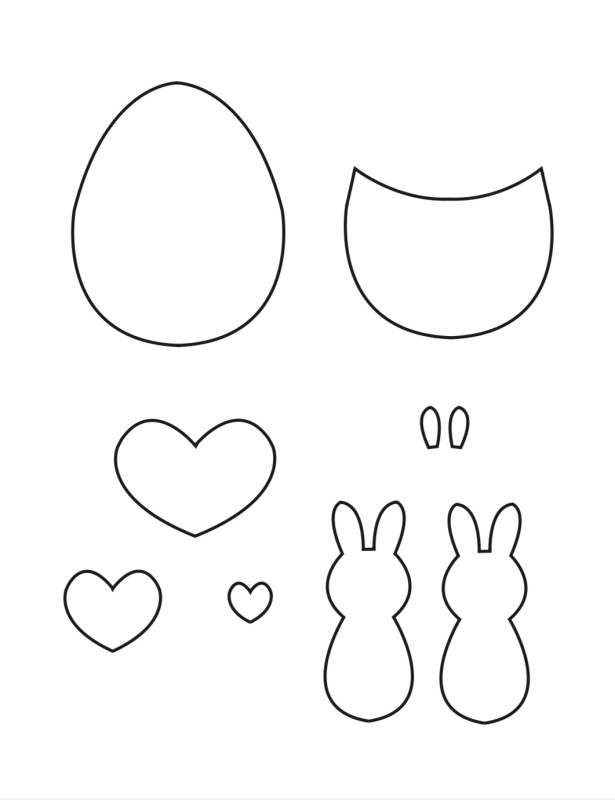
Felt Bunny Craft Template
Although we used felt in this project you could also use other scrap materials. Just be aware that the edges will fray over time unless they are hemmed/finished off correctly.
How To Make Your Felt Bunny
Cut Out Your Fabric Pieces
Print out this Bunny Template and cut out the pattern pieces.
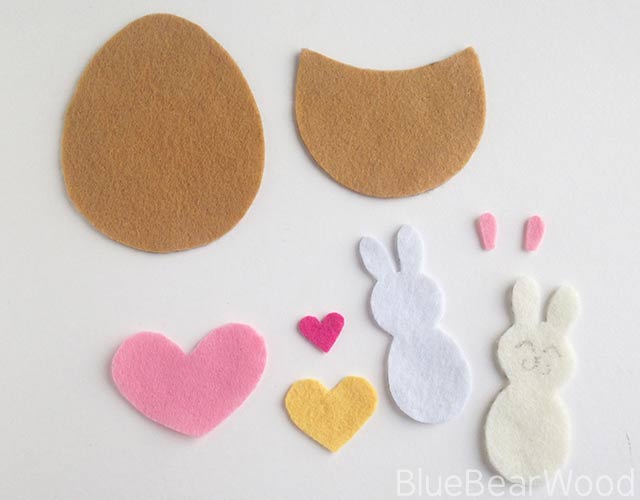
Use a pencil to trace each pattern piece onto the selected felt fabrics. Cut the pieces out and lightly draw a bunny face on one of the bunny silhouettes.
Add Detail To The Bunny’s Face
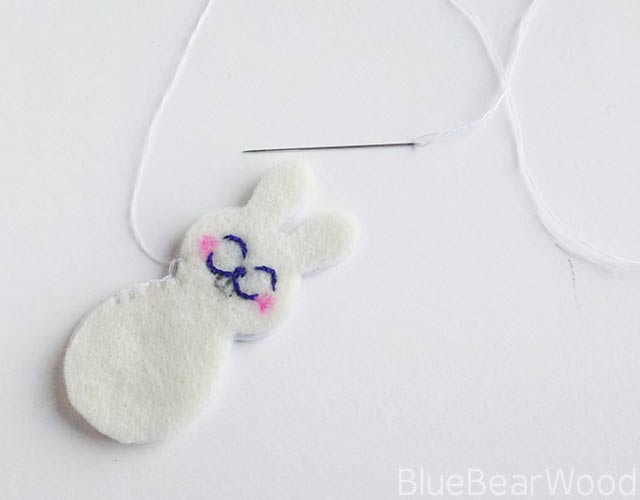
Using a dark-coloured thread carefully sew in the bunny’s facial features. Alternatively, you could use a dark-coloured fabric pen or sharpie.
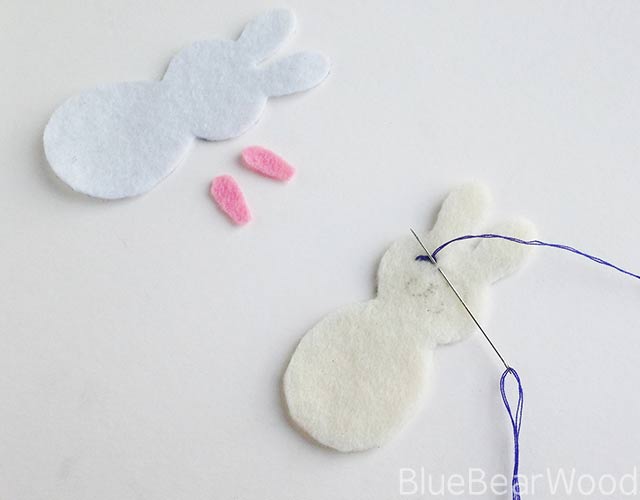
Next, use a pink highlighter to create blush shades on both cheeks of the bunny.
Sewing & Stuffing The Bunny
Use a needle and thread to join the front part of the bunny with the back part. You can start your stitch from anywhere but remember to keep a small opening for stuffing (i suggest the bottom of the Bunny). I recommend using blanket stitch to sew up the Bunny, but you could also use back stitch.
Sew around the whole Bunny leaving a good thumb width free to poke the stuffing in through. You can stuff the Bunny with either the leftover felt pieces or some soft toy stuffing. If you use felt scraps, cut the leftover felt pieces into smaller pieces and push them inside the bunny through its open end. Use the pencil to push the stuffing towards the head part of the bunny.

When you’re satisfied with the amount of stuffing, continue sewing around the edge until you reach your sewing start point. Tie off with two tight knots and push the needle into the stuffed bunny and out the other side. Pull slightly on the excess thread and cut off carefully. This should result in the end of the thread pulling back inside the bunny.
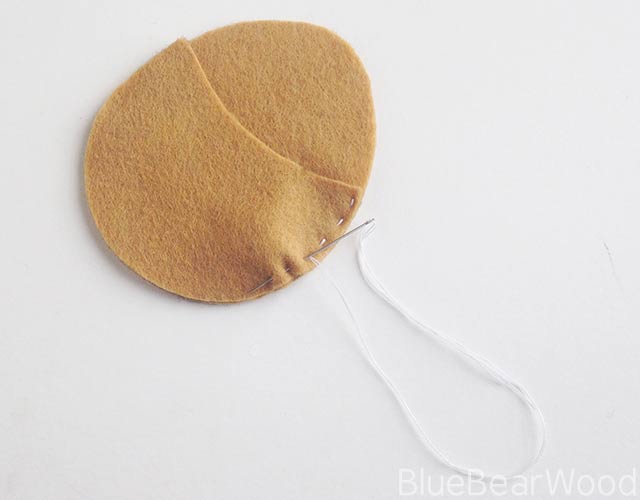
How To Make The Felt Egg
The felt egg bed has two parts, one full egg shape, and one halfish shape. Place the smaller part on the top of the larger part and match their bottom ends. Prepare needle and thread to join both parts together. You can do a running stitch, blanket stitch or back stitch to join the pieces.
Finally, it’s time to decorate your egg. For this craft we chose to glue on hearts, but you could use any shape.
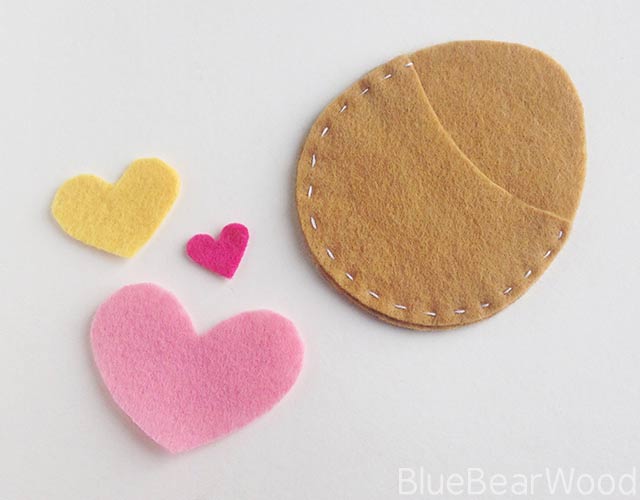
You could also sew decorations onto the egg including beads and sequins. But if you do want to sew decorations on, they need to be added before you sew the egg pieces together!
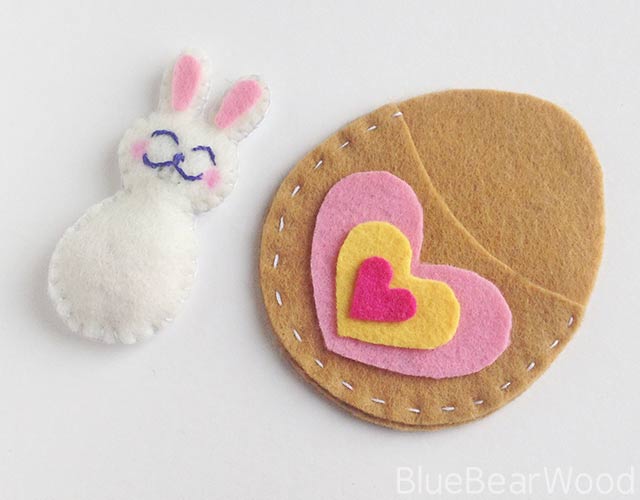
The finished bunny and egg bed makes the cutest little pocket pal.