Crepe Paper Daffodils
Creating crepe paper daffodils is a delightful craft that will bring a touch of spring into your home all year round! These charming flowers make for a fun and easy DIY project that anyone can enjoy. With just a few simple materials and a bit of creativity, you can brighten up your space with these lovely blooms. Whether you're a seasoned crafter or just starting out, crafting crepe paper daffodils is a wonderful way to add a pop of color and cheer to any room. So gather your supplies, put on some music, and let's get crafting!
Materials:


Cut along the short edge (the cuts should go with the grain), making a fringe that goes just over 1/2 way down the paper.

Cut another piece of yellow crepe paper to be 1-1/2 by 3-1/2 inches, with the grain of the paper parallel to the short edge.

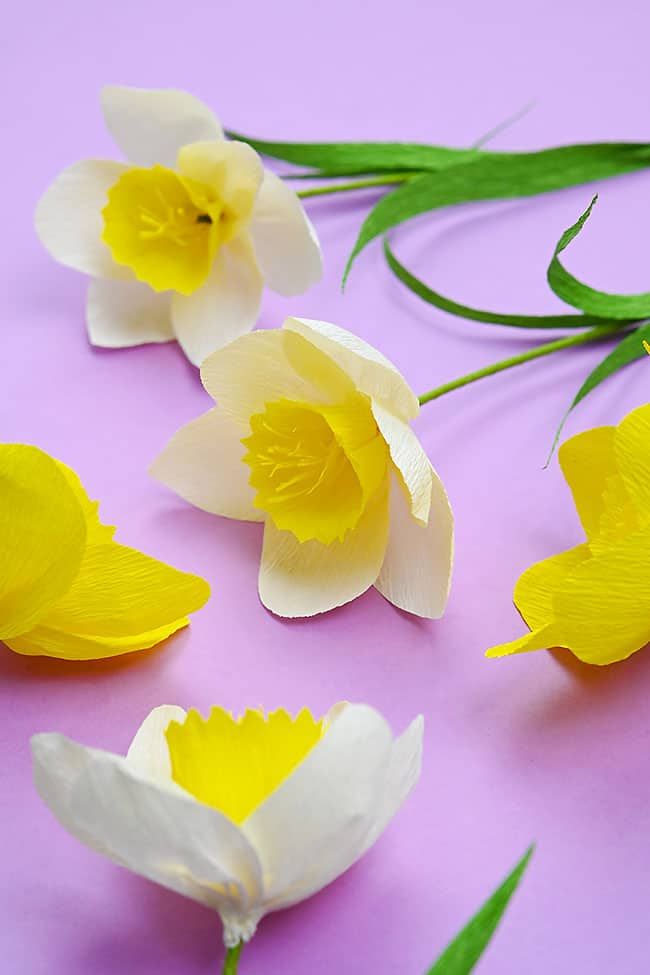
Cut small “V” shapes along one of the long edges. It’s okay (good, actually!) if they’re not perfectly even.

Add a line of hot glue along one short end of this paper.

Glue it to the other end, creating a cylinder.

Scrunch the flat bottom together, using your finger to keep the top part open.


Cut a petal shape from the white paper.

Pinch the flat bottom of the petal and twist it to keep it together.

Repeat, making 5 more petals. (You should have 6 petals altogether.)


Cut from the center of the paper up to the top right corner. Repeat, cutting up to the top left corner, creating 3 pointed leaves.

Take a piece of floral wire and cut it to be 10 inches long. Use needle nose pliers to curve one end into a loop.

Wrap green floral tape around the wire, including the curved part, to create the stem.


Wrap the fringed yellow paper around the stem with the fringe side up (away from the wire).

Twist the fringe together, then add hot glue around the bottom of it.

Open the cylinder piece back up and slide it down around the fringe. Scrunch it back into shape, then fold the pointed edge down slightly so it sticks out.

Add hot glue to the bottom twist of a petal and attach it to the yellow part of the flower.

Add the next 2 petals onto the flower. They should fit evenly around.

Glue the remaining 3 petals, placing them between the first 3 petals.


Wrap the first leaf around the stem about 2/3 of the way down. Repeat with the other 2 leaves, placing the second further down. Finish with the third leaf around the bottom of the stem.

Your crepe paper daffodil is complete!
These crafts are so cute and easy for the kid and adults to make.