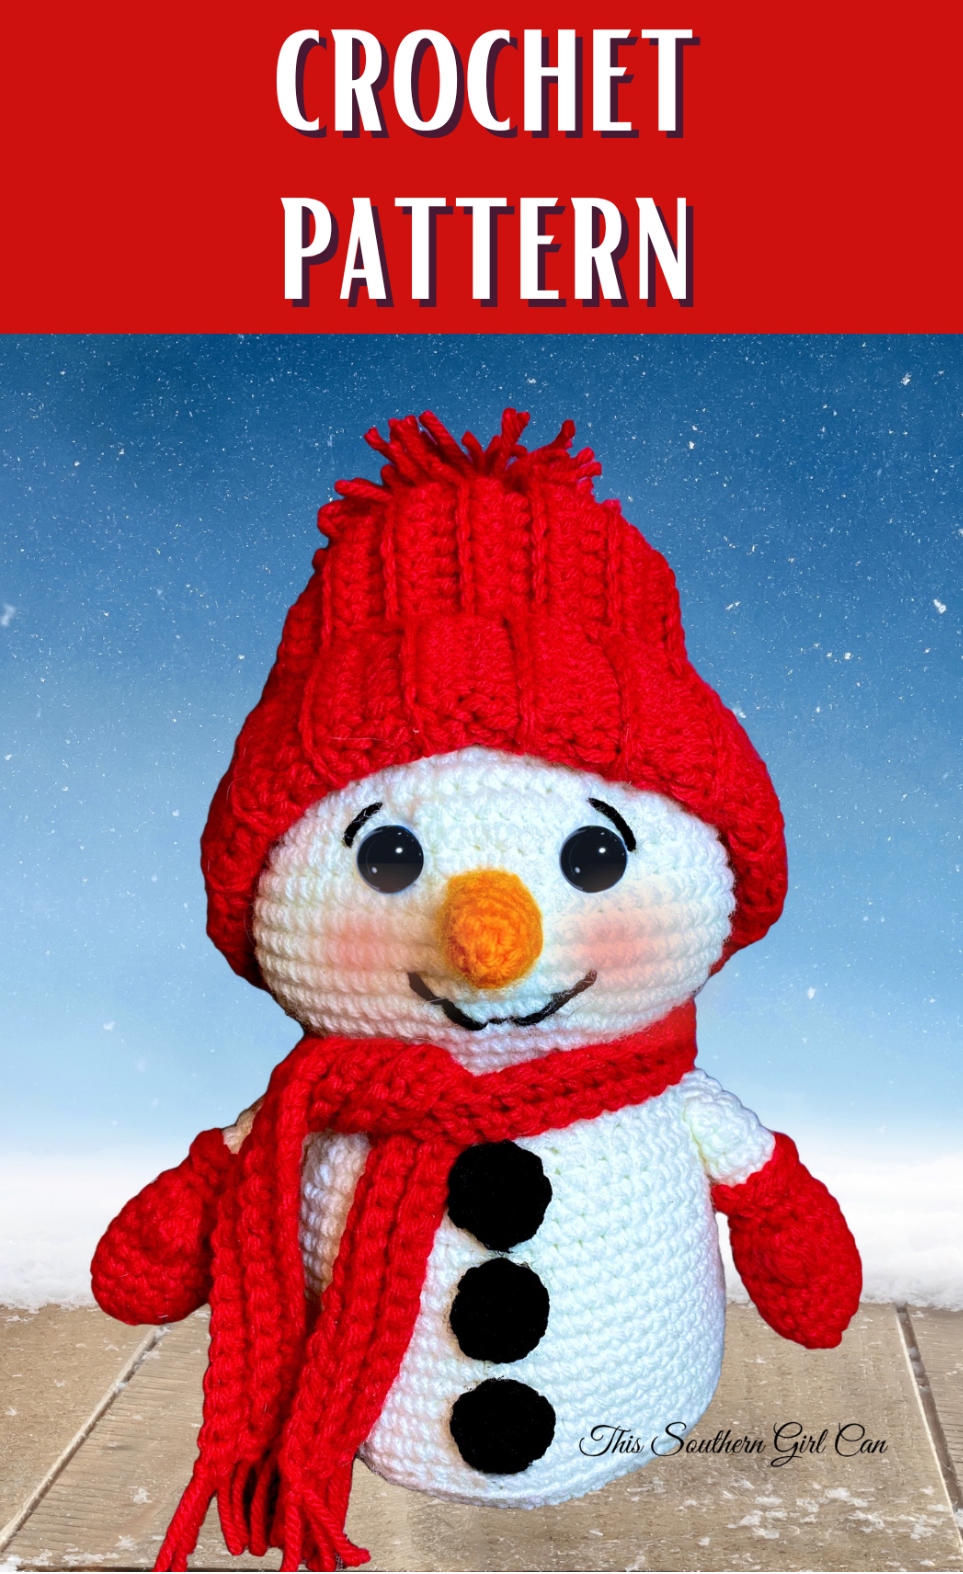
Simple Crochet Snowman
Create your very own snowman using the art of crocheting! Crafted with yarn and a crochet hook, this adorable snowman can be customized with different colors and accessories to make it truly unique. Crocheting allows you to bring your snowman to life stitch by stitch, adding personality and charm to your creation. Whether you're a beginner or an experienced crocheter, making a crochet snowman is a fun and rewarding project that can be enjoyed by all ages. You can make a whole family of crochet snowmen in various sizes to display around your house or give as thoughtful handmade gifts to friends and family. With just a few basic crochet techniques, you can create a whimsical snowman that will bring joy and warmth to your home. So grab your yarn and crochet hook, and get ready to bring the magic of winter to life with your very own crocheted snowman!
-4.5mm crochet hook
-Yarn needle
-Scissors
-Red Heart Super Saver yarn in the colors white, black, orange, and red
- polyester fiberfill stuffing
-12mm black safety eyes, or whatever size and color you prefer
-blush for the cheeks
-cardboard
-small bag of river rocks (can be found at craft stores)
Abbreviations Used (American Terms):
Sc= single crochet
Ch= chain
SlSt= slip stitch
Dec: decrease
Hdc= half double crochet
MC= magic circle
BLO= back loop only
Inc= increase
Pc= popcorn (make 5 hdcs in the same stitch. Remove hook, and place it in the 1st hdc. Grab the open loop where you removed your hook, and pull through.)
Measures 11” tall

I always prefer to start projects worked in the round with a magic circle. If you do not prefer this method, simply chain 2, and start working in the 2nd chain from the hook.
Body
White
1: 6sc in a MC (6)
2: inc in each stitch around (12)
3: sc, inc. Repeat around (18)
4: scx2, inc. Repeat around. (24)
5: scx3, inc. Repeat around. (30)
6: scx4, inc. Repeat around (36)
7: scx5, inc. Repeat around. (42)
8: scx6, inc. Repeat around. (48)
9: scx7, inc. Repeat around. (54)
10: scx8, inc. Repeat around (60)
Trace the piece you just made onto cardboard, and cut it out. Set this to the side.
11: BLO sc around (60)
12-20: sc around (60)
21: scx8, dec. Repeat around (54)
22: sc around (54)
23: scx7, dec. Repeat around. (48)
24: sc around (48)
25: scx6, dec. Repeat around (42)
27: scx5, dec. Repeat around (36)
Place the piece of cardboard in the bottom of the body.
28: scx4, dec. Repeat around (30)
29: scx3, dec. Repeat around (24)
Place a handful of river rocks in the bottom of the body, and start stuffing firmly as we continue with the rest of the snowman.
30: Inc in each stitch around. (48)
31: scx5, inc. Repeat around (56)
32: scx6, inc. Repeat around (64)
33: scx7, inc. Repeat around (72)
34-39: sc around (72)
Insert safety eyes between rows 37&38, with 7 stitches between.
40: scx7, dec. Repeat around (64)
41: scx6, dec. Repeat around (56)
42: scx5, dec. Repeat around (48)
44: scx3, dec. Repeat around (32)
45: scx2, dec. Repeat around (24)
46: sc, dec. Repeat around (16)
47: dec around (8)
48: dec around (4)
Finish off, leaving a long tail for sewing.
Use a yarn needle to close up the top.
Arms
Red
1: 6sc in a MC (6)
2: inc in each stitch around (12)
3: scx3, inc. Repeat around. (15)
4-6: sc around (15)
7: pc using hdc. Scx14. (15)
8: Dec, scx3. Repeat around (12)
9: Scx2, dec. Repeat around. (9)
Start stuffing the mitten, and continue stuffing the arm as you go.
10: BLO scx9. (9)
11-14: sc around (9)
15: Finish off, leaving a long tail for sewing
Holding the arm with the mitten end facing you, join red yarn with a slst to any of the front loops from row 10. Ch1, and sc into the same stitch. Inc in the next stitch. Sc, inc around. (13)Finish off.
Scarf
Red
Ch82
1: sc in 2nd ch from the hook, and across. (80)
2-4: ch1 and turn. BLO sc across. (80)
Finish off. Cut short pieces of yarn, and tie across the short ends of the scarf to resemble fringe.
Red
Ch30
1: starting in the 2nd ch from the hook, hdc across. (28)
2-37: ch1 and turn. BLO hdc in each stitch across. (28)
Joining: Ch1 and turn. Holding both short edges of your work together, slip stitch all the way across, making sure to work through both layers. This will create a tube. Finish off, leaving a long tail for sewing.
Using a yarn needle, weave your yarn in and out of the stitches all the way around the end of the tube, and pull tight. Fasten off.
Flip your work right side out, and turn up the edge to resemble a brim on a hat. Optional: Sew a pompom to the top.
Orange
1: 3sc in a MC (3)
2: inc in each stitch around (6)
3: scx6 (6)
4: sc, inc. Repeat around (9)
5-7: scx9 (9)
Finish off, leaving a long tail for sewing.
Buttons
Make 3
Black
1: 8hdc in a MC. (8)
Finish off
Stitch the nose to the face. Using black yarn, stitch on a mouth and eyebrows. Sew on the arms between rows 25 and 26. Sew the buttons to the front of the body. Tie scarf around the neck. Add blush to cheeks.
Enjoy!