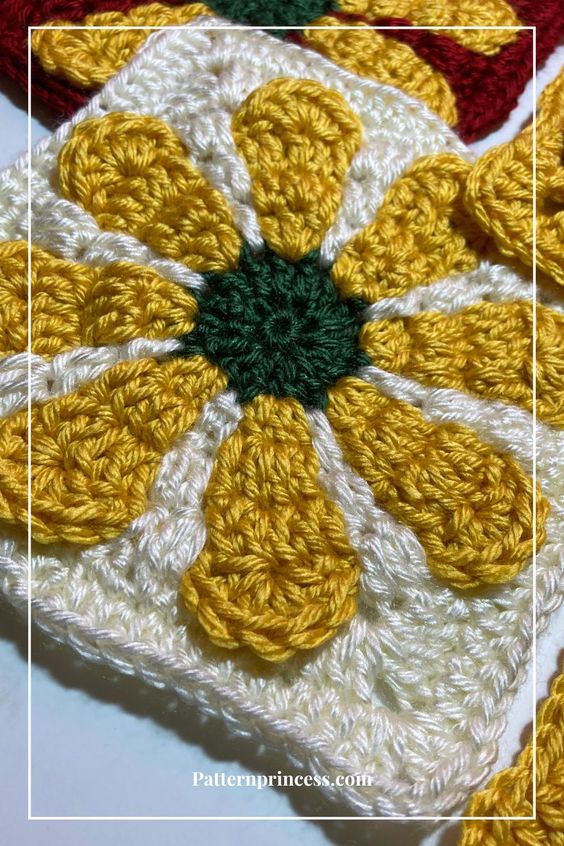
Crochet a Retro Daisy Granny Square
Crocheting a Retro Daisy Granny Square is such a delightful project filled with nostalgia and creativity. With its charming design and vibrant colors, this granny square pattern brings a touch of retro vibes to any modern project. By following the simple instructions and combining different yarns, you can create a truly unique piece that adds a whimsical flair to blankets, pillows, or even clothing. The repetitive nature of crocheting the granny square is not only soothing but also allows you to experiment with various color combinations to make each square a work of art. So pick up your crochet hook, select your favorite yarns, and get ready to bring a bit of vintage charm into your crafting repertoire!
Skill Level
Intermediate
Gauge
17 single crochet every 4 inches and 7 rows of double crochet every 4 inches.
Size
This pattern worked with a medium weight yarn and Size H or I Crochet hook will make about 6 ½ X 6 ½ inch square.
Materials
Yarn. A medium weight yarn works well with this pattern. For my samples, I used three different colors of Caron Simply Soft yarn for each daisy granny square. Plan on about 150 yards of yarn.
Crochet Hook. Choose a hook size that matches your yarn weight. I used a size I crochet hook 5.5 mm. However, an H size hook, 5.0 mm would also work.
Scissors
Tapestry Needle
Abbreviations
- CH = Chain
- DC = Double Crochet
- HDC = Half Double Crochet
- SC = Single Crochet
- SK = Skip
- SL ST = Slip Stitch
- SP = Space
- ST = Stitch
- STs = Stitches
- YO = Yarn Over
- [ ] = Repeat Between
Pattern Notes for Retro Daisy Granny Square
Written in US Terms.
This pattern is worked in the round.
There are only six yarn ends to weave in. I like to leave a 6-10 inch yarn tail on when cutting the yarn off. This gives me plenty of yarn length to weave in.
Rounds 1 and 2 make up the center of the flower. Round 3 begins the flower petals. The background color starts with round 4.
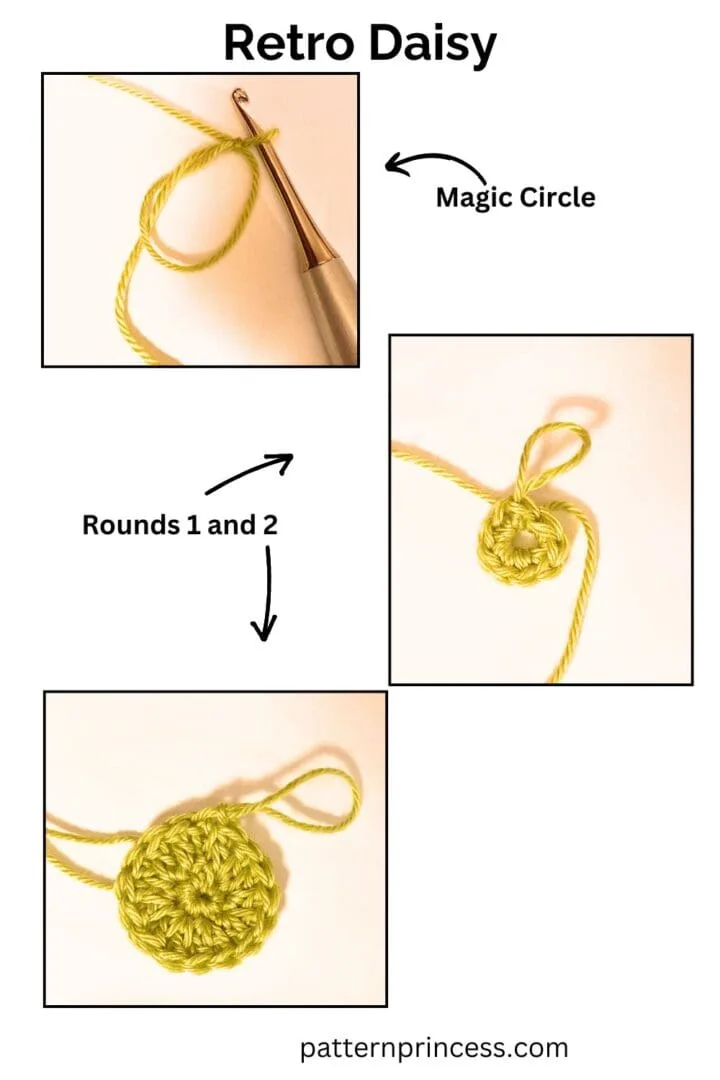
Begin
Make a Magic Circle. Sometimes it is called a magic loop. Alternatively, you can also work a CH 4 and SL ST back into the first CH ST to make a circle.
Round 1
Continue using the same yarn.
CH 1 (Doesn’t count as a ST). Work 8 SC inside the magic circle. Pull the yarn tail to close the circle. Make a SL ST into the first SC to close the circle. (8 SC).
How to work the single crochet inside the magic loop. Insert the hook into the circle and pull up a loop, yarn over and pull through both loops. (repeat this 7 more times).
Round 2
Use the same yarn that you did in round 1.
CH 3 (Counts as the first DC of the round). Make one more DC into the first ST. Work 2 DC into every ST around. Make a SL ST into the top of the CH 3. (16 DC including the initial CH 3).
Fasten off the yarn. Cut the yarn leaving 6-10 inches. Pull the yarn tail through the last loop. You can take a moment to weave in your yarn ends now or wait until you are done with the granny square to weave in all six of the yarn ends at once.

Round 3
Add a new yarn color. Pull the yarn into any one of the stitches in the previous round. Tie a knot.
Insert the hook into the loop. YO and pull up a loop and CH 3. (Counts as the first DC of the round). Make 2 more DC into the same ST. [CH 1, SK the next ST. Work 3 DC into the next ST]. Repeat between [ ] all the way around. End with a CH 1, SK 1, SL ST into the top of the CH 3. (At the end of the round, there will be 8 clusters of 3 DC).
At the end of this round do not fasten off the yarn. Just pull the loop larger so it doesn’t slip out. You can also use a stitch marker to hole the yarn in place while you work on the next round.
Round 4
Add a new yarn color. Pull the yarn into any one of the stitches of round 2 that we skipped in the previous round. Tie a knot.
For this round, as you work, push the stitches for round 3 away from your work a bit so they are out of the way. The stitches for this round 4 will be worked in front of round 3 stitches and into round 2 stitches.
Insert the hook in the stitch and CH 3. (Counts as the first DC of the round). CH 4, SK over to the next SK ST of round 2 and work a DC. [CH 4, SK over to the next SK ST of round 2 and work a DC]. Repeat between [ ] all the way around. At the end of the round work a SL ST into the top of the CH 3. (You should have 8 DC stitches in this round).
At the end of this round do not fasten off the yarn. Just pull the loop larger so it doesn’t slip out.
Round 5
Switch back to the yarn color from round 3.
Insert hook through the CH spaces of round 4 and pull the loop from round 3 to the front side. CH 3. (Counts as the first DC of the round). Work 2 DC into the next ST in the round 3 STs. Keep the round 4 CH STs pushed toward the back of your work and out of the way. Work 1 DC in the last ST of the cluster. [CH 2. Skip the DC from round 4 and work 1 DC in the next ST, 2 DC in the next ST, and 1 DC in the next ST]. Repeat around between [ ]. End with CH 2 and SL ST into the top of the CH 3. (At the end of the round, there will be 8 clusters of 4 DC).
At the end of this round do not fasten off the yarn. Just pull the loop larger so it doesn’t slip out.
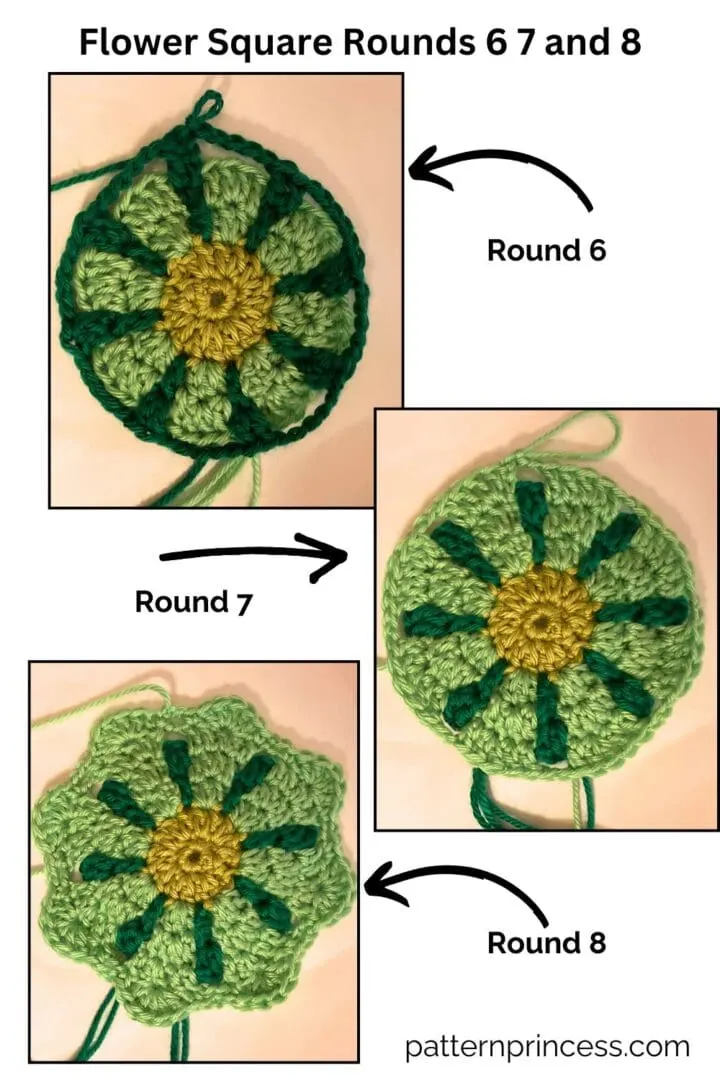
Round 6
Switch back to the yarn color from round 4. Pull the loop to the front in one of the CH 1 SPs.
CH 3 (Counts as the first DC of the round). Make one more DC into the first ST. [CH 5, SK the 4 DC and work into the DC ST from round 4. Work 2 DC]. Repeat round between [ ] end with CH 5 and SL ST into the top of the CH 3. (You should have 16 DC stitches in this round).
Round 7
Switch back to the yarn color from round 5. Pull the loop to the front in one of the CH 5 SPs.
Insert the hook through the CH spaces of round 6 and pull the loop from round 5 to the front side. CH 3. (Counts as the first DC of the round). Work 2 DC into the next ST in the round 5 STs. Keep the round 6 CH STs pushed toward the back of your work and out of the way. Work 1 DC in the next 2 STs of the cluster. [CH 2. Skip the 2 DC from round 6 and work 1 DC in the next ST, 2 DC in the next ST, and 1 DC in the next 2 STs]. Repeat around between [ ]. End with CH 2 and SL ST into the top of the CH 3. (At the end of the round, there will be 8 clusters of 5 DC).
Round 8
Continue working with the same yarn. (This round creates the top of the flower petal).
CH 1 (Does not count as a ST). Work SC into the first ST. SK 1 DC ST. work 5 DC into the next ST (should be the middle DC ST). SK 1 DC ST, SC into the next ST. [CH 2. SK the CH 2 of round 7. Work 1 SC into the first ST of the next DC cluster. SK 1 ST, work 5 DC into the next ST, SK 1 ST, work 1 SC into the last ST of the DC cluster]. Repeat between [ ] around. End with a CH 2 and SL ST into the SC ST. (At the end of the round, you should have 8 sections of a SC, 5DC, SC cluster).
Fasten off the yarn. Cut the yarn leaving 6-10 inches. Pull the yarn tail through the last loop.
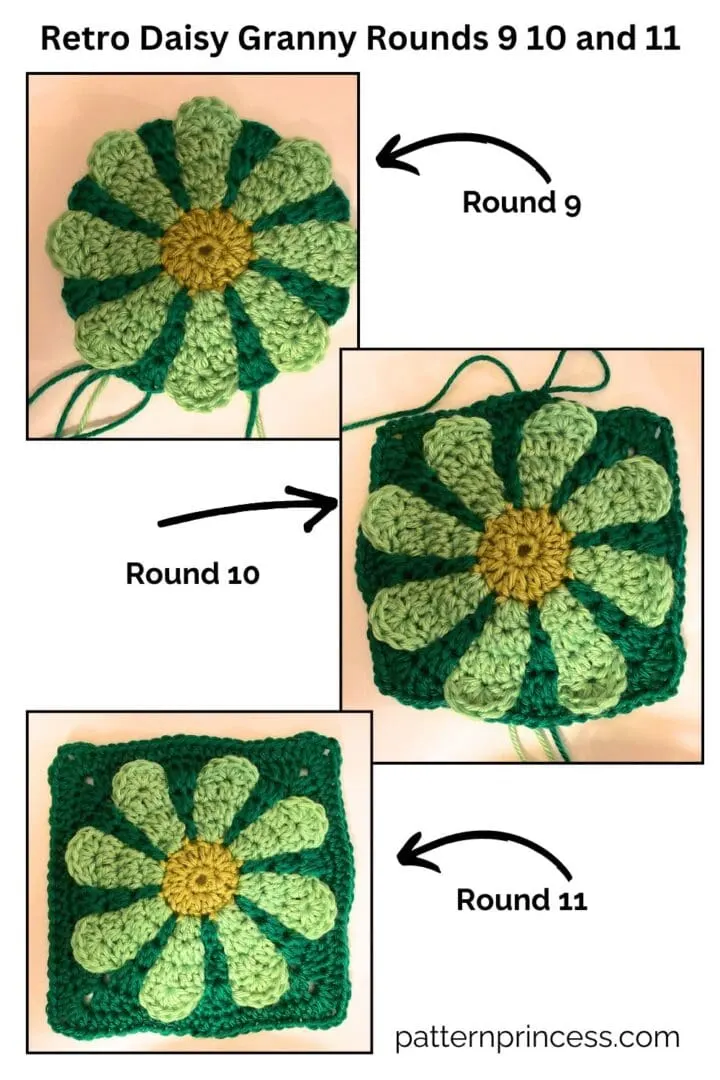
Round 9
Switch back to the yarn color from round 7. Pull the yarn to the front.
Insert the hook through the CH spaces of round 6 and pull the loop from round 5 to the front side. CH 3. (Counts as the first DC of the round). 2 DC in the next ST in round 7.
Next, flip the top of the flower petal from round 8 down and work 5 DC into the CH SP from round 7 that is behind the flower petal now. Flip the flower petal back up. Working in front of the stitches of round 8, work 1 DC in the first DC ST and 2 DC in the next DC ST. [Flip the flower petal down and work 5 DC in the CH SP. Flip the flower petal back up and work 1 DC in the first ST and 2 DC in the next ST]. Repeat around between [ ] end with a SL ST into the top of the CH 3. (At the end of this round, you should have 8 sections between the flower petals of 3 DC and 8 sections behind the flower petals of 5 DC).
Round 10
This is the first round to turn the circle into a square. CH 1 (Does not count as a ST). Work a SC into the first ST. Work a SC into the next 5 STs. Work a HDC in the next ST. Work a DC into the next ST.
The next stitch becomes the first corner. Work (2 DC, CH 2, 2DC) all in the same ST. DC in the next ST, HDC in the next ST. Work SC into the next 11 STs. HDC in the next ST, DC in the next ST. The next ST becomes the second corner. Work (2 DC, CH 2, 2DC) all in the same ST.
DC in the next ST, HDC in the next ST. Work SC into the next 11 STs. HDC in the next ST, DC in the next ST. The next ST becomes the third corner. Work (2 DC, CH 2, 2DC) all in the same ST.
DC in the next ST, HDC in the next ST. Work SC into the next 11 STs. HDC in the next ST, DC in the next ST. The next ST becomes the fourth corner. Work (2 DC, CH 2, 2DC) all in the same ST.
DC in the next ST, HDC in the next ST. Work SC into the last 5 STs. End with a SL ST into the first SC.
Round 11
Continue using the same yarn.
CH 1 (Does not count as a ST). Work a HDC into the first ST and next 9 STS. In the corner CH 2 SP work (2 DC, CH 2, 2DC). (First corner).
Work a HDC into the next 19 STs. In the corner CH 2 SP work (2 DC, CH 2, 2DC). (Second corner).
Work a HDC into the next 19 STs. In the corner CH 2 SP work (2 DC, CH 2, 2DC). (Third corner).
Work a HDC into the next 19 STs. In the corner CH 2 SP work (2 DC, CH 2, 2DC). (Fourth corner).
Finish the last row with a HDC in the next 9 STs. End with a SL ST into the first ST.
Fasten off the yarn. Cut the yarn leaving 6-10 inches. Pull the yarn tail through the last loop.
Finishing
Use the tapestry needle to weave in the yarn tails on the back side of the work. I like to weave back and forth 3 to 5 times. Cut off the excess yarn. You are finished with this run Retro Daisy Granny Square.