How to Make Air Dry Clay Beads
Air dry clay beads are a fantastic way to let your creativity soar without the need for a kiln or oven! These beads are a joy to work with and provide endless possibilities for crafting unique jewelry pieces or decorative items. Whether you're a seasoned crafter or just starting out, air dry clay beads are a fun and easy way to add a personalized touch to your creations. The best part? No special equipment is required – just your hands, some clay, and a dash of imagination! So go ahead, get your hands dirty, and let your creativity shine with these delightful and versatile clay beads.
Supplies for Homemade Beads
I have lots of white air dry clay on hand from Redesign. You don’t need to use this type of clay, craft stores have lots of choices for air dry clay in many different colors.
If you use your beads on a string, choose your cord before beginning your beads. Check the thickness of the cord and then find a solid object a little bit thicker, for a thin cord use a cocktail toothpick, a medium cord use a wood skewer, for a large cord use a small dowel. I have a set of plastic clay tools from Dollar Tree, so I used one of them instead.
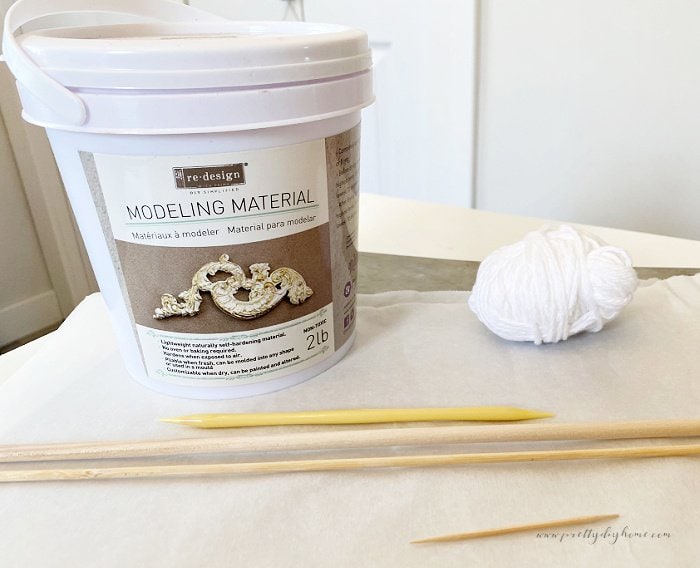
- Air dry clay
- Cocktail stick/skewer/dowel
- Twine or Cord
- Parchment paper/wax paper
- Cookie sheet
- Sandpaper 120-grit.
- Small roll of cording (optional)
- Large eyed needle (optional)
Step 1 – Shaping Air Dry DIY Beads
Let’s begin by preparing a work area. A piece of parchment paper placed on a smooth surface like a cookie sheet works well. Once the cookie sheet is lined place it on a flat surface to craft and dry the beads on. The cookie sheet makes the beads easy to move out of the way.
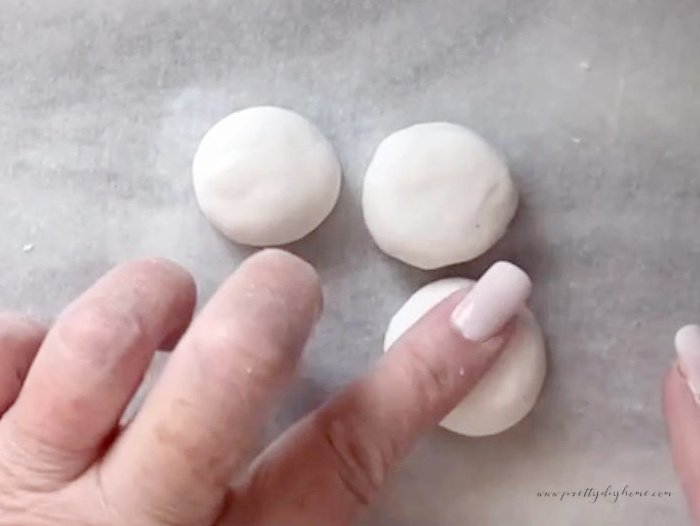
Remove a small block of clay from the sealed container, as you don’t want it to dry while working on your beads. How much clay you take depends on the size of the bead you want, my small beads are about the size of fresh cranberry. The donut-shaped big beads are meant to be chunky and flat, so I used a piece of clay about the size of a large grape.
Take a piece of clay and roll it into little balls of any size you like. Knead the clay to soften and smooth it, then roll it into a round ball between the palms of your hands.
The bead’s surface may have wrinkles, if you want a smooth bead brush the wrinkles from the surface of the clay with your fingers and roll the bead again until it’s smooth. I want my beads to look homemade so I welcome the small wrinkles.
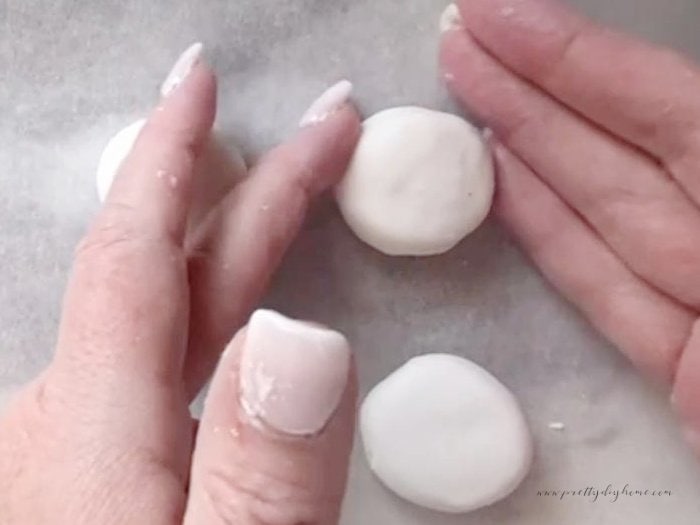
I made several balls before piercing them and would line them up beside each other and double-check they were uniform beads close to the same size.
Follow the same process for the donut-shaped beads. Use a larger piece of air dry clay and roll it into a large bead. Put the round beads onto your work surface and press it flat with the palm of your hand.
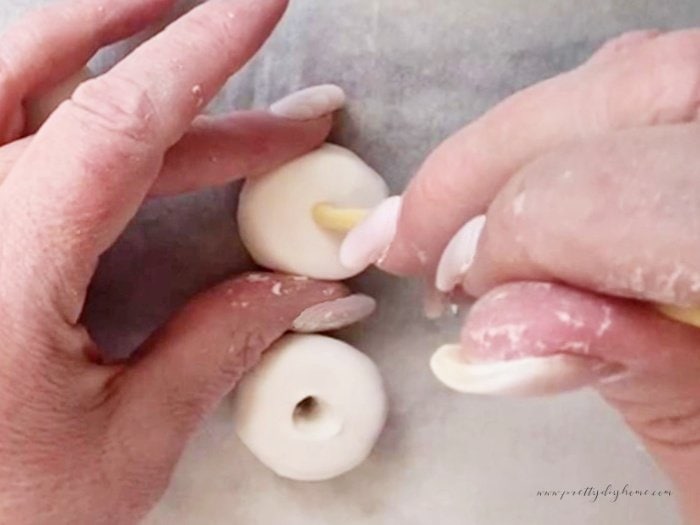
Step 2 – Piercing the Center of the Beads
With the beads set out onto the parchment-lined cookie sheet. Take whatever you choose to make the center. Using a small amount of pressure press the skewer into the center of the bead.
Step 3 – Air Drying the Beads
Once you have made all your beads, leave them to dry for several hours. The time it takes to dry depends on the size of your beads, the air humidity, and the house temperature. Mine took 24 hours to dry completely.
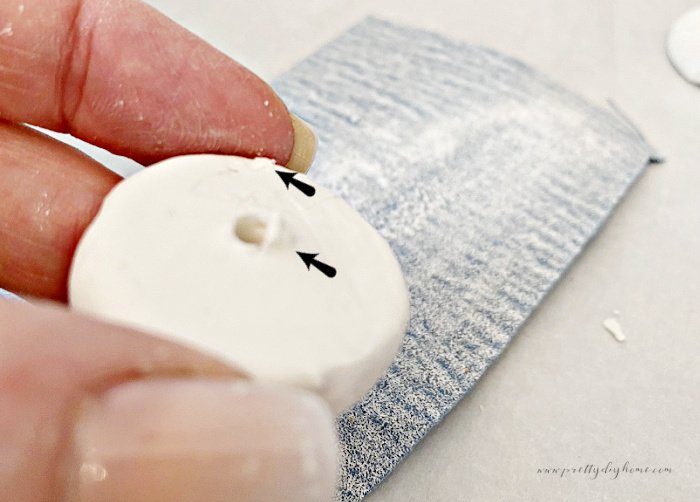
As the beads dry the central hole tends to shrink, every 8 hours or so I would go and check the holes and pierce any that were shrinking.
Step 4 – Sanding the Beads
Once the beads have dried completely, you can use a fine grit 220 sandpaper to smooth out any large bits from the surface of the beads. During the process when piercing mine again, I got little dabs of clay onto the work surface. They then stuck themselves on the other clay beads, the sandpaper took them off in no time.
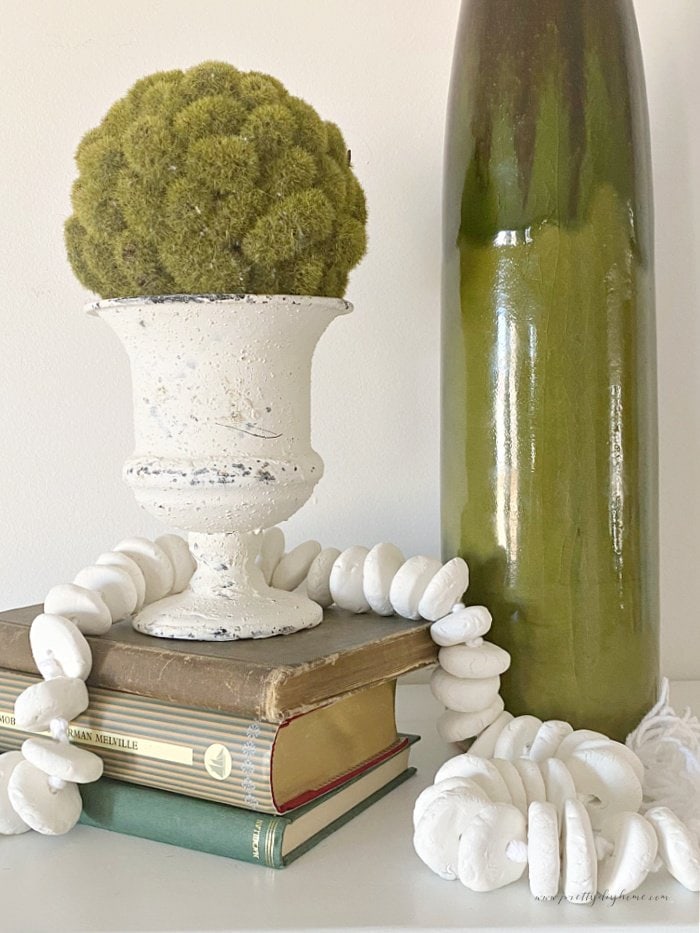
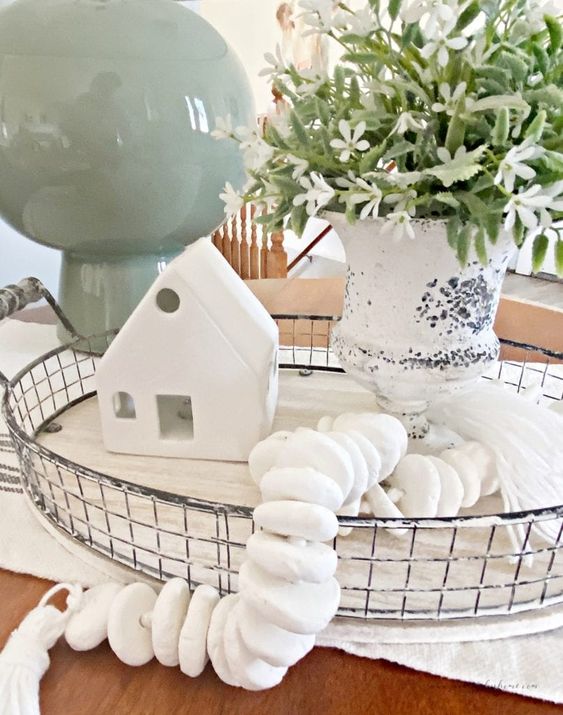
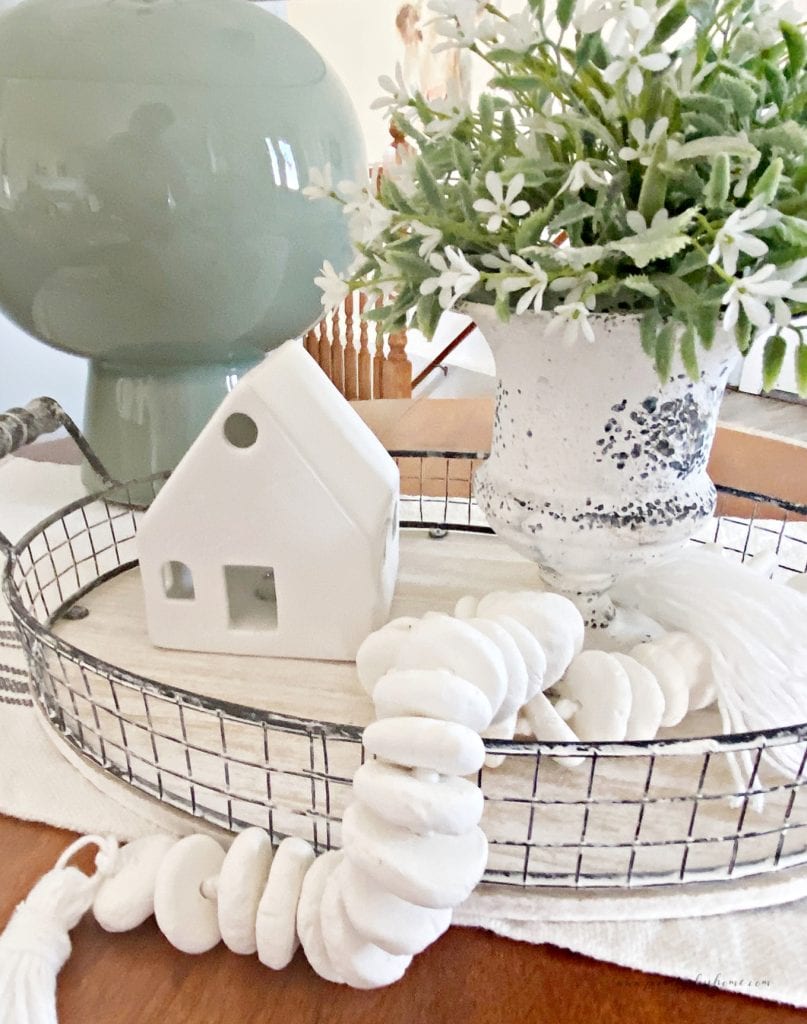
How to Make a Rustic String of DIY Air Dry Beads
The next step is to make a string using the air-dried beads. You will need a lot of beads to make a string. I used 40 beads for mine.
I measured and then cut 14 feet of white cotton cord.
Thread the needle. find the two ends and make a small knot at the end. Make a second large knot an inch from the first one. The knot has to be large enough to not pass through the center of your bead. I used two knots for my string. Then thread your bead onto the needle, and pull your bead down to the knot. Patience as the cord can tangle. Once in place, tie another two large knots after the bead, ensuring it doesn’t pass through the center. Repeat this process until your string is as long as you like or you run out of beads.
After you place your last bead on, tie a double knot right after the bead the same as the rest. Then tie the final knot an inch from that last double knot. Trim the cord.
Making Tassels for Your Air Dry Bead String
Here is how I make tassels I like this method as it hides the end of the strings inside the wrapping.
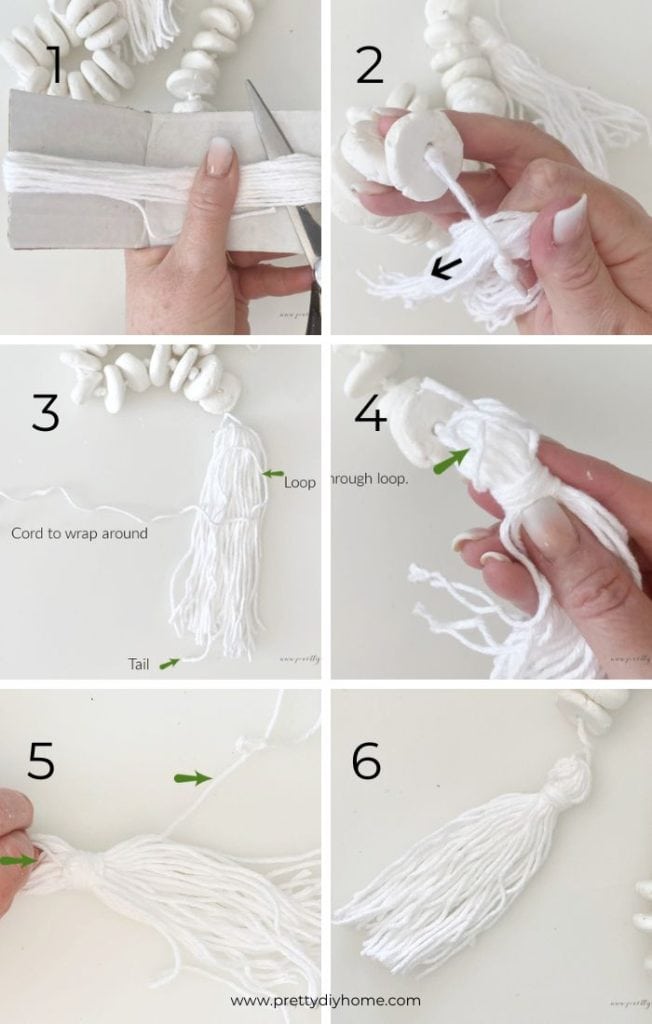
1. Cut a piece of cardboard 2 by 6 inches. Wrap the white cord around the cardboard 20 times. Snip the cording and remove the cardboard.
2. Holding one end of the gathered cords thread them through the one-inch opening between the last two knots at the end of your string of beads.
Adjust the ends of the cut threads so they are even.
3. Take a second piece of cord about 18 inches long. Tie a knot on one end (this helps recognize which cord it is), and line it up with the bottom of the other strands. Make a loop across the top as shown, and place the thread to the side.
4. Wrap the long piece of cording around the tassel 7 times and then fit it through the loop on the top.
5. Pull both ends of the cord tightening the knot, then cut the ends.
6. Straighten the top of the tassel and then trim the ends evenly.
Make a second tassel for the other end of your string.