Glitter Christmas Luminaries
Get ready to add some sparkle to your holiday decor with Glitter Christmas Luminaries! These luminaries are the perfect way to create a warm and inviting atmosphere in your home during the festive season. Simply take some mason jars, apply a generous amount of glue to the outside, sprinkle glitter all over, and let them dry. Once they're dry, pop in a tea light candle and watch as they radiate a beautiful glow that will enchant your guests. Whether you place them on your mantle, dining table, or outdoor patio, these luminaries are sure to bring that extra touch of magic to your Christmas celebrations. Time to get crafting and let the glitter shine bright!
Supplies:
- Empty jars
- Clear contact paper
- Tree pattern
- Scissors
- Paintbrush
Crystal Gloss Enamels Glitter:
- Brown
- Green
- Red
- Crystal Clear
Embellishments:
- White ribbon
- Twine
- Faux berries
Instructions
- Print off the pattern provided and place it underneath a piece of clear contact paper. I pin mine to a piece of foam core board so I can trace without having to hold the contact paper in place. Trace over the pattern making sure you have an equal amount of space on the right side of the contact paper. Make one stencil for each jar you are making.
- Fold the contact paper along the dotted line that represents the center of your tree. Cut along the pattern lines.
- When you open the folded cut-out you will have a tree like this.
- Peel off the backing and press it on to your clean glass jar, making sure there are no air bubbles.
- Use a paintbrush to apply a coat (does not need to be perfect, just apply it) of Crystal Gloss Enamel Glitter (in this case, red), leaving the area around the tree for last.
- Paint over the tree stencil.
- Immediately after you paint, dab a cosmetic sponge over the red paint to mute it a bit. This will also get rid of the streaky lines the brush created.
- Use the tip of a craft knife to loosen the top of the tree stencil and remove it. Allow the paint to dry for about an hour.
- As you can see, the trees are very noticeable before the clear glitter coat has been applied. If you prefer the trees to be more prominent, do not remove the stencils until after the final glitter coat (next step).
- Using a paintbrush, apply the Crystal Clear over the top of the entire jar. Use a generous amount and do not overwork it. A stroke or two, three at the most, will do the trick. If you chose to leave the stencil on, remove it once you are finished painting. Do not wait for the paint to dry.
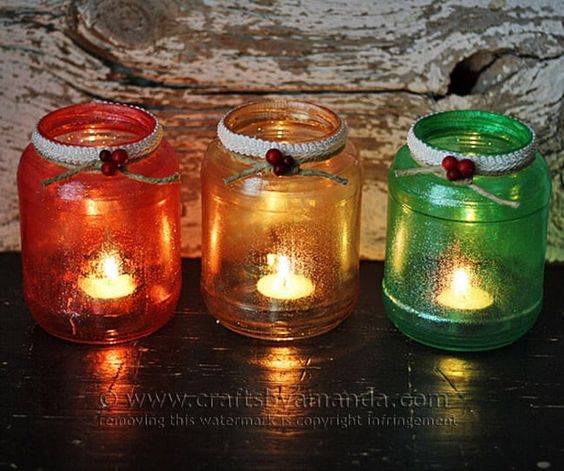
- Embellish the rims with a bit of white ribbon and twine and a few faux berries.
- When your jars have dried (overnight is best) they will have a beautiful, glittery sheen, inside and out!
A few pictures would be helpful.