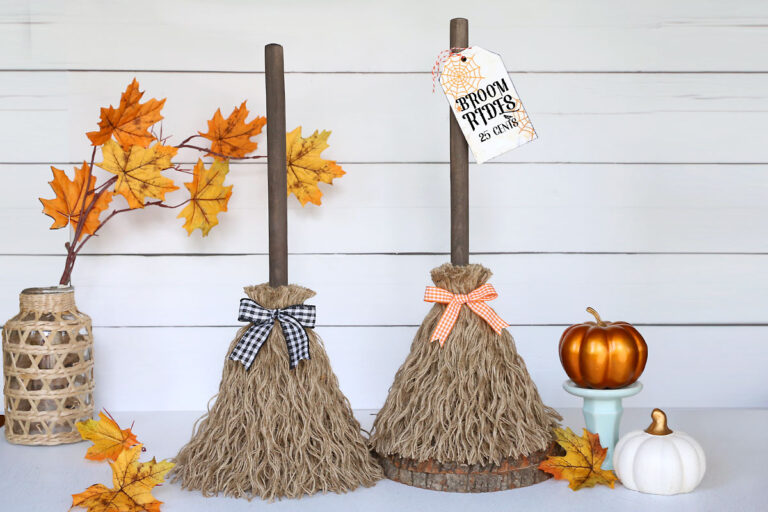
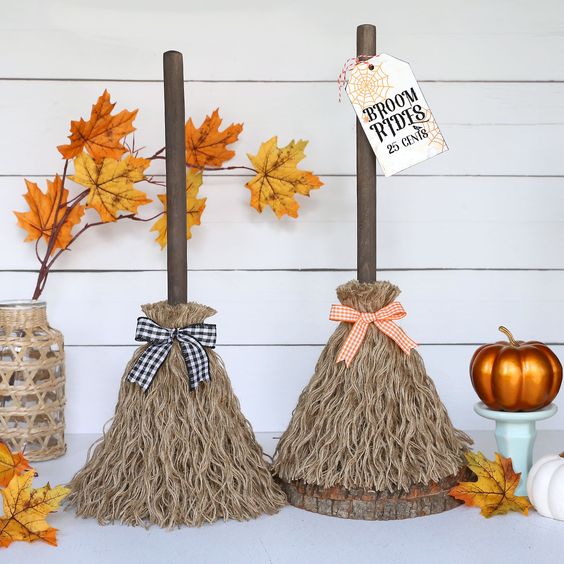
Witches’ Broom Craft
Creating your own DIY witches' broom can be a fun and enchanting project to add a touch of magic to your Halloween decor. To start, gather some natural materials like twigs, hay, or straw to form the broom's bristles. Then, select a sturdy stick for the broom handle and secure the bristles to one end using twine or rope. Get creative by adding embellishments like ribbons, feathers, or faux spiders for a personalized touch. Once you've completed your DIY witches' broom, you'll have a whimsical prop that is sure to spark conversations and bring a festive touch to your home during the spooky season.
Supplies
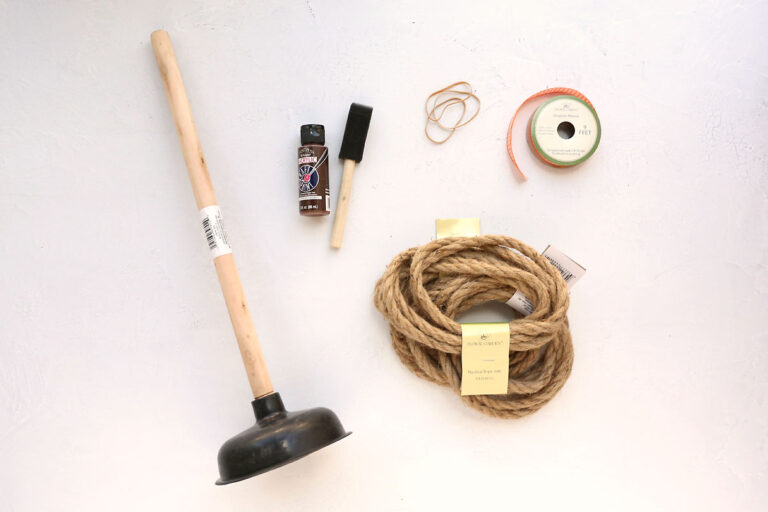
Here’s what you need to make a witches’ broom from a plunger:
- Toilet Plunger: I used one from Dollar Tree
- Dark Brown craft paint
- Small Foam paint brush
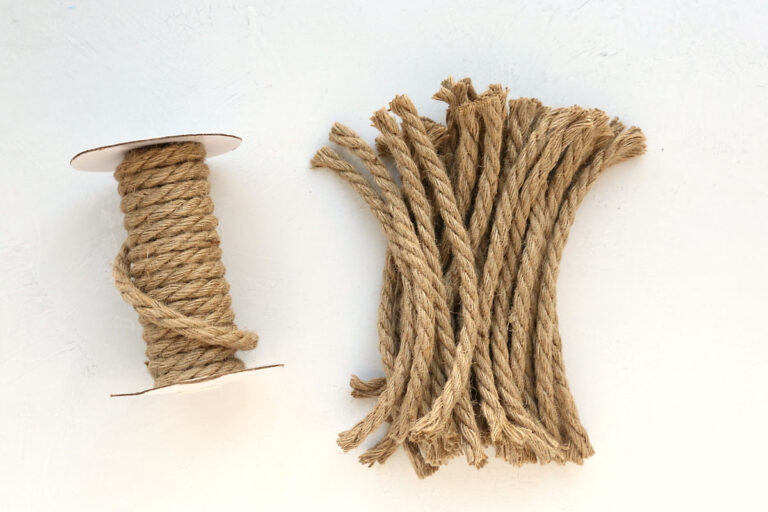
- Rope: You’ll need about 24 feet of jute rope. You can use the jute rope from Dollar Tree, but if it’s out of stock you can also find jute rope on Amazon. This is the rope that I used.
- Rubber Bands: You’ll need 3 or 4 rubber bands
- Ribbon
How To Turn A Plunger Into A Witches’ Broom
This Halloween craft can be completed in under an hour, with much of that time being cutting and then unraveling the rope. So it’s a great craft to work on while watching a show!
Paint The Broomstick
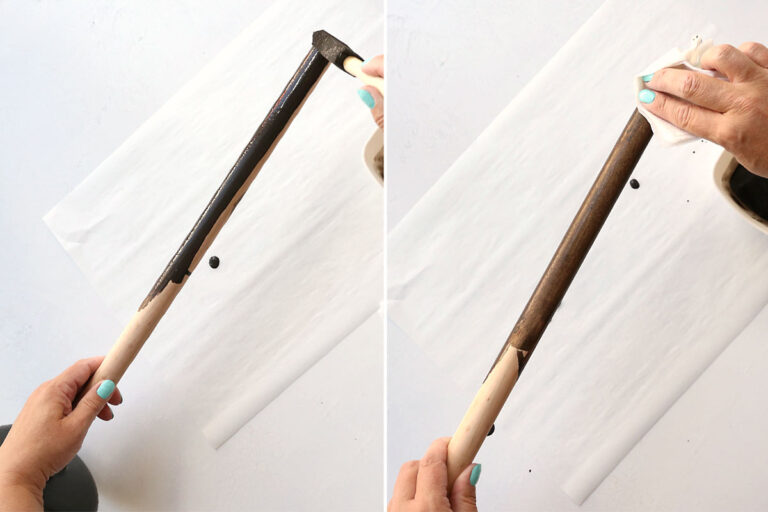
The first step is to paint the stick of the plunger to make it look more like a broomstick. Put some dark brown craft paint into a small bowl or cup and add some water. Mix it up with your foam paintbrush. Making sure you have protected your work surface, brush the watered down paint onto the wood handle of the plunger. Then use a paper towel to wipe some of the paint back off the handle so you can still see the wood grain showing through. Allow the handle to dry. It only takes about 15 minutes but you can speed up drying time with a hair dryer if desired.
Add Rope For The Broom Head
The head of this broom is made using jute rope. Begin by cutting the rope into 9 inch pieces. Use more pieces for a very full broom head and fewer pieces for a slimmer broom head. I used 29 pieces of 10 mm jute rope and it made a very full broom.
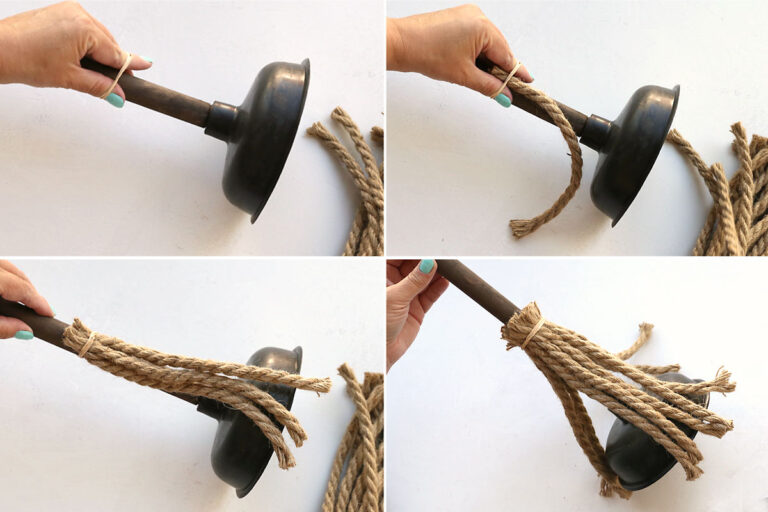
The next step is to attach the rope around the broomstick. I’ve seen this done by hot gluing the rope directly onto the broomstick, but that takes a long time and you can’t adjust adjust how high up on the stick the rope attaches if you glue it. So I used rubber bands instead, which was super easy! Double or triple the rubber band in your hand, then slide it over the broomstick. Hold the rubber band open around the broomstick with one hand, then tuck pieces of rope under the rubber band with the other hand, as shown in the photos below. Continue adding pieces of rope until they surround the broomstick. I used 11 pieces of rope on this first layer.
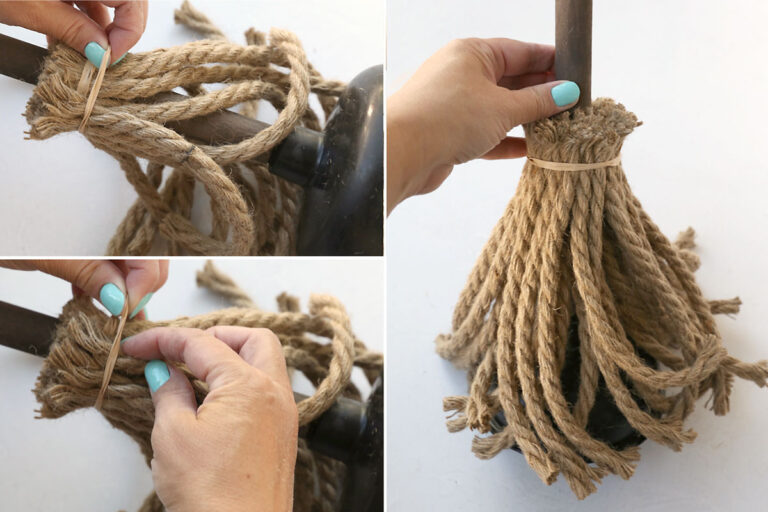
Next, repeat the process with a second rubber band and a second layer of rope. It took 18 pieces of rope to completely surround the first layer. Once all the rope is attached, you can adjust the broom head slightly up or down. Make sure that the pieces of rope go just past the plunger head. Then slide one more rubber band (tripled up) over all the rope to secure everything.
Unravel The Rope And Decorate
At this point you may be worried the rope isn’t going to completely cover the plunger head – don’t be! Unravel each piece of rope, first into three sections, and then pull apart each of those three sections into three or four more sections.
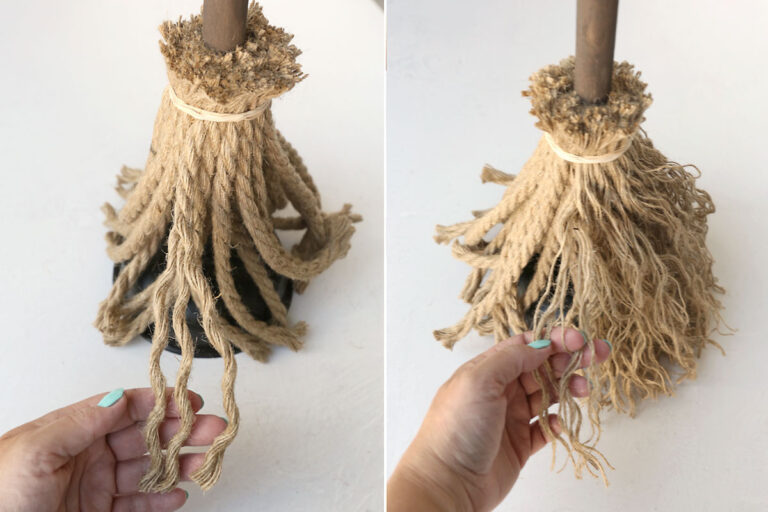
Once you’ve gone all the way around the broom unraveling, the rope will be very fluffy and will completely cover the plunger. Trim any uneven pieces of rope if needed. Finally, tie a ribbon around the rubber bands and add a tag if desired, then display your new witches’ brooms.
