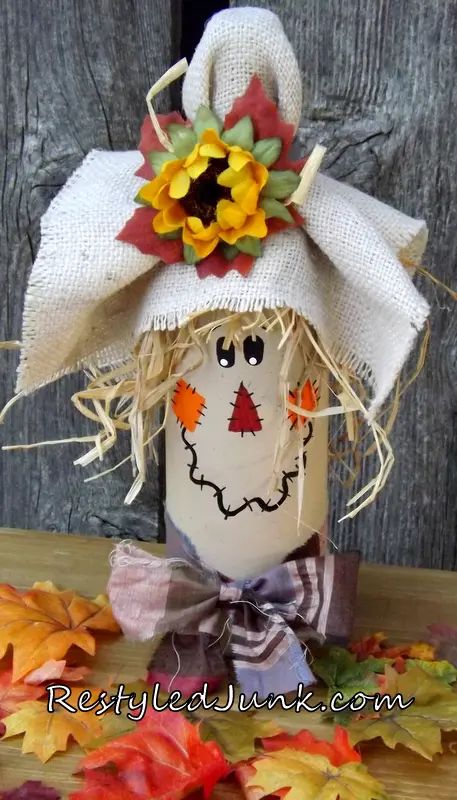
DIY Upcycled Wine Bottle Scarecrow
Creating a DIY upcycled wine bottle scarecrow is a fun and eco-friendly way to spruce up your garden or front porch! Simply gather some old wine bottles, colorful fabric scraps for the scarecrow's outfit, and some hay or straw to stuff the clothes. Use your imagination to paint a friendly face on the wine bottle and attach it securely to a wooden stake. Dress up your scarecrow with the fabric scraps, add a hat for extra flair, and voila, you've got a unique and charming scarecrow ready to welcome guests to your home. Not only is it a creative project, but it's also a great way to give new life to old materials and add a touch of whimsy to your outdoor space. Enjoy the process and have fun getting crafty with your upcycled wine bottle scarecrow!

Things You Will Need:
Wine bottle
Acrylic craft paints-beige, red, orange, black and white
Black paint pen
Sea sponge
Burlap scrap
Fabric scraps
Ruler
Scissors
Craft wire and wire cutters
Pencil with new eraser
Paintbrush (artist)
Raffia
Hot glue gun
Silk fall leaf and sunflower
Instructions:
Step 1:
Remove the wine labels and clean the bottle. Tip: Labels can be difficult to remove, but if warmed with a heat gun the adhesive will soften, allowing the label to be peeled away.

Step 2:
Dampen a sea sponge and dip in beige paint. While holding the bottle’s neck, sponge the paint over the surface of the bottle from the bottom to the base of the neck. Allow the paint to dry. If needed, apply a second coat.

Step 3:
Cut an 11″ square from burlap. Pull the threads from all four edges until 1/4″ is frayed. Drape the square over the bottle neck and hand-gather at the base of the neck. Wrap craft wire around the gathers and twist ends together to hold. Adjust the brim and the corners of the hat.

Step 4:
Determine which side of the bottle will be the face. With the nose tip 1″ below the edge of the hat, use a pencil to draw a 1″ tall x 5/8″ wide triangle nose. 1/2″ from each side of the nose, draw 3/4″ square cheeks. Paint the nose red and the cheeks orange. Dip the eraser end of the pencil in black paint. Positioning the eyes 1/8″ apart, dot one eye 1/4″ above the nose. Slightly slide the eraser upward to create a long eye. Dip the eraser and dot/slide the second eye in the same way. Allow the paint to dry.

Step 5:
Detail the face. Using a black paint pen, draw a squiggly smile from one cheek to the other, with a drop in the center at about 1 1/2″. Dip the pointed end of a wooden skewer in black paint and draw stitch marks randomly around the cheeks, nose and through the line of the mouth. In the same way, draw two eyebrows above the eyes. Dip the blunt end of the skewer into white paint. Dot a highlight on each eye. Allow the paint to dry.

Step 6:
Remove the hat and set aside. Apply a line of glue down the neck of the bottle to the base of the neck. Place the end of a raffia strand at the top of the glue line and continue to press it into the remaining glue line. Allow the excess raffia to hang down. Continue around the neck until it is completely covered in raffia.

Step 7:
Place the hat back on the bottle. If it is too tight to slide over the raffia, loosen the craft wire. Apply hot glue under the hat, at the base of the bottle’s neck, to secure.
Step 8:
Give your scarecrow a haircut. Trim around the face, leaving the sides and the back as long as desired.

Step 9:
Rip a 1″ x 18″ strip of fabric for the hatband. Wrap the fabric around the hat, covering the craft wire. Knot the ends, trim and tuck them under the wraps to conceal.

Step 10:
Layer a silk fall leaf, raffia and a sunflower. Hot glue the layers together. Apply hot glue to the back of the layers and attach to the hatband.

Step 11:
Rip a 2″ x 27″ strip of fabric for the bow tie. Wrap the strip around the bottom of the bottle and tie in a bow. Trim the ends.
