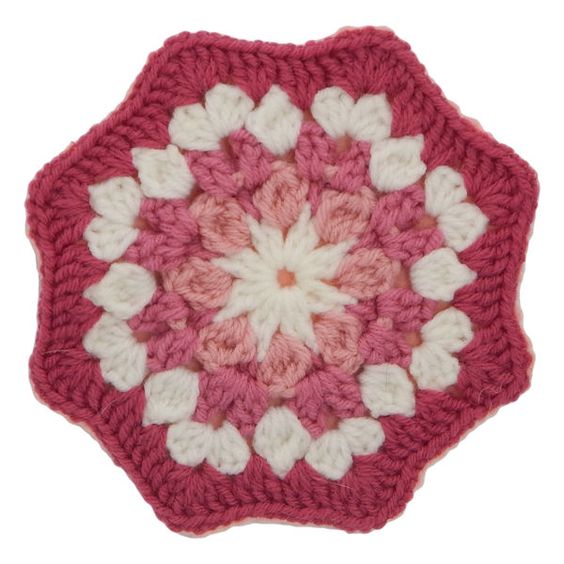
Crochet Spoon Stitch Potholder
Let's talk about the charming Crochet Spoon Stitch Potholder! This delightful kitchen accessory not only adds a touch of handmade warmth to your home but also serves a practical purpose. With its intricate spoon stitch pattern, this potholder is both functional and stylish, making it a lovely addition to your kitchen decor. Whether you're handling hot pots or adding a decorative touch to your culinary space, this crocheted potholder is sure to bring a smile to your face every time you use it. So, grab your crochet hook and some colorful yarn, and let's create a beautiful and useful piece that will brighten up your cooking adventures!

Materials Needed:
Small amounts each Color, Red Heart WW yarn.
Color A: White, Color B: Light Rose, Color C: light Raspberry, Color D: Raspberry.
Size G aluminum crochet hook
Yarn needle
1 sheet of felt. color to match I used Pink
Sewing thread to match last RND color
Sewing needle
Yarn Thickness: 4mm
Gauge: 5 sc =1" with G hook
Finished Size: =9" side to side
Skill Level: Beginner
Special Stitch Instructions
Spoon Stitch (spn)
Insert hook into place indicated. Bring up a lp, yo and draw yarn through one lp on hook. Yo, pull lp through on lp on hook again. To form a ch. Rep from beg 4 times. Yo and draw through all 5 lps on hook.
Instructions
RND 1: With color A, Ch 4, join w/slst to first ch to form ring. Ch3. *Dc in ring. Ch1, 2dc in ring. Ch1. Rep from * 6 times more. Join w/slst to top of ch3. Fasten off Color A.
RND 2: With color B, Tie yarn into the first ch 1 sp. Ch2. spn in same sp. Ch3. *Spn in next ch1 sp. Ch3. Rep from * around. Join w/slst to top of first spn st. Fasten off Color B.
RND 3: With color C, Tie yarn into the first ch3 sp. Ch3, dc in same sp. Working behind ch3 sp, tr, ch2, tr in 2nd dc of RND1bet spn sts. Now back on the ch3 sp work 2 dc in sp. Ch1. *2dc in next ch3 sp. Working behind ch3 sp, tr, ch2, tr in 2nd dc of RND1bet spn sts. Now back on the ch3 sp work 2 dc in sp. Ch1. Rep from * around. Join w/slst to top of ch3. Fasten off Color C.
RND 4: With color A, Tie yarn into the first ch1 sp. Ch2, spn in same sp. Ch1. 3dc, ch1, 3dc in next ch2 sp. Ch1. *Spn in next ch1 sp. Ch1. 3dc, ch1, 3dc in next ch2 sp. Ch1. Rep from * around. Join w/slst to top of first spn st.
RND 5: With Color D, tie yarn into any ch1 corner sp. Ch3, 5dc in same sp. Work 3dc in each of the next 2 ch1 sps. *Work 6 dc in next ch1 corner sp. Work 3dc in each of the next 2 ch1 sps. Rep from * around. Join w/slst to top of ch3. Fasten off yarn. Weave all ends into work.
Assembly
Lay the potholder onto the felt and pin in place all around the edge. Then with a pair of very sharp scissors, cut around the potholder really close but do not cut through the yarn. After cutting. Sew the felt to the back of the potholder with needle and thread using an over cast stitch working about 1 st per st all the way around. Draw up each stitch snuggly but not so tight as to cut through the yarn.