Mason Jar Graduation Gift Idea
Looking for a thoughtful graduation gift idea? How about creating a Mason jar filled with goodies customized to celebrate their achievement? You can fill it with their favorite candies, inspirational quotes, small gift cards, or even personalized notes from friends and family. Decorate the jar with ribbons, stickers, and glitter to add a personal touch. This DIY gift is not only creative but also a fantastic way to show your support and excitement for their future endeavors. So get crafting and make a Mason jar graduation gift that will surely bring a smile to their face!

Supplies
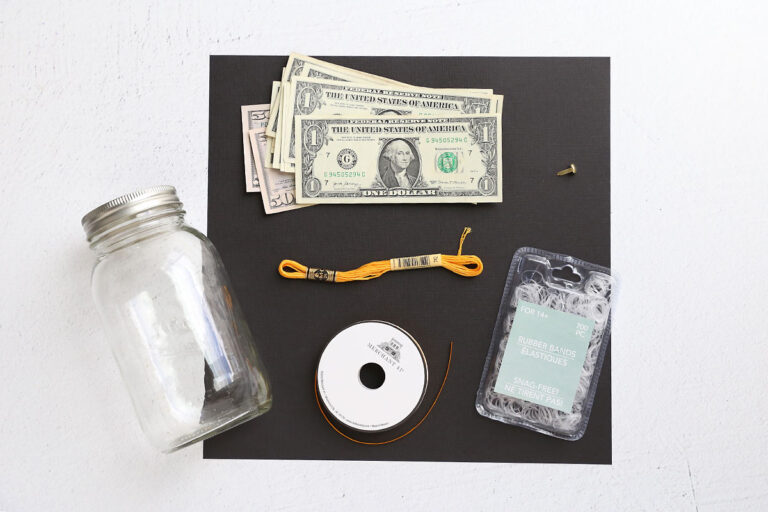
Here’s what you need to put together this mason jar grad gift:
- Mason Jar: I used a quart size jar with a standard size lid (not wide mouth). You can also use a pint jar.
- Dollar Bills: Use whatever bills you’d like to give! A quart size jar holds about 40 bills and a pint size jar holds about 20 bills.
- Black Cardstock: You’ll need one sheet of black cardstock; either 12×12 or 8.5×11.
- Embroidery Floss: Used to make a tassel.
- Clear Rubber Bands: Used to secure the bills in rolls.
- Narrow Ribbon: Used to tie up the dollar bills and make them look like diplomas.
- Metal Brad: Used to attach the tassel to the graduation cap.
- Optional – Curly ribbon or paper shred to place in the bottom of the jar – this can help fill up the jar some if you don’t want to use as many bills.
Prep The Dollar Bills
You’ll need about 40 dollar bills for a quart size jar or 20 bills for a pint size jar, although if you put curly ribbon at the bottom of the jar you won’t need quite as many bills. Roll each dollar bill up around a pencil.
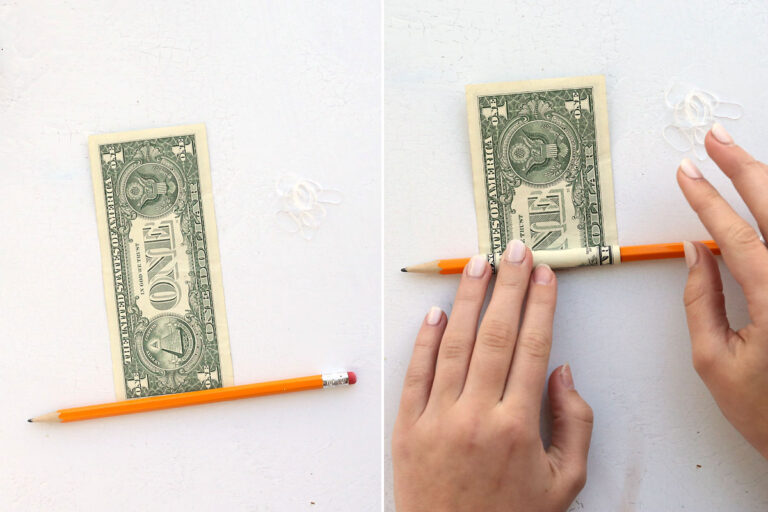
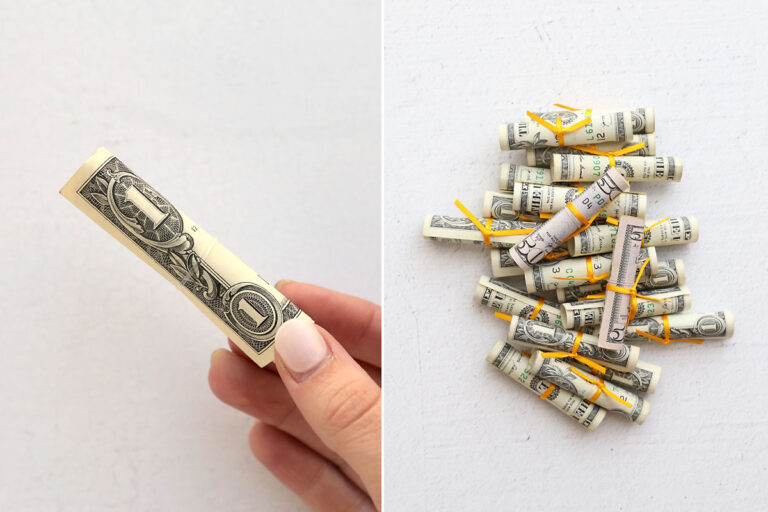
Slide pencil out of the bill, then slide a clear rubber band over it to secure it in a roll. Repeat with all the dollar bills, then tie a narrow ribbon around each rolled bill. I found it easiest to cut 6 inch lengths of narrow ribbon, tie them around the bills, then trim the ribbon slightly. This makes the dollar bills look like little diplomas.
Make A Graduation Cap
I made a grad cap from cardstock that can sit over the lid of the major jar. I did not glue the grad cap to the jar because that makes it harder to screw the lid on and off the jar. Instead, the cap just sits on top of the lid and can easily be removed.
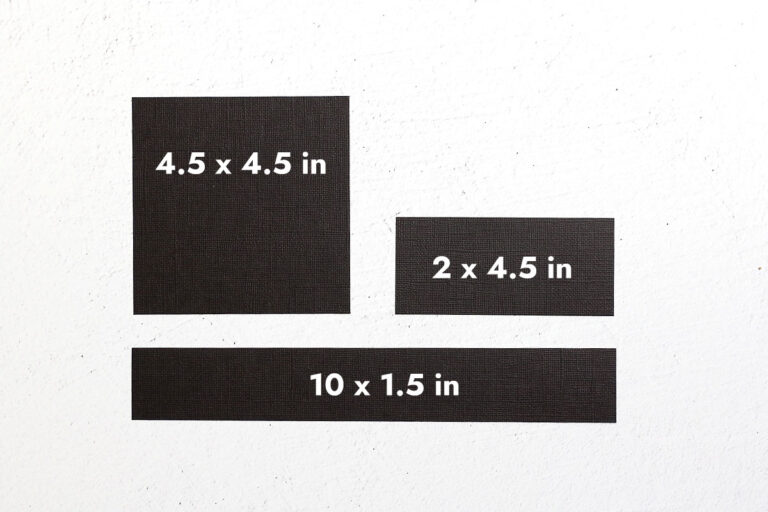
Begin by cutting the following pieces from black cardstock:
- 4.5 x 4.5 inch square (for the top of the grad cap)
- 10 x 1.5 inch rectangle (for the circle part of the grad cap)
- 2 x 4.5 inch rectangle (used in making the tassel)
Next, find the center of the square and poke the brad through it, then open it up on the underside to secure. Wrap the long rectangle into a circle that’s slightly larger than the jar lid and hot glue the cardstock to itself to secure in a circle.
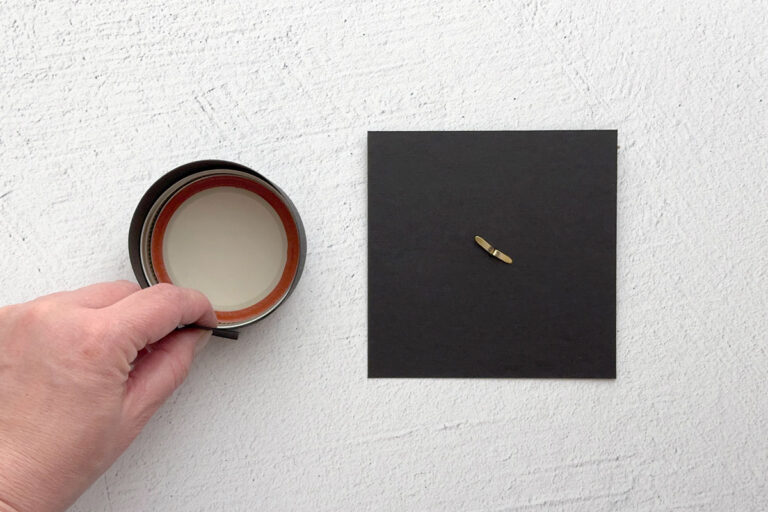
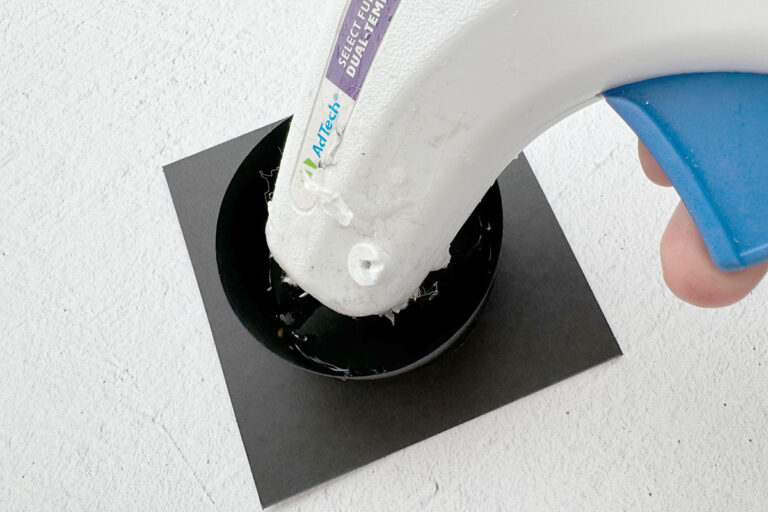
Place the cardstock square down with the brad facing down, then center the cardstock circle over it. Run hot glue inside the circle where it touches the cardstock square to secure the cap together.
Make A Tassel
You’ll use the 2 inch wide piece of cardstock and embroidery floss to make a tassel.
- Wrap embroidery floss around the cardstock about 25 times.
- Cut a 12 inch piece of floss and slide it under the wrapped floss.
- Tie the 12 inch piece into a tight knot, then slide the floss off the cardstock.
- Cut a 6 inch piece of embroidery floss and tie it around the tassel just below where you tied the longer piece (see last photo below).
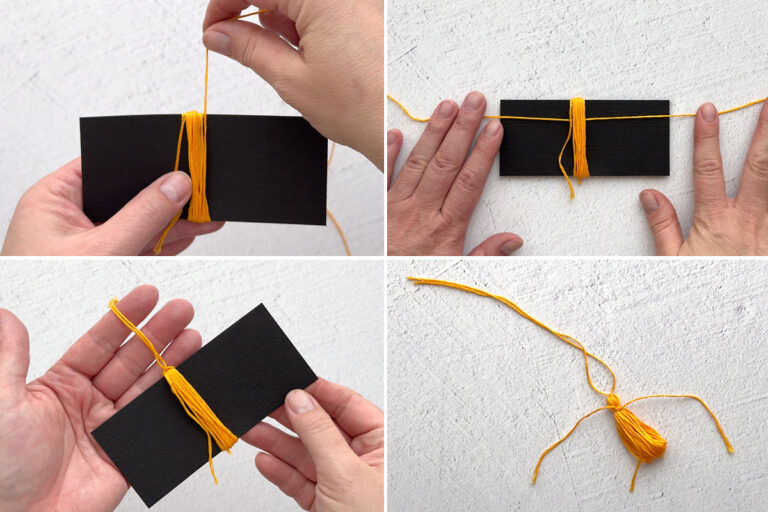
Now you can cut through the loops of floss at the bottom. Trim the bottom edge of all the embroidery floss pieces straight across, and your tassel is complete.

Decide how long you’d like the tassel to be, then tie a knot in it and trim, then slide it over the brad so it hangs over the top of the graduation cap.
Assemble The Gift
Now it’s time to put your gift together! If you’d like, you can put some colorful paper shred or curly ribbon at the bottom of the jar. Then drop in the dollar bills. Finally, screw on the lid and place the grad cap on top.
