Crochet Amigurumi Cup Cake
Discover the enchanting world of crochet with the delightful Amigurumi Cup Cake! This adorable creation combines the art of crochet with the sweetness of a cupcake, resulting in a charming and unique piece of handmade art. With its intricate stitches and vibrant colors, the Amigurumi Cup Cake is sure to capture the hearts of both crochet enthusiasts and cupcake lovers alike. Whether you're a seasoned crocheter or just starting out, the Amigurumi Cup Cake is a wonderful way to explore the world of crochet and create a charming piece of art that will bring a smile to anyone's face. So grab your crochet hook and let your imagination run wild as you embark on this delightful crochet journey!

Materials:
- for bottom of cupcake – Sand or ligth yellow colored yarn . I use cotton yarn 50 gr / 90 m and crochet hook 4.5 mm.
- for top of cupcake (cream) – White and lilac, cotton yarn 50 gr / 90 m and crochet hook 4.5 mm.
- for whipping cream – White cotton yarn 50 gr / 90 m and crochet hook 4.5 mm.
- for raspberry – purple cotton yarn 50 gr / 180 m and crochet hook 2 mm.
- sintepon as in pillows for stuffing
- needle with a big eye
- scissors
Measurement: Cupcake is 4 inches tall and 2.7 inches wide.
Abbreviations Used in This Patterns:
sts= stitches
sc = single crochet
dc = double crochet
FPdc = Front post double crochet
PS = puff stitch
sl st = slip stitch
Inc = increase
Dec = decrease
How to crochet amigurumi cup cake:
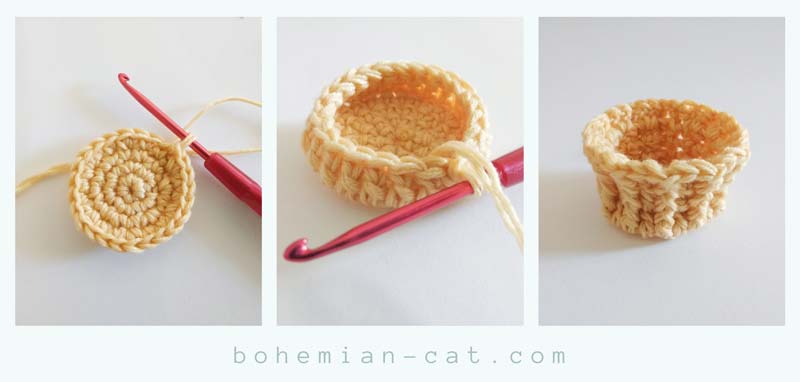
Step 1: How to crochet cake bottom
The pattern is worked in continuous rounds from bottom to top. Use a scrap of contrast colored yarn to denote beginning of round.
Start with light yellow coloured yarn. Make Magic Ring.
Round 1: Sc 6 into magic ring (6 sts).
Round 2: Inc around (12 sts)
Round 3: [Sc, Inc] x 6 times (18 sts)
Round 4: [Sc 2, Inc] x 6 times (24 sts)
Round 5: Dc back loop only around, sl st to join (24 sts)
Round 6-7: [Dc, FPdc] x 12 times around, sl st to join (24 sts)
Round 8: [Inc, FPdc] x 12 times around, sl st to join (36 sts), fasten off.
Step 2: How to crochet cake top (cream)
Work with white and lilac yarn.
Start with white yarn.
Row 1: Ch 17, 2 Sc into second st from hook, 13 Sc, Dec, Ch 1, turn
Row 2: Dec, 13 Sc, Inc, change yarn to lilac color, Ch 1, turn
[
Row 3: Inc, 13 Sc, Dec, Ch 1, turn
Row 4: Dec, 13 Sc, Inc, change yarn to another color, Ch 1, turn
] repeat [] 12 times
Row 27: Inc, 13 Sc, Dec. Fasten off and leave the thread about 20 inches.
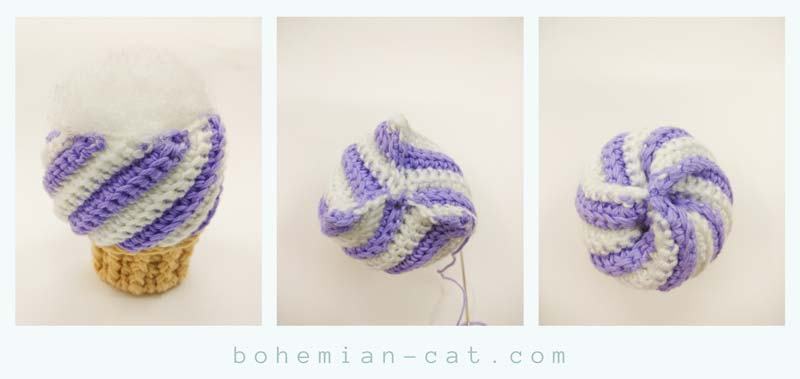
Insert the thread into the needle with a large eye. Sew both ends to close the product into the ring. Sew the loop into the loop, making two stitches in each. You should get 14 lanes.
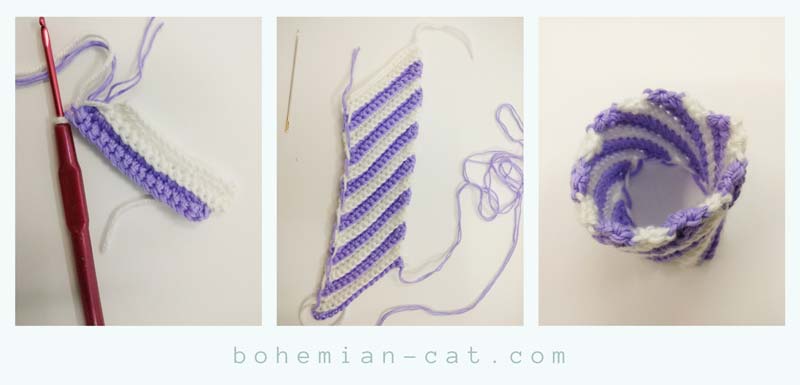
Now our cupcake is ready, but we will add topping and decorate it.
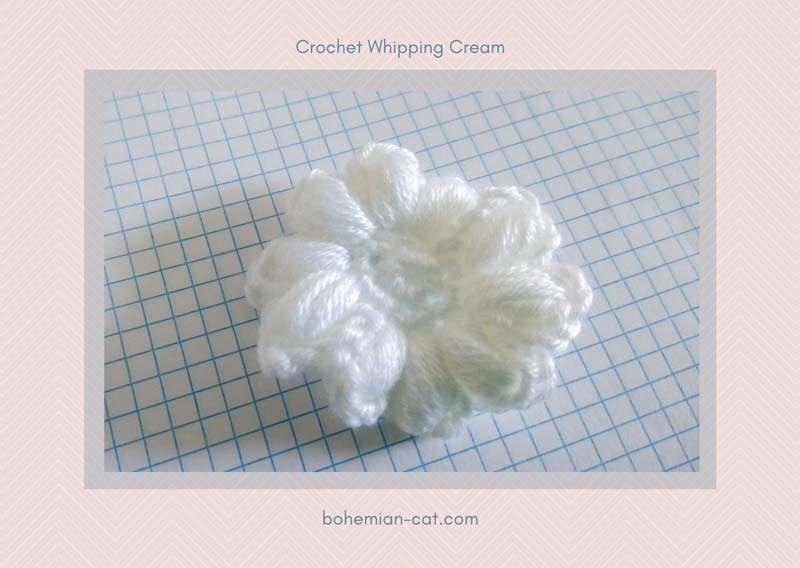
Step 3: How to crochet whipped cream
Work with white yarn. Make Magic Ring.
Round 1: Sc 6 into magic ring, sl.st. to join (6 sts).
Round 2: Inc around, sl.st. to join (12 sts)
Round 3: ( [ch 2, PS, Ch 4, sl.st into next stitch] x 5 times, ch 2, PS, Ch 4, 2 sl.st into next stitch ) x 2 times. Fasten off. (10 sts)
Step 4: How to crochet berries
Work in continuous rounds. Use a stitch marker to mark the first stitch of each round; move it up as you go along.
Work with purple yarn. Make Magic Ring.
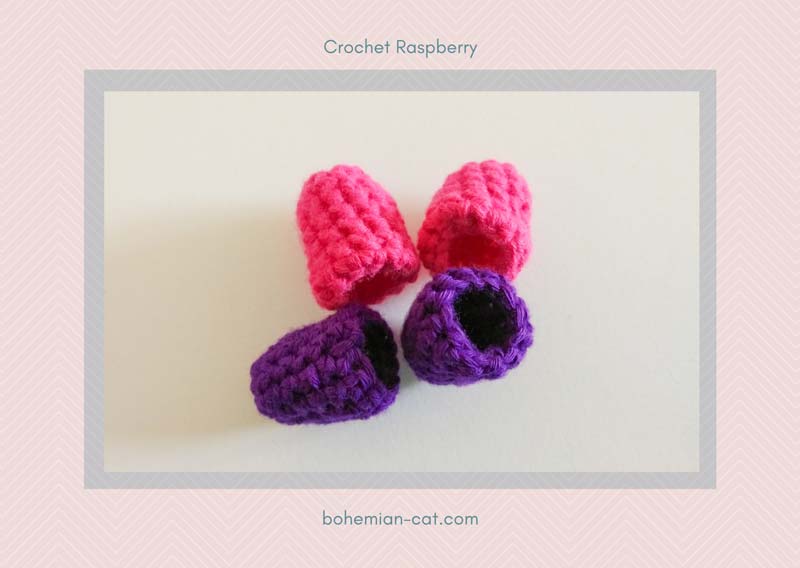
Round 1: Sc 6 into magic ring (6 sts).
Round 2: Inc around (12 sts)
Round 3-6: Sc around (12 sts), 2 sl.st. Fasten off.
Sew or stick whipped cream and berries on top of the cupcake. Crochet cupcake is ready! I hope you enjoyed it! I would be glad to read your comments.